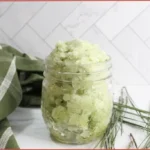
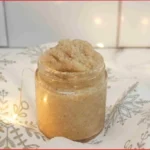
Bring a touch of luxury to your winter skincare routine with these DIY snowflake sugar scrub bars.
Shaped like delicate snowflakes and infused with cozy, seasonal aromas, these bars gently exfoliate and moisturize the skin, leaving it silky-soft and lightly scented.
Each bar combines the skin-nourishing benefits of shea butter and beeswax with the exfoliating power of sugar and the soothing scents of essential oils. The result is a beautiful, spa-style treat that’s as lovely to look at as it is to use. It’s perfect for pampering yourself or gifting to someone special during the holidays.
✨ Get 12 Free Holiday Diffuser Blends — Printable PDF
Instantly make your home smell like Christmas with these festive, ready-to-use recipes.
Whether you’re creating a festive self-care ritual or adding a handmade touch to your Christmas gifts, these snowflake-shaped sugar scrub bars bring a bit of seasonal sparkle to your winter days.
Table of Contents
Affiliate Disclosure: Some links on this site are affiliate links. I may earn a small commission if you purchase through them, at no extra cost to you. See the full affiliate disclosure.
What Are Sugar Scrub Bars?
Sugar scrub bars are solid exfoliating bars that combine nourishing butters, hardening waxes, and granulated sugar into a convenient, mess-free format.
Think of them as the solid version of traditional jar scrubs, but much more practical and travel-friendly.
Traditional sugar scrubs come in jars and require you to scoop out the product with wet hands, often resulting in water contaminating the entire batch.
Sugar scrub bars eliminate this problem entirely. You simply rub the bar directly on damp skin, and it releases just the right amount of exfoliating sugar and moisturizing oils exactly where you need them.
The solid format also makes these bars incredibly easy to store. They take up minimal space and there’s no risk of spills in your shower caddy or gym bag.
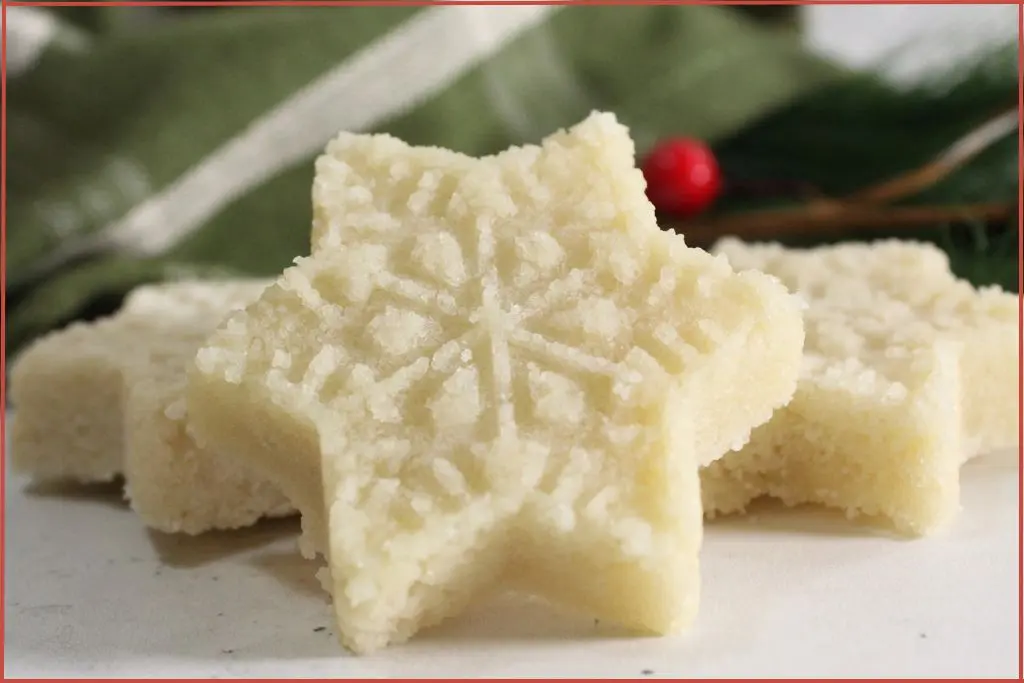
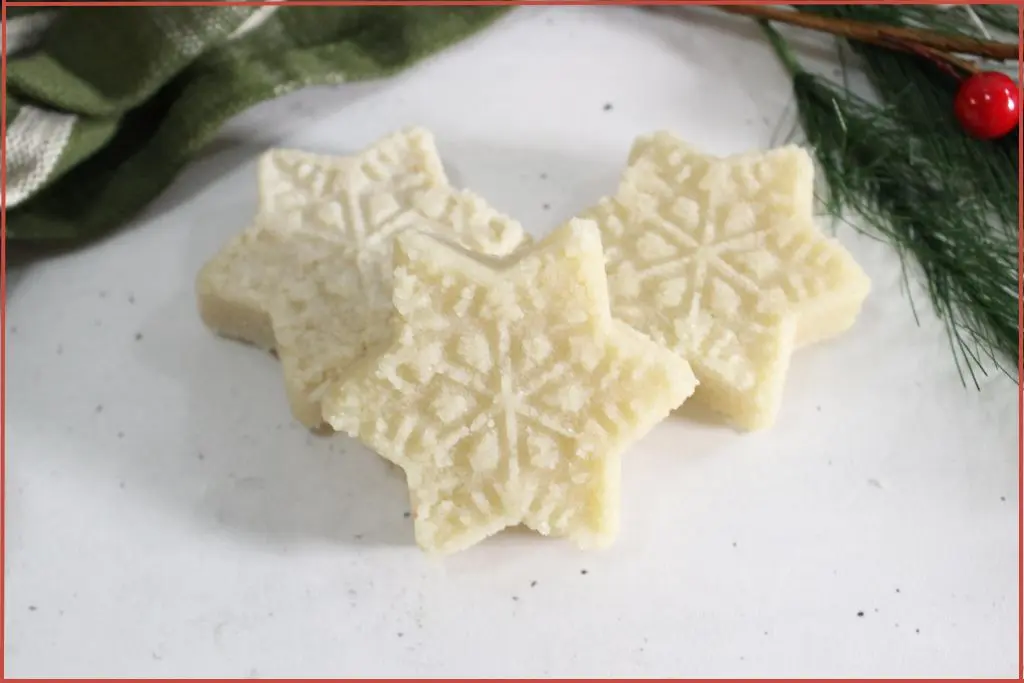
Plus, their beautiful snowflake shape makes them feel extra special, turning an ordinary skincare routine into a luxurious self-care ritual.
These bars are ideal for winter skincare when cold weather and indoor heating can leave skin feeling dry and rough.
The sugar exfoliates, removing the barrier of dead skin, while the rich butters immediately replace that moisture, preventing the tight, dry feeling that sometimes follows exfoliation.
Using these bars regularly throughout winter keeps skin smooth and properly moisturized.
The combination of gentle exfoliation and rich moisturization helps reveal softer, smoother skin while the aromatherapy benefits of essential oils create a calming, seasonal experience.
Why You’ll Love This Sugar Scrub Recipe
There’s a lot to love about making and using this sugar scrub recipe:
- Festive and fun to make: The snowflake design makes these bars feel instantly wintry and special.
- Moisturizing and exfoliating in one: Shea butter and beeswax deeply nourish while sugar buffs away dryness, leaving your skin soft and smooth.
- Infused with essential oils: Create your own cozy Christmas scent with blends of peppermint, orange, and vanilla or your favorite winter essential oils.
- Customizable recipe: Experiment with different oils, scents, or even add a hint of shimmer for a frosty glow. The customization possibilities are endless.
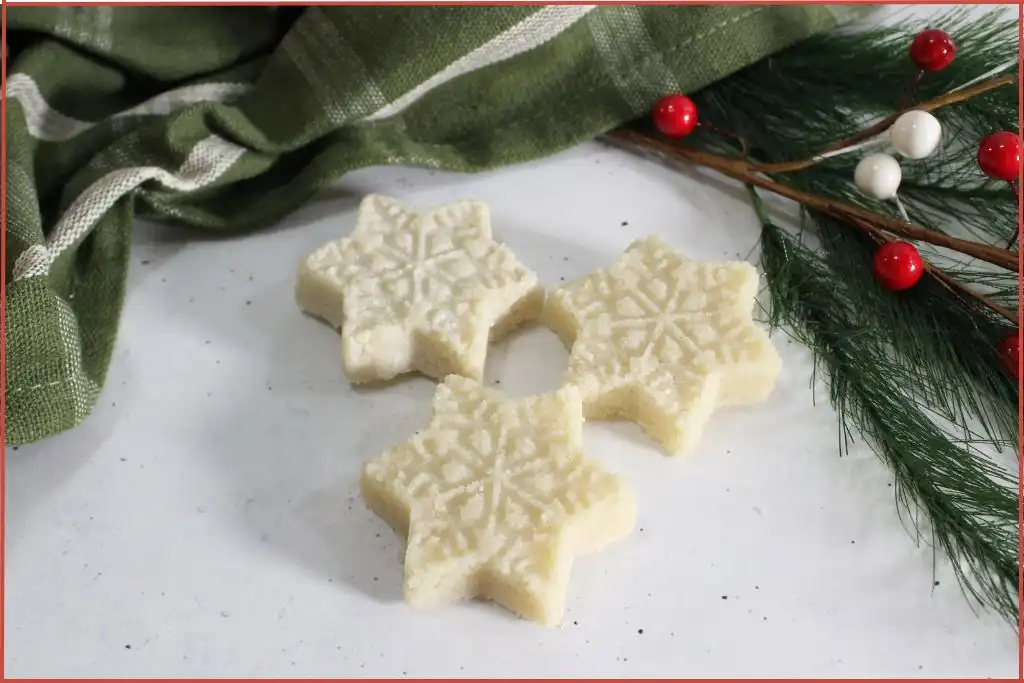
- Perfect for gifting: These pretty snowflake bars look stunning wrapped in ribbon or tucked into a winter spa gift basket.
Ingredients You’ll Need To Make Snowflake Sugar Scrub Bars
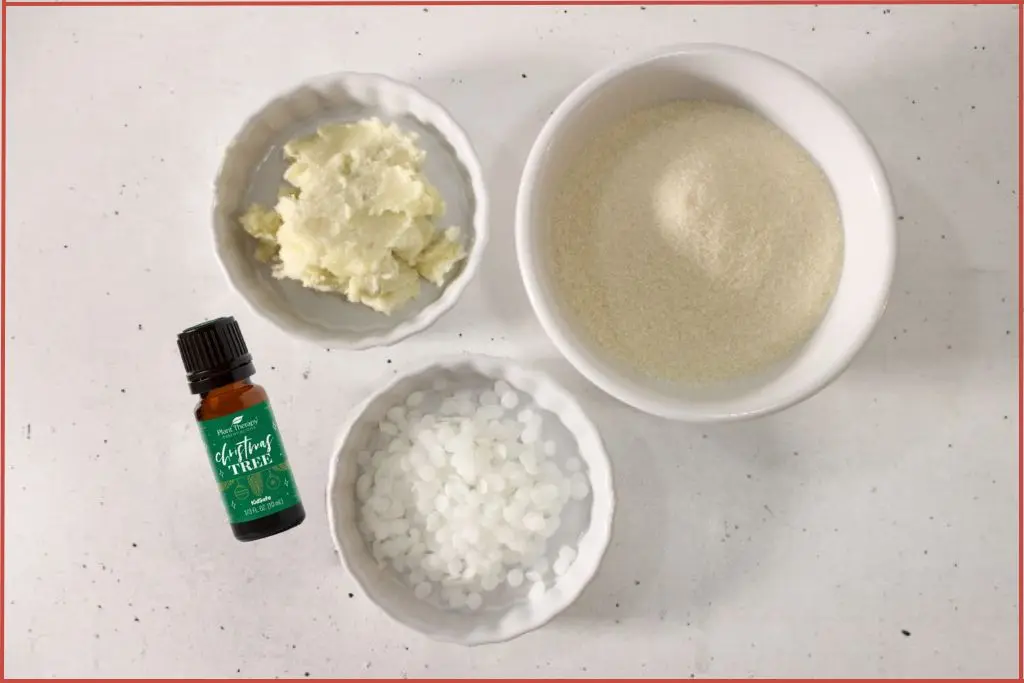
You only need a few simple ingredients to make these beautiful snowflake sugar scrub bars:
- 1/6 cup Shea Butter
- 1/8 cup Beeswax
- ½ cup Sugar
- Snowflake Silicone Mold
Note about the ingredients:
Shea Butter: Known for its nourishing properties, shea butter serves as the moisturizing foundation of sugar scrub bars. It melts at body temperature, which helps the bars glide smoothly during use while leaving skin feeling soft and conditioned.
Beeswax: This natural wax is the structural component. Beeswax has a higher melting point than shea butter, which helps your bars hold their beautiful snowflake shape even when stored at room temperature. It also creates a protective barrier on the skin that helps lock in moisture.
Sugar: The star exfoliant, regular granulated white sugar, provides gentle yet effective exfoliation. As you rub the bar on damp skin, the sugar crystals help slough away dead skin cells, revealing the smoother, brighter skin underneath. Sugar dissolves gradually during use, providing just the right amount of exfoliation without being overly harsh.
Essential Oils: Essential oils offer a lovely aroma while also creating a sensory experience that can be uplifting, calming, or energizing, depending on which oils you choose.
Snowflake Silicone Mold: This mold gives the scrub bars their distinctive snowflake shape and intricate detail.
Optional: You can substitute shea butter with cocoa butter or mango butter for a different texture and scent.
How To Make Snowflake Sugar Scrub Bars: Step By Step
Follow these simple steps to create your own beautifully textured, aromatic snowflake scrub bars.
Step 1: Melt the Butter and Beeswax
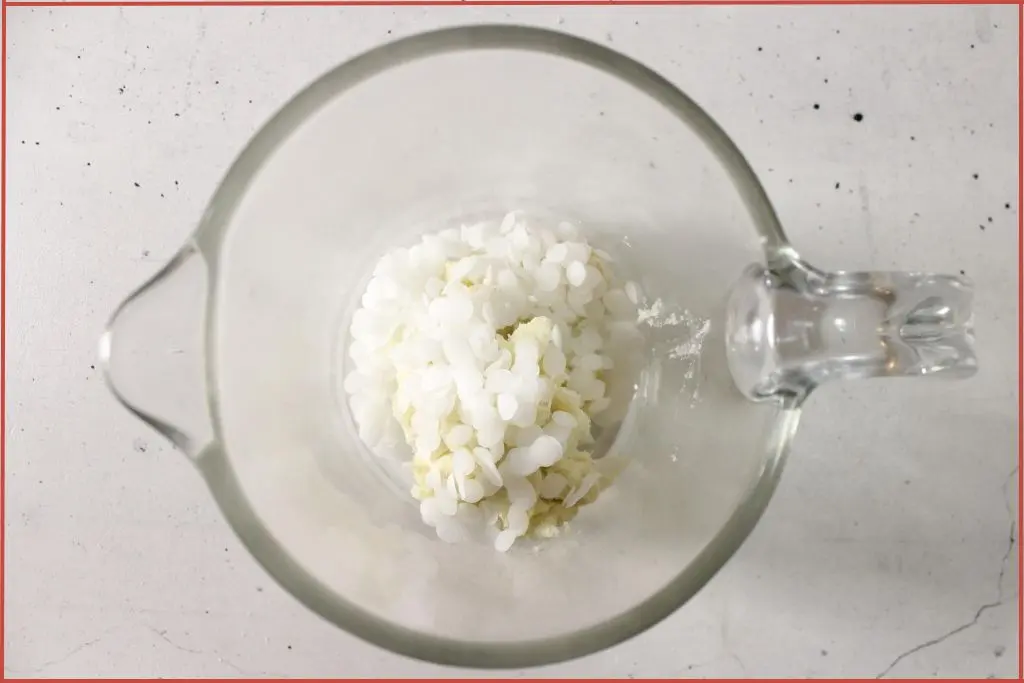
Add the shea butter and beeswax to a double boiler or a heat-safe bowl set over a pot of simmering water.
Melt slowly over low heat, stirring occasionally until fully combined and smooth.
Stir occasionally as the mixture melts. The beeswax will take longer to melt than the shea butter, so continue heating until everything is completely liquefied and well combined. You should have a smooth, golden liquid with no solid pieces remaining.
Once fully melted, remove the mixture from the heat and let it cool for 2-3 minutes. This cooling period is crucial because adding essential oils to liquid that’s too hot will cause the aromatic compounds to evaporate, resulting in bars with little to no scent. The mixture should still be liquid but not steaming hot.
Tip: Melt gently. High heat can cause the mixture to become grainy or lose its silky texture. Once melted, remove from the heat and allow it to cool for a few minutes before adding the next ingredients.
Step 2: Add the Essential Oils
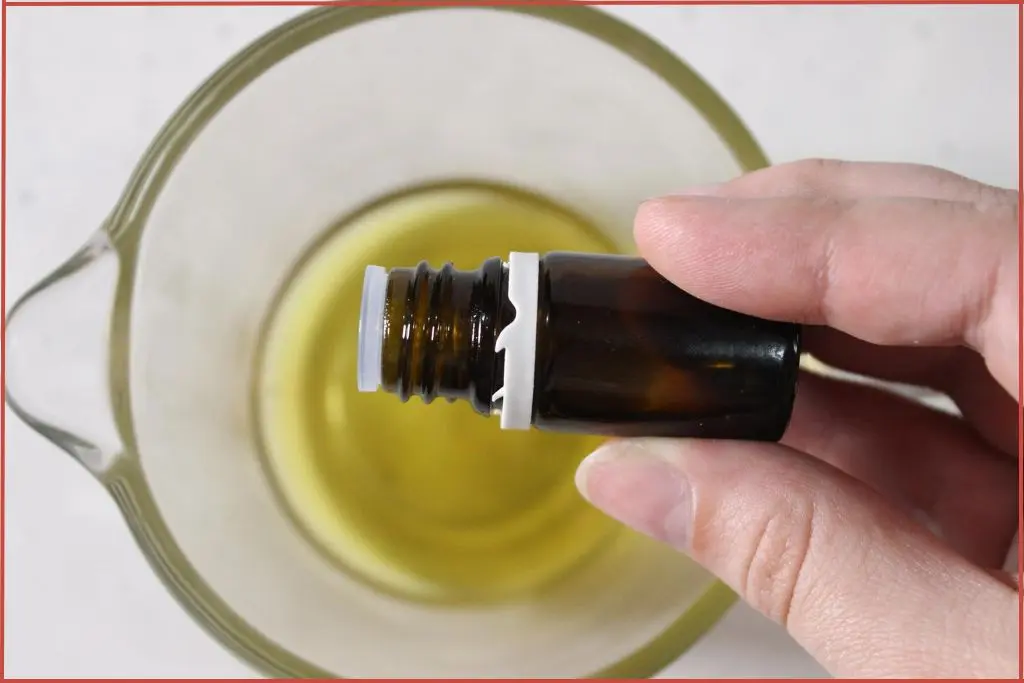
When the mixture has cooled slightly but is still liquid, stir in your essential oils. This helps preserve their delicate aroma and prevents the scent from fading due to heat.
Stir gently but thoroughly to distribute the essential oils evenly throughout the base. Use steady, consistent strokes to ensure every bit of your mixture is beautifully scented.
This is also the time to add any optional colorants if you’re using them. I love the natural ivory color of the base, so I chose not to add any color.
Work relatively quickly during this step, as the mixture will begin to thicken as it cools. You want to add the sugar while the mixture is still pourable, but not so hot that it melts the sugar crystals.
Step 3: Incorporate the Sugar
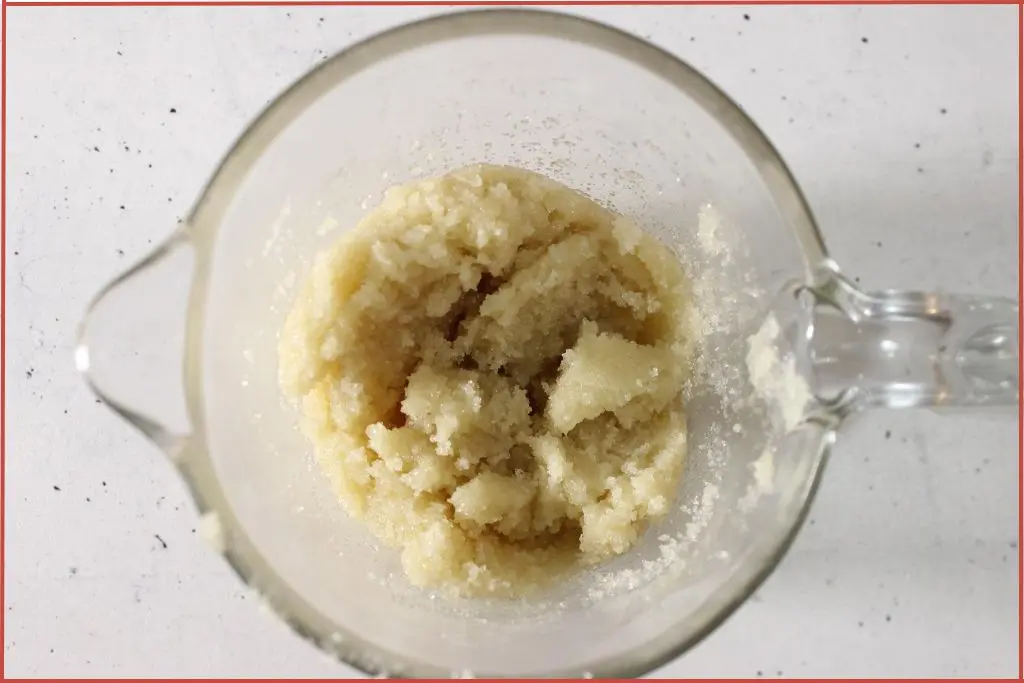
Add the sugar to your scented mixture and stir well. This is the most physically demanding part of the process, as you need to work quickly to combine the sugar thoroughly before the mixture begins to set.
Use firm, rapid stirring motions to ensure the sugar is evenly distributed.
The mixture will become thick and somewhat difficult to stir, which is exactly what you want. Every bit of sugar should be coated with the butter and wax mixture. If you see dry pockets of sugar, keep stirring until everything is uniformly combined.
Speed is essential once the sugar is added, as the mixture will start to solidify within a minute or two. Have your mold ready so you can transfer the mixture immediately.
Tip: If you add sugar when the oils are too hot, it may dissolve. Let the mixture cool until it’s just warm before stirring it in.
Step 5: Pack the Mix Into Molds
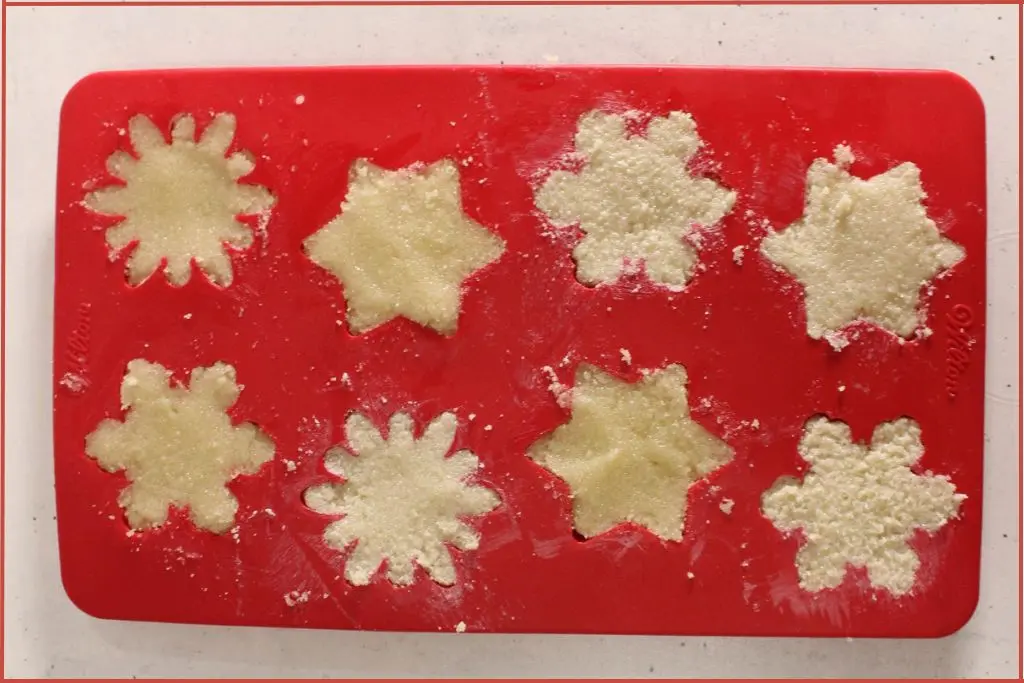
Working quickly, spoon or press the mixture into your snowflake molds. Don’t just drop the mixture in. Really PRESS it down firmly with the back of a spoon or your fingers. Packing the mixture tightly prevents air pockets and helps ensure your bars won’t crumble when unmolded.
Fill each cavity so it is slightly overfilled. Then press down to compress the mixture. This firm packing is the secret to creating bars that hold together beautifully. The backs of your bars don’t need to be perfectly smooth. Any imperfections will be hidden as this is the bottom of the bar.
If the mixture becomes too stiff to work with before you’ve filled all the molds, you can briefly warm it again over the double boiler. However, working quickly usually prevents this issue.
Tip: Packing the sugar tightly into the mold helps the snowflake pattern show up beautifully when unmolded.
Step 6: Set Aside to Dry
Place your filled mold on a flat surface where it won’t be disturbed. Allow the bars to set at room temperature for a full 24 hours.
Resist the temptation to check them early or speed the process by refrigerating, as this can cause the bars to crack or not release properly from the mold.
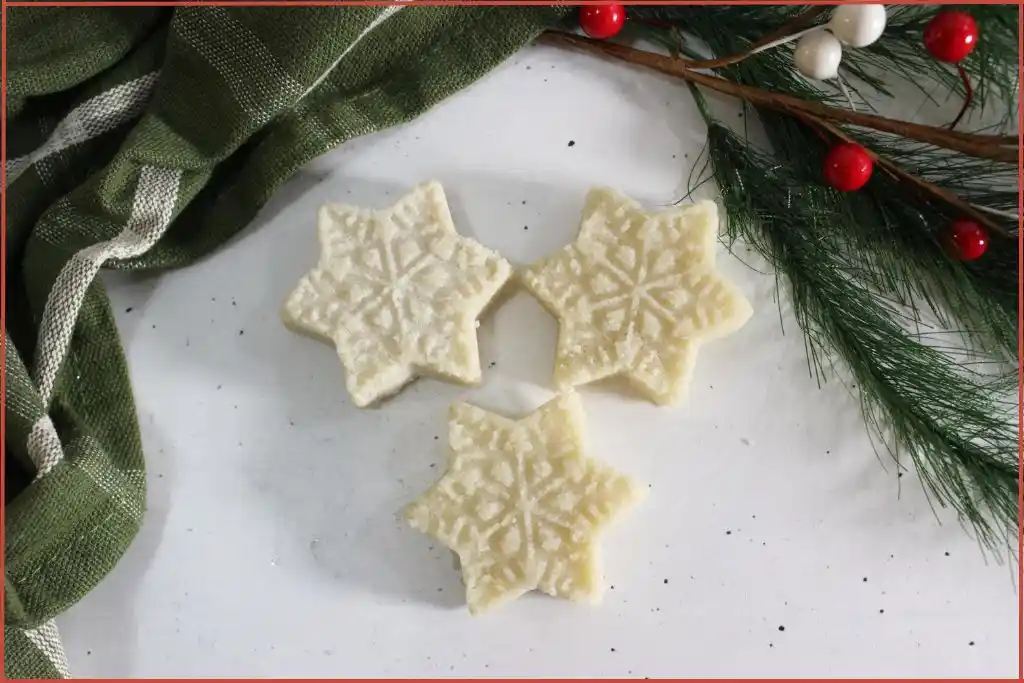
Step 7: Unmold Each Scrub Bar Carefully
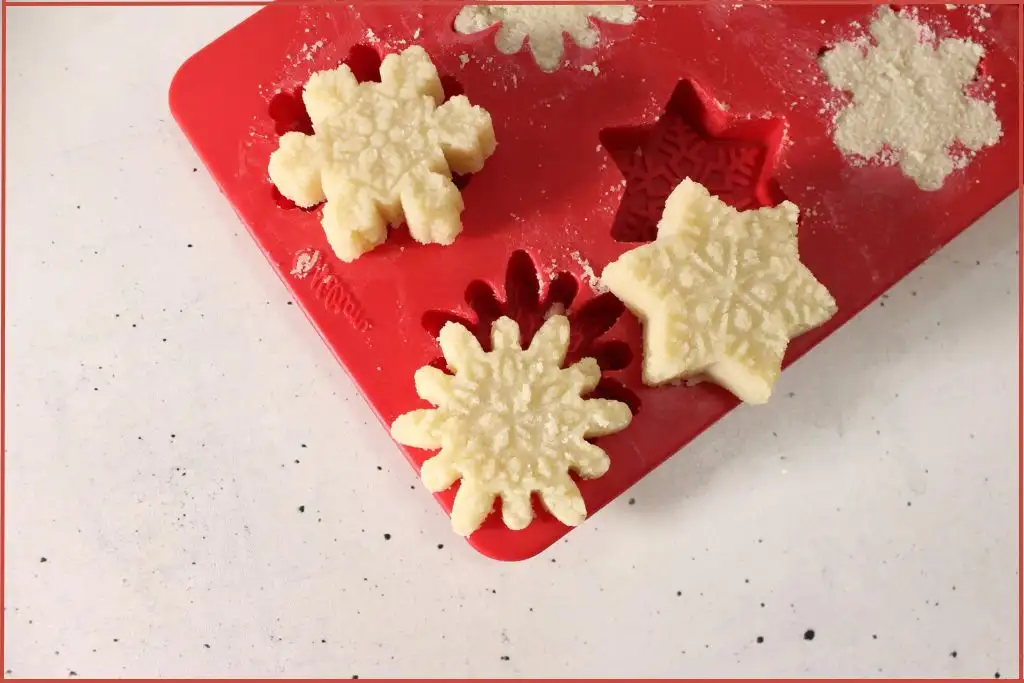
After 24 hours, your bars should be completely firm and solid. To unmold, gently flex the silicone mold. The bars should pop out easily.
If they seem stuck, place the mold in the freezer for 10-15 minutes, then try again. The cold will cause the bars to contract slightly, making removal easier.
Handle your newly unmolded bars gently for the first few hours, as they’ll continue to harden slightly over the next day or two. Store them in a cool, dry place away from moisture until you’re ready to use or package them.
Tips for Creating Perfect Sugar Scrub Bars
These simple tips will help you get the best texture, scent, and finish for your snowflake scrub bars.
Melt Ingredients Slowly: Always use low heat to prevent the shea butter from becoming grainy or losing its creamy texture.
Mind The Temperature: The temperature of your mixture when adding essential oils is critical. Too hot, and the aromatic compounds evaporate. Too cool, and the mixture becomes too thick to work with. Aim for that sweet spot where it’s liquid but not steaming – usually 2-3 minutes after removing from heat.
Let The Mixture Cool Before Adding Sugar: Wait until it’s warm but still pourable. If it’s too hot, the sugar will dissolve instead of exfoliating.
Work Quickly: Once you add the sugar, move quickly and decisively. Have everything ready before you begin, and don’t second-guess yourself. The mixture waits for no one once it starts to set.
Pack The Mixture Tightly Into The Mold: The difference between bars that crumble and bars that last comes down to how firmly you pack the mixture into the molds. Press down firmly to eliminate air pockets and create a dense, cohesive bar.
Don’t Be Tempted To Unmold Prematurely: A full 24 hours might seem excessive, but it ensures your bars are completely hardened throughout, not just on the surface. Bars that are unmolded too early may seem solid, but can break or deform easily.
Consider Your Climate: If you live in a very warm climate, your bars may be softer than those made in cooler environments. You can increase the beeswax slightly (by about a teaspoon) to compensate for higher temperatures.
Keep Sugar Scrub Bars In A Cool, Dry Place: Sugar scrub bars can soften in humid bathrooms. Store extras in an airtight container until you’re ready to use or gift them.
Troubleshooting Common Issues
Even with the simplest recipes, occasionally things don’t go quite as planned. Here’s how to solve the most common sugar scrub bar challenges:
Bars Won’t Release from Mold
This usually means they need more time to set. Return them to a flat surface and wait another 12 hours.
If you’re certain they’ve set long enough, place the mold in the freezer for 15-20 minutes. The cold will cause the bars to contract very slightly, making removal easier.
Gently flex the silicone mold from all sides, and the bars should pop out cleanly.
Bars Are Crumbly or Fall Apart
This indicates the mixture wasn’t packed firmly enough into the molds, or there’s too much sugar relative to the binding ingredients.
For future batches, take care to measure the ingredients correctly and pack the mixture more firmly into each mold.
In very dry climates, increasing the beeswax quantity by a teaspoon can help give the bars more structure.
Sugar Settles to the Bottom
This happens when the mixture cools too much before the sugar is added, or if you don’t stir vigorously enough after adding the sugar. The sugar is heavier than the liquid base and will sink if the mixture is too thick to keep it suspended.
Work more quickly next time and stir more thoroughly. The mixture should still be fairly liquid when you add the sugar.
Bars Are Too Soft
If your bars don’t firm up properly even after 24 hours, you may need more beeswax in your recipe. This is especially common in warm climates.
Try increasing the beeswax to 3 tablespoons instead of 1/8 cup (2 tablespoons). Also, ensure you’re storing bars in a cool location – above 75°F, bars may remain perpetually soft.
Scent Fades Quickly or Isn’t Strong Enough
This usually means essential oils were added when the mixture was too hot, or the bars haven’t been stored properly. Essential oils evaporate when exposed to heat and air.
Store bars in airtight containers when not in use. For a stronger scent, you can increase to 12-15 drops of essential oil, though always be mindful of skin sensitivity with stronger concentrations.
Bars Feel Too Scratchy
If the exfoliation feels too harsh, try using fine sugar instead of regular granulated sugar in your next batch. You can also reduce the amount of sugar slightly to 1/3 cup instead of 1/2 cup, though this may affect the texture and coverage you get from each bar.
White Film Forms on Bar Surface
Sometimes a white, powdery film may form on the surface of the bars after they’ve been stored for a while. This is called “bloom” and is completely normal with beeswax products. It doesn’t affect the quality or function of your bars. Wipe it off with a soft cloth, or just leave it alone. It disappears immediately when the bar gets wet.
Best Essential Oils for a Winter-Inspired Scent

The right blend of essential oils turns your scrub bars into an aromatic holiday treat. Here are a few winter-inspired combinations you can try. Each one captures a different side of the season, from cozy and sweet to crisp and refreshing.
Sweet Holiday Blend
- 4 drops Peppermint
- 4 drops Sweet Orange
- 2 drops Vanilla oleoresin or extract
A classic candy-cane scent that’s cheerful and uplifting.
Winter Wonderland
- 4 drops Eucalyptus
- 3 drops Peppermint
- 3 drops Pine
A fresh, invigorating aroma reminiscent of a snowy forest walk – particularly energizing for morning showers.
Cozy Cabin
- 5 drops Cedarwood
- 3 drops Sweet Orange
- 2 drops Cinnamon Leaf
A warm, comforting aroma that evokes fireplaces and cozy evenings.
Note: Be careful not to add too much cinnamon leaf oil as it can be irritating to the skin.
Sugar Cookie
- 4 drops Vanilla
- 4 drops Sweet Orange
- 2 drops Nutmeg
A sweet, spicy scent that’s reminiscent of holiday baking.
Fresh Snow
- 5 drops Peppermint
- 3 drops Spearmint
- 2 drops Fir Needle
A crisp, clean scent that captures the essence of a winter morning.
Feel free to adjust the ratios to suit your preferences, keeping the total at approximately 10 drops for this recipe size. Remember that some essential oils are stronger than others, so you may want to use less of particularly potent oils like peppermint or eucalyptus.
The scent lasts beautifully for weeks, so they’re perfect to make in advance for holiday gifts or stocking stuffers
On my site, you’ll find several Christmas essential oil blend recipes, each with a distinct vibe that you can use to scent different batches of sugar scrub bars:
Give the bars a cool, peppermint twist with candy cane diffuser blends for a fresh, tingly finish.
Create a forest-fresh vibe with blends that smell like a Christmas tree, using combinations of pine, fir, and cedar essential oils.
Go warm and cozy with gingerbread scented blends featuring ginger, cinnamon, and vanilla for bakery-sweet comfort.
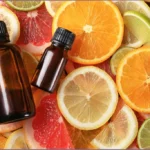
Brighten things up with citrus & spice aromas that mix orange or lemon with clove and cinnamon for cheerful sparkle. [Link anchor: Citrus & Spice blends]
Keep it classic with traditional Christmas blends that layer evergreen, spice, and a hint of citrus for a timeless holiday scent.
How to Customize Homemade Snowflake Sugar Scrub Bars

One of the joys of DIY aromatherapy skincare is how easily you can personalize every recipe.
Texture Variations to Try
While regular white granulated sugar works beautifully, experimenting with different sugars can create varied experiences:
- Brown Sugar: Creates a slightly gentler exfoliation with a warm, subtle molasses scent that complements vanilla and cinnamon blends. Brown sugar crystals are typically softer than white sugar, making them ideal for sensitive skin.
- Fine/Caster Sugar: Creates a more delicate exfoliation suitable for those with sensitive skin.
- Coarse Sugar: Provides more aggressive exfoliation, perfect for rough patches on feet, knees, and elbows. Mixed Textures: Combine half fine and half regular sugar for a medium exfoliation that provides both immediate and lasting scrubbing action as the finer crystals dissolve first.
You can also experiment with colored sugars if you want to create visually striking bars, though natural ivory with sparkling white sugar is elegantly simple and timelessly beautiful.
Here are a few other ways to make your snowflake scrub bars uniquely yours.
Try different butters or oils: Replace shea butter with cocoa butter for a richer feel or use coconut oil for a lighter texture.
Use different molds: Pour into silicone molds in varied shapes. Experiment with stars, hearts, or mini trees, and wrap in cellophane with a ribbon and label for handmade Christmas gifts.
Add shimmer: Mix in a small pinch of mica powder or fine cosmetic glitter for a frosted sparkle. It makes the snowflake design even more magical.
How To Use Homemade Snowflake Sugar Scrub Bars
Using your snowflake sugar scrub bar is as easy as it is luxurious.
In the shower or bath, wet your skin with warm water. The warmth helps open pores and softens skin, preparing it for exfoliation.
Gently rub the scrub bar over damp skin using circular motions. Focus on areas that tend to be rougher, such as elbows, knees, heels, and the backs of arms.
Don’t scrub too aggressively. Let the sugar do the work. Gentle, consistent circular motions are more effective than harsh scrubbing, which can irritate
As you use the bar, you’ll feel it gliding more smoothly as the butters melt from your body heat. This is normal and desired.
The melting action helps the moisturizing ingredients absorb into your skin. The sugar crystals will gradually dissolve as they work.
After exfoliating, rinse thoroughly with warm water. Pat your skin dry gently,
There’s usually no need for additional lotion, though you can certainly apply some if you prefer. You’ll notice your skin feels incredibly soft and smooth, with a light layer of moisturization from the butters.
Creative Ways To Package & Gift Snowflake Sugar Scrub Bars
Quick gifting ideas for single bars:
- Stocking stuffer: Wrap one bar in clear cellophane, tie with an ice-blue ribbon, and add a tiny snowflake charm.
- Neighbor or teacher gift: Slip one or two bars into a white organza bag with a “Winter Wonderland” label and simple use directions.
- Party favor: Place a bar in a mini bakery box, then seal with a round scent sticker and a made-on date.
- Hostess add-on: Tie a bar to a hot cocoa packet or a small candle with twine for a cozy touch.
Cozy Winter Spa Night Gift Set
Warm, comforting, curl-up-at-home vibes. Use a kraft box or basket with cream paper shred and a sprig of greenery.
- Drop in candy cane bath bombs for a fizzy, minty soak that feels like a holiday spa.
- Add the gingerbread sugar scrub for a deeper body polish on self-care nights.
- Pair the bars with this luxurious whipped gingerbread body butter for a rich, cozy finish after exfoliating.
- Round it out with a delicate snowflake pillar candle to create a soft, calming holiday mood.
Frosted Morning Glow Gift Set
Fresh, bright, spa-at-home energy. Use a white tin or box with ice-blue tissue and silver ribbon.
- Start with lavender & eucalyptus shower steamers to open the senses and wake up the mind.
- Add striped candy cane soap for an uplifting, minty cleanse that looks festive on any sink.
- Follow with a Christmas tree sugar scrub to buff dry winter skin and leave a fresh tingle.
- Finish with a candy cane lip scrub and lip balm for a smooth, peppermint-fresh pout and a Christmas roll-on perfume for on-the-go aromatherapy.
Bonus Bath Lover Add-Ons
- Add Christmas tree bath bombs for a piney, joyful bath that smells like winter woods.
- Include melt & pour penguin soaps for a cute accent that kids and adults will love.
- Tuck in a large bottle of candy cane bath salts in red and white layers for a treat to the senses.
- Add a bottle of foaming hand soap scented with Christmas essential oils and blends.
Packaging And Labeling Tips
Use clear cellophane or organza bags in white or ice blue; tie with ribbon that matches the scent theme.
Add scent name, ingredients, made-on date, and best-by date (about 6 months).
Example usage: Rub over damp skin in circles, then rinse well. Use 2–3 times weekly.
Give Your Gift Sets Festive Names: Winter Wonderland, Cozy Cabin, Sugar Cookie, Frosted Citrus, Peppermint Mocha.
Safety Considerations When Using Sugar Scrub Bars
While these bars are gentle and natural, it’s always good to keep a few safety tips in mind:
For external use only: Do not ingest or use on broken, irritated, or sunburned skin. The exfoliation will be painful and can worsen irritation. Wait until skin is healed before resuming use of any exfoliating products.
Use caution with spicy oils: Essential oils like cinnamon or clove can irritate sensitive skin. Always use a very small amount when adding warm spices.
Patch test new blends: Essential oils are concentrated plant extracts and should always be properly diluted. The recipe’s dilution ratio is safe for most people, but if you have sensitive skin, you might want to reduce the essential oil amount to 6-8 drops or perform a patch test first.
Watch out for slippery surfaces: These bars contain natural butters that can make your tub or shower floor slick. Rinse the area after use.
If you experience any irritation, redness, or discomfort, discontinue use immediately. While reactions to these simple ingredients are rare, everyone’s skin is different. Certain essential oils can be irritating to some people, so pay attention to how your skin responds.
Storage & Shelf Life
Proper storage helps maximize the life of your sugar scrub bars. After each use, place the bar in a well-draining soap dish away from direct water spray.
Allowing the bar to dry completely between uses prevents it from becoming soft or dissolving prematurely.
Store your bars in a cool, dry location. While it’s convenient to keep them in the shower, the humidity and temperature fluctuations can soften the bars over time.
Consider keeping your current bar in the shower and storing extras in your bedroom or linen closet.
For long-term storage, place bars in an airtight container separated by parchment paper to prevent them from sticking together. A plastic storage container or tin works well. Properly stored bars will maintain their quality for 3-6 months.
Avoid storing bars near heat sources like radiators or in direct sunlight, as this can cause the butters to soften or even melt. Similarly, very humid environments can cause the sugar to begin dissolving, so a dry storage location is ideal.
If you notice your bar becoming soft, simply move it to a cooler, drier location for a day or two. The beeswax content should allow it to firm back up. If bars do become too soft to use comfortably, you can remelt them and pour them into molds again, though this is rarely necessary with proper storage.
Expanding Your Sugar Scrub Bar Repertoire
Once you’ve mastered this basic snowflake recipe, you’ll likely want to experiment with variations. The beautiful thing about this formula is how adaptable it is to different seasons, scents, and purposes.
For spring, consider using floral molds and scenting the bars with these floral and citrus essential oil blends. You could add a drop of green soap colorant for garden-themed bars or rose-scented bars with pink coloring for Mother’s Day gifts.
Summer calls for refreshing citrus combinations and bright colors. Try lemon, lime, and grapefruit essential oil blends with yellow or orange colorants. Beach-themed molds like shells or starfish work perfectly for summer sugar scrub bars.
Fall brings opportunities for warm, spicy scents. Combine cinnamon leaf, clove, and orange with brown sugar for autumn-themed bars. Leaf-shaped molds or pumpkin molds create seasonally appropriate gifts.
You can also create bars for specific purposes. A “wake-up” bar might feature energizing peppermint and rosemary. A “relax” bar could contain lavender and chamomile. “Muscle relief” bars might include eucalyptus and peppermint for use after workouts.
Consider experimenting with different butter bases, too. Cocoa butter provides a chocolate-like scent, while mango butter is lightweight, absorbs quickly, and smells deliciously tropical. You could even create a combination of butters for different properties.
The basic ratio remains the same regardless of your variations: approximately 1 part wax to 2 parts butter, with enough sugar to create the desired texture. Once you understand this ratio, you can scale the recipe up or down and customize it endlessly.
These snowflake sugar scrub bars are a beautiful way to bring winter’s charm into your self-care routine with the perfect balance of gentle exfoliation and rich moisturization. They look magical, smell like the holidays, and leave your skin feeling smooth, soft, and pampered.
Don’t be intimidated if you’ve never made bath and body products before. This recipe is genuinely beginner-friendly, with a forgiving formula that produces excellent results even on your first try. The most common “mistakes” are easily corrected, and each batch teaches you something about how the ingredients work together.
Start with the basic recipe and recommended scent blend to get a feel for the process. Once you’re comfortable, let your creativity guide you to new scent combinations and variations.
DIY Snowflake Sugar Scrub Bars
Can I use brown sugar instead of white?
Yes! Brown sugar gives a softer scrub and a warmer tone, while white sugar offers a firmer texture.
Can I use coconut oil instead of shea butter?
Yes, you can substitute solid coconut oil for shea butter, though the texture will be slightly different. Coconut oil creates a harder bar and may melt more quickly on warm skin. Use the same measurement (1/6 cup).
Keep in mind that coconut oil has a distinct scent that may compete with your essential oils.
How do I correct bars that are too soft or too hard?
Add a bit more beeswax for firmness or increase the shea quantity for softer bars.
Why are my bars crumbling when I use them?
Crumbling usually indicates the mixture wasn’t packed firmly enough into the molds, or there wasn’t enough beeswax to hold everything together. Make sure to press the mixture very firmly into the molds and allow the full 24 hours of setting time before unmolding and using.
Can I use these sugar scrub bars on my face?
These scrub bars are formulated for body use and may be too harsh for delicate facial skin. For a facial scrub, you’d need to create a gentler formula with finer exfoliants and milder ingredients.
Can I color my scrub bars?
You can add a small amount of soap-safe colorant, such as mica powder or natural colorants like beetroot powder or blue spirulina, for a subtle tint. Natural mica in silver or blue creates a beautiful winter effect for snowflake bars. A little goes a long way!
Can I make these scrub bars without essential oils?
Absolutely! The bars work perfectly well unscented. Just skip the essential oil step. You’ll still have the natural, mild scent from the shea butter and beeswax, which many people find pleasant. This is also a good option for those with sensitive skin or scent sensitivities.
How long do these sugar scrub bars last?
When stored in a cool, dry place, they should stay fresh for up to 3 months.
Do these bars need to be refrigerated?
No, refrigeration isn’t necessary and can actually cause condensation issues when you remove them. Store at room temperature in a cool, dry place away from direct sunlight and heat sources. The beeswax content keeps them solid at normal room temperatures.