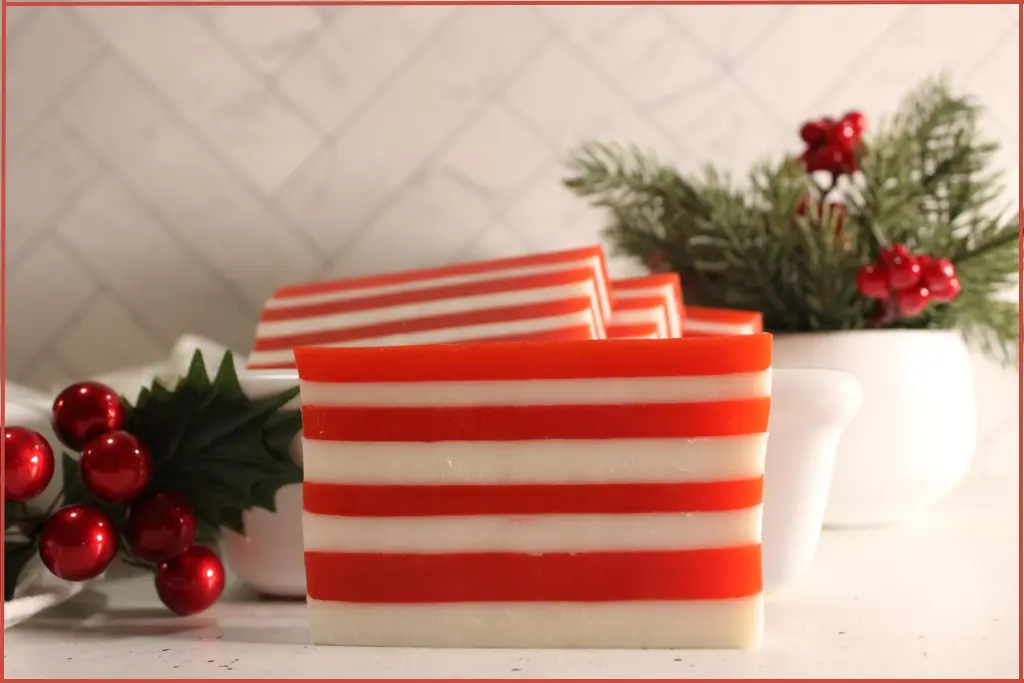
Nothing says Christmas quite like the cheerful red and white stripes of a candy cane, and now you can bring that festive charm to your handmade soaps! This DIY candy cane melt and pour soap looks just like a classic candy cane, smells delightfully minty-sweet, and makes a beautiful handmade gift for friends and family. It’s the perfect holiday project.
✨ Get 12 Free Holiday Diffuser Blends — Printable PDF
Instantly make your home smell like Christmas with these festive, ready-to-use recipes.
The best part? You don’t need any special soap-making skills. Using a melt-and-pour base, you can easily layer red and white soap to create those signature candy cane stripes.
Scented with a peppermint and vanilla essential oil blend, this DIY soap captures the cozy, uplifting aroma of the holidays – fresh, sweet, and festive.
I take away the guesswork with this detailed guide on how to make striped candy-cane soap step-by-step, from melting and coloring your base to creating even layers and getting that perfect candy-cane look.
Table of Contents
Affiliate Disclosure: Some links on this site are affiliate links. I may earn a small commission if you purchase through them, at no extra cost to you. See the full affiliate disclosure.
Why You’ll Love This Melt-And-Pour Candy Cane Soap
There are so many reasons to love this DIY project
- Festive & Fragrant Christmas Soap: The blend of peppermint and vanilla essential oils fills the air with a scent that’s both refreshing and cozy, just like the holidays.
- Beginner-Friendly Process: This is a melt-and-pour soap recipe, so there’s no need to handle lye or complicated soap-making steps. Simply melt, color, pour, and layer.
- Eye-Catching Design: The red and white candy cane stripes give these soaps a fun, festive look that instantly brightens any bathroom or gift basket.
- Perfect for Gifting: Wrap each bar with a little ribbon or tuck a few into a DIY Christmas gift set for a thoughtful, handmade present.
- Customizable Recipe: Try different molds or adjust the scent strength and shade of red to make it uniquely yours.
What You’ll Need To Make Candy Cane Soap With Red & White Stripes
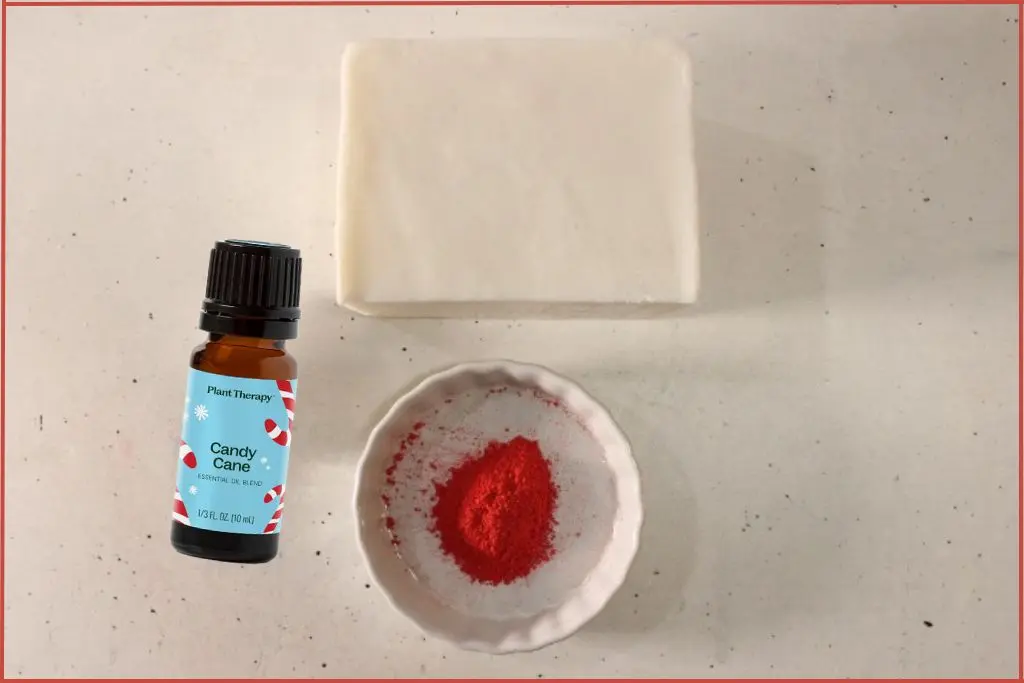
You’ll need a melt-and-pour soap base, red mica powder, and your favorite candy cane essential oil blend for that nostalgic holiday scent. A soap mold, heat-safe bowls, and a spatula or whisk will help you pour smooth layers with ease.
Ingredients
- 2 lbs Goat Milk Melt-And-Pour Soap Base
- Red Mica Powder (as desired)
- 120 drops Candy Cane Essential oil Blend (1% dilution)
Equipment & Supplies
- Soap mold (loaf mold or individual cavity molds)
- Soap Cutter – Straight or Crinkled
- Two Heat-Safe Glass Bowls
- Double boiler or microwave
- Stirring utensils (wooden skewers or silicone spatulas work well)
I used a goat milk melt-and-pour base for this candy cane soap recipe. Goat milk soap creates a creamy lather and has a naturally off-white color that provides the perfect canvas for your red and white stripes.
Other melt and pour base options include:
- Clear glycerin base for translucent white stripes
- Shea butter base for a vegan option
- Olive oil base for a gentle, conditioning bar
How To Make Candy Cane Melt And Pour Soap With Essential Oils: Step By Step
The beauty of melt-and-pour soap making is that the base comes pre-made with the proper pH and saponification already complete. This means you can focus entirely on the creative aspects including color, scent, and design, without worrying about lye or complex chemistry.
Before you begin melting anything, take a few minutes to set up your workspace. This will make the layering process much smoother.
Step 1: Cut and Melt the Soap Base
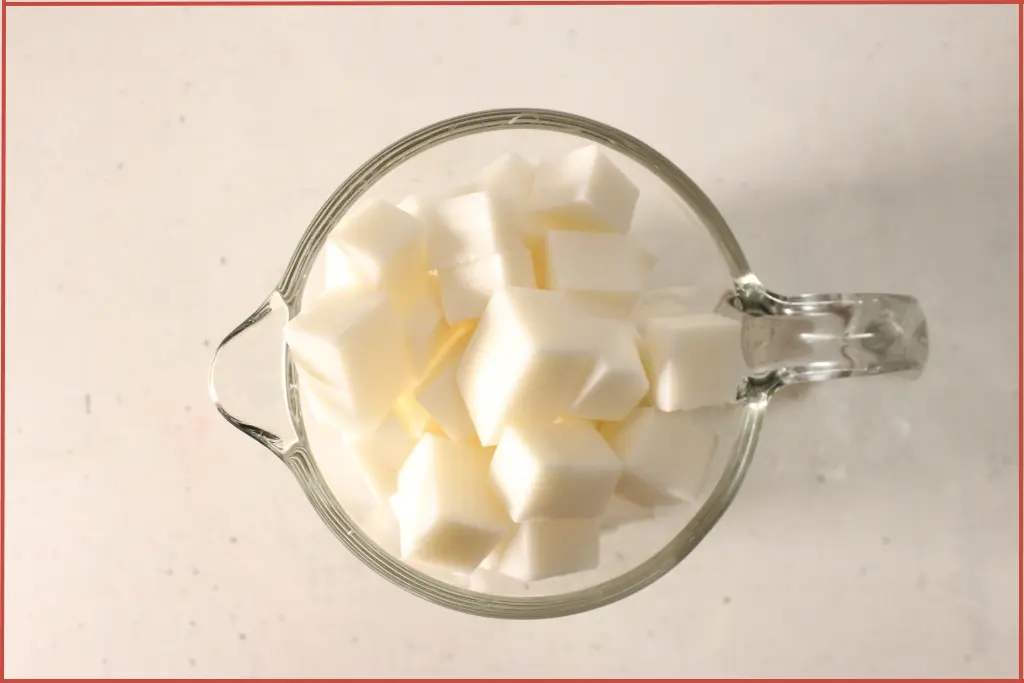
Cut your melt-and-pour soap base into small, even cubes, about 1 inch in size. This ensures that the soap melts evenly.
Place half of the cubes into one heat-safe bowl and the other half into a second bowl. Melt one bowl at a time using a double boiler or in the microwave in 30-second intervals, stirring frequently to prevent overheating.
Double Boiler Method: Place one bowl of soap cubes over a pot of simmering water, making sure the bottom of the bowl doesn’t touch the water. Stir occasionally as the soap melts. This method provides gentle, even heating and reduces the risk of overheating.
Microwave Method: Place one bowl of soap cubes in the microwave and heat in 30-second intervals, stirring between each burst. This is the faster option and works perfectly as long as you’re careful not to overheat the soap. The soap is ready when it’s completely liquid with no remaining chunks.
Both work equally well. Choose whichever is more convenient for you.
You’ll know your soap base is fully melted when it’s smooth, clear (or opaque white for milk-based soaps), and free of any solid pieces.
Avoid overheating, as this can cause the soap to bubble or dry out, resulting in a less smooth finish once hardened.
Step 2: Create The Red Color
Now for the fun part – creating your candy cane colors!
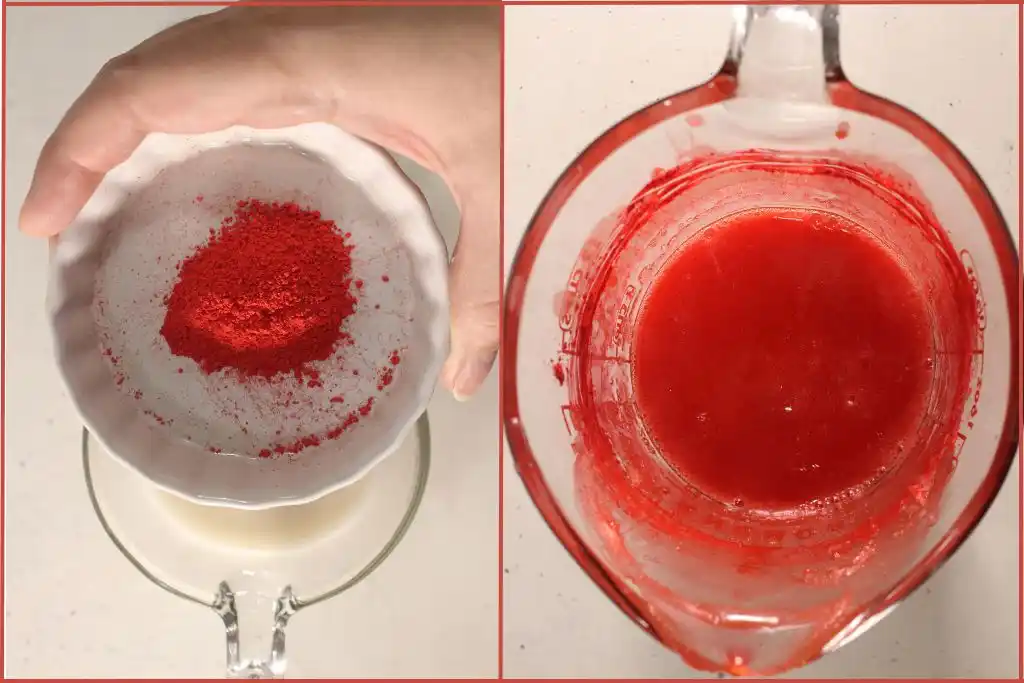
Leave one bowl of melted soap uncolored. The natural color of your soap base creates the perfect white stripes.
Add red mica powder to the second bowl of melted soap. Start with about 1 teaspoon and stir thoroughly. The mica powder should disperse evenly throughout the soap, creating a uniform color.
If you want a deeper, more vibrant red (like traditional candy canes), gradually add more mica powder, stirring well after each addition, until you reach your desired shade.
For this recipe, approximately 2 teaspoons of red mica powder will give you that rich, festive candy cane red you see in the finished bars. The exact amount can vary depending on your mica powder’s intensity and your personal color preference.
Step 3: Add The Candy Cane Essential Oil Blend
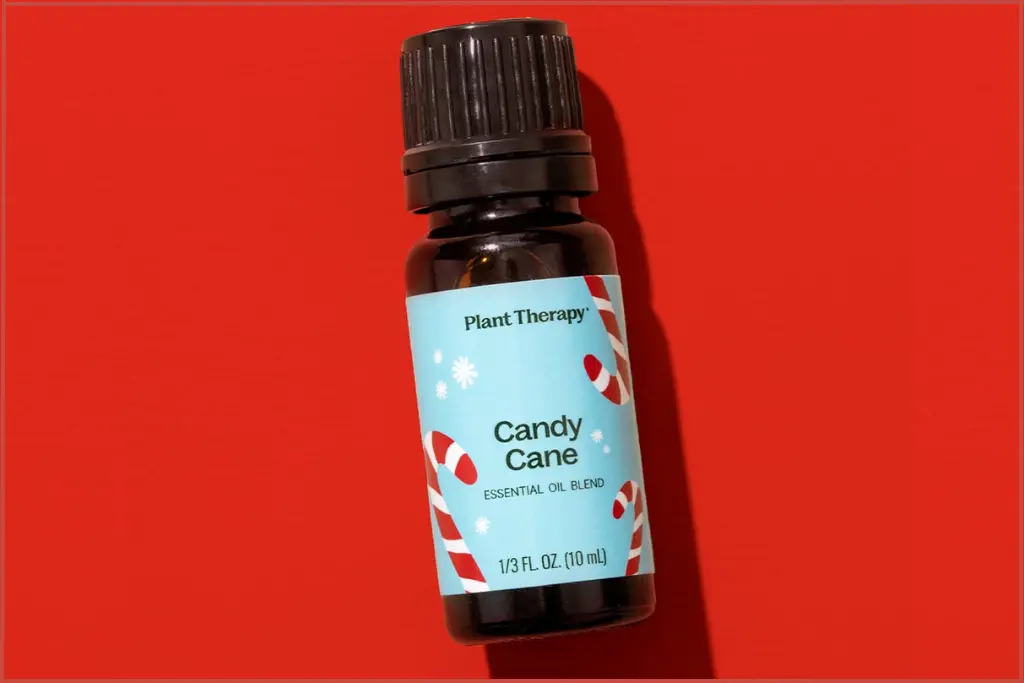
Once your colors are set, it’s time to add the aromatic heart of your Christmas soap – the candy cane blend. You can either use this blend recipe or buy a premade blend from Plant Therapy.
Divide your 120 drops of candy cane essential oil blend evenly between the two bowls. Add 60 drops into the red melted soap base and 60 drops into the white soap base. This ensures that every layer of your soap carries that refreshing peppermint scent.
Stir the essential oils thoroughly into each bowl. It’s important to let your melted soap cool slightly before adding essential oil.
If the soap is too hot (above 140°F), some of the volatile aromatic compounds can evaporate, weakening your scent. Aim for a temperature where the soap is still fully liquid but not steaming hot.
Step 4: Layer The Colors Carefully For Perfect Stripes
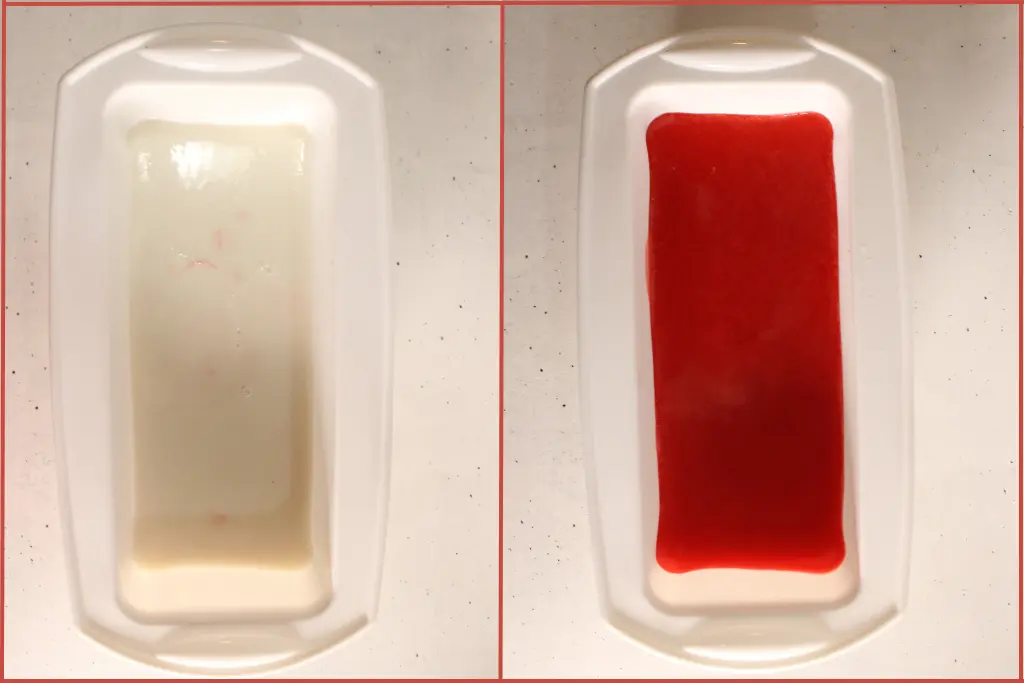
The layering technique is what creates those eye-catching candy cane stripes, and while it requires a bit of patience, the process is straightforward.
Pour your first layer into the mold. You can start with either red or white—the choice is yours. Pour enough to create a layer about ¼ to ½ inch thick, depending on how many stripes you want and the thickness of your mold. For the most classic candy cane look, aim for 4-6 alternating stripes.
Wait 5-10 minutes for the layer to set before pouring the next color. This timing is crucial.
Pour too soon, and the colors will blend into one another instead of creating distinct stripes.
Wait too long, and the layers may not bond properly. They’re more likely to separate when you cut the soap later.
To test if your layer is ready for the next pour, gently touch the surface with your finger. It should feel slightly tacky and firm, neither too wet nor completely dry and hard.
Alternate colors to create your striped pattern. While you’re waiting for each layer to set, your other bowl of soap will likely start to solidify. Just reheat it in 15-20 second microwave bursts or put it back in the double boiler until it’s liquid again.
Be careful not to overheat. You want it just liquid enough to pour smoothly.
Continue this process – pour a layer, wait 5-10 minutes, reheat the other color if needed, pour the next layer – until you’ve used all your soap or filled your mold to your desired height.
Tip 1: If you pour too soon, the colors may swirl together instead of forming crisp layers.
Tip 2: Lightly spritz each layer with isopropyl alcohol before adding the next. This helps the layers stick together and removes surface bubbles.
Step 5: Setting and Unmolding

Once you’ve poured your final layer, allow the soap to fully cool and harden before attempting to unmold it. This may take several hours at room temperature, though you can speed up the process by placing the mold in the refrigerator for about an hour.
You’ll know your soap is ready to unmold when it feels firm and cool to the touch, and the soap has pulled away slightly from the sides of the mold (especially noticeable with silicone molds).
To unmold, gently flex the sides of the mold away from the soap. If you’re using a loaf mold, you may need to turn it upside down and tap the bottom gently to release the soap loaf.
Step 6: Finishing Touches

If you’ve used a loaf mold, you’ll now slice your soap into individual bars. Use a sharp, non-serrated knife and a gentle sawing motion to cut clean edges. Wipe the knife clean between cuts to prevent color transfer between bars.
For best results and longest shelf life, store your candy cane soaps in a cool, dry place. Avoid storing them in humid environments like bathrooms (until you’re ready to use them), as melt and pour soap can “sweat” when exposed to moisture.
If you’re gifting these soaps, wait at least 24 hours after making them before wrapping, to ensure they’re completely set and any surface moisture has evaporated.
Tips for Success & Troubleshooting
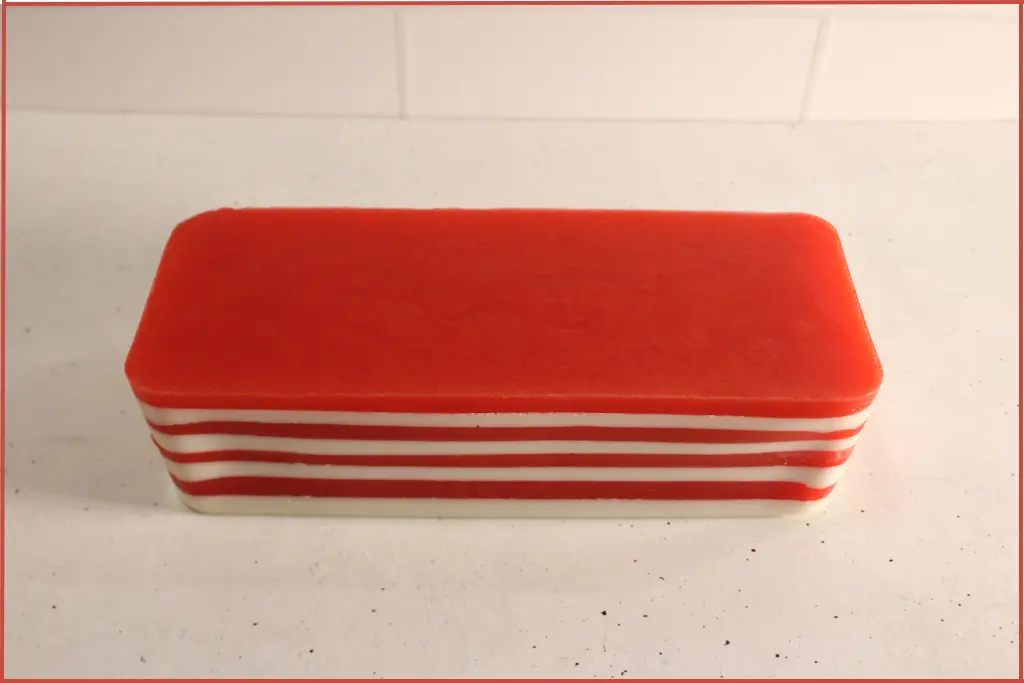
Even though this candy cane melt and pour soap recipe is beginner-friendly, a few small tweaks can make a big difference in how your striped layers and scent turn out. Here are some easy tips and fixes to help you get the best results every time.
1. Getting Clean, Even Layers
The most common challenge in making layered soap is getting the timing just right between layers.
To achieve those crisp red and white candy cane stripes, it’s important to pour the next layer while the previous one is just tacky to the touch, not completely hardened. If you wait too long, the layers may not bond well and could separate when sliced.
Here’s what happens with different timing scenarios:
If you pour too soon (the layer is still too liquid), the colors will blend into each other, creating muddy stripes or even mixing completely. You might also see the new layer sink into the previous one.
If you wait too long (the layer is completely hardened), the layers won’t bond properly. When you cut your soap bars, you may find the stripes separate or the layers break apart easily. This is the issue mentioned in the recipe notes – if you wait too long for the layer to harden, the finished soap may not hold together well.
The sweet spot is when the layer is set but still slightly tacky, firm enough to hold its shape but not completely cool. This typically occurs around the 5-10 minute mark, although it can vary depending on room temperature and the thickness of the poured layer.
Quick Fix: If your layers do separate, slightly re-melt the edge of one layer and press them together again to seal. One of the many benefits of melt and pour soap making is how easy it is to fix any mistakes!
2. Perfecting The Color Intensity
When it comes to mica powder, a little goes a long way. It’s always better to start with less and gradually add more until you achieve your desired color intensity.
Too much mica can darken the color or leave residue on the soap’s surface. For a true candy cane look, aim for a vibrant red against a creamy white base.
For this candy cane soap:
- 1 teaspoon of red mica powder will give you a lighter, pink-red shade
- 2 teaspoons create the classic, vibrant candy cane red used in this recipe
- 3+ teaspoons will create a very deep, intense red
Quick Fix: If the color looks dull, remelt the layer gently and stir in a touch more mica.
Keep in mind that the color will look slightly different when wet versus dry. If you want to test your color before committing to the full batch, pour a small amount onto a white plate and let it set. This gives you a preview of the final color.
As mentioned earlier, when used in these proportions, the red mica powder in this recipe does not stain skin during use. The colorant stays in the soap and washes cleanly down the drain.
3. Preserving the Scent
The key to retaining the iconic Christmas scent is to add your essential oil blend after removing the soap from the heat. Stir well to distribute the scent evenly through each batch.
If your soap is too hot when you add essential oils, the heat can cause some of the aromatic compounds to evaporate, weakening your scent. If the soap is too cool, it will start to thicken and become difficult to distribute the essential oil throughout the mixture.
Quick Fix: If the fragrance seems faint, gently reheat the soap just enough to melt, then stir in a few extra drops of your blend (without overheating).
4. Temperature Management
Aim for soap that’s fully liquid and pourable, but not steaming hot – around 130 to140°F is ideal. At this temperature, it pours smoothly, sets at a reasonable pace, and preserves your essential oil scent.
A soap base that’s too hot can also take longer to set between layers. If it’s too cold, the layers will settle unevenly.
When reheating soap between layers, use short bursts (15-20 seconds in the microwave or brief periods in the double boiler) and stir well. The soap doesn’t need to be as hot as it was during the initial melt. It just needs to be liquid enough to pour.
If you’re working in a warm kitchen and the layers take too long to set, place the mold in the fridge for 3–5 minutes between pours. Just don’t leave it too long, or condensation can form and affect the finish.
5. Avoiding Air Bubbles
Air bubbles can form while stirring or pouring. To get a smooth finish, stir slowly and spritz the surface with isopropyl alcohol after each pour. This removes bubbles and helps layers adhere better.
Quick Fix: If you spot bubbles after the soap sets, use a small knife to trim or smooth them before wrapping.
6. Preventing Overheating
Melt-and-pour soap bases are sensitive to heat. If the soap gets too hot, it can form bubbles, discolor, or develop a dry texture. Always melt in short bursts in the microwave or use a double boiler over low heat.
Quick Fix: If you notice a thin film forming while melting, remove from heat immediately and stir to redistribute the moisture.
7. Protecting The Finish
Once cooled, wrap each bar tightly in plastic wrap or wax paper to prevent moisture from dulling the surface.
Optional: Tie with ribbon or twine and add a small candy cane or gift tag for a festive finishing touch.
Homemade Candy Cane Soap Customization Ideas
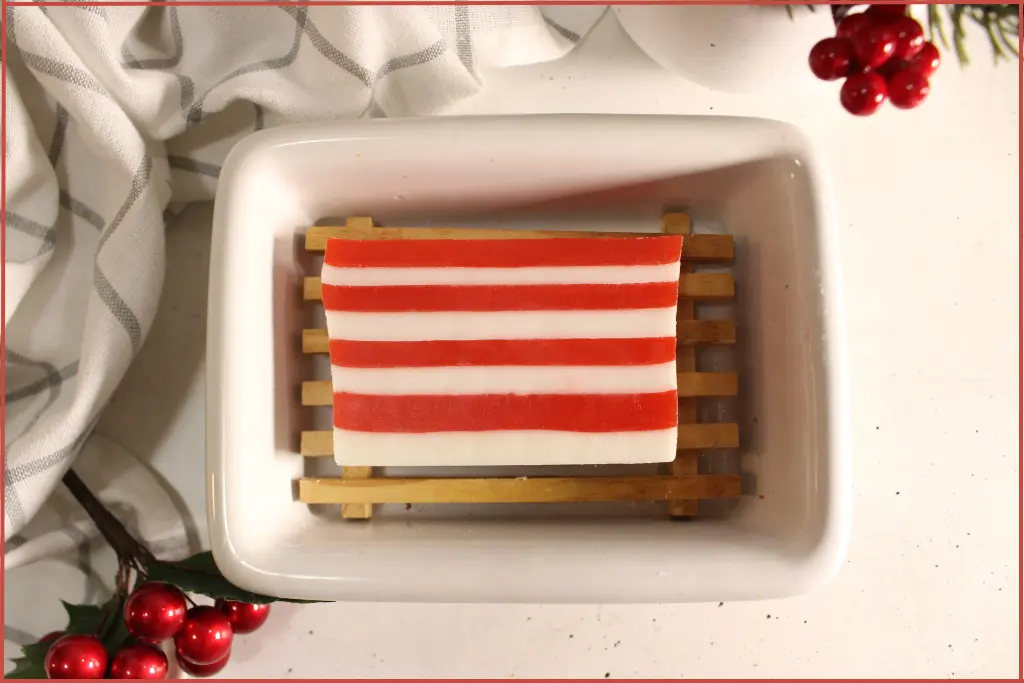
Once you’ve made your first batch of candy cane soap, you’ll see how easy it is to get creative with colors, scents, and shapes. Here are some fun ways to make each batch uniquely yours.
Try Different Soap Bases
Each soap base gives your finished bars a slightly different look and feel:
- Goat Milk Base: Creamy and moisturizing with a smooth white color that’s perfect for crisp red stripes.
- Shea Butter Base: Rich and conditioning with a soft, velvety texture.
- Clear Glycerin Base: Great for a translucent, candy-like effect that mimics real peppermint sticks.
Tip: You can even layer a clear base with an opaque one for a glossy, dimensional finish.
Create Diagonal Red & White Stripes
For a different look, try pouring your layers diagonally:
- Tilt your mold at a 45-degree angle and secure it with a rolled towel or book
- Pour your first layer and let it set
- Tilt the mold in the opposite direction for the next layer
- This creates diagonal candy cane stripes that look especially striking when cut
Create Red & White Swirls
For a more organic, swirled candy cane look:
- Pour both colors into the mold at the same time from opposite ends
- Use a skewer or chopstick to gently swirl the colors together
- Create figure-eight patterns or gentle spirals
- Don’t over-swirl, or the colors will blend completely
Experiment With Different Color Combinations
While candy cane soap bars have a distinctive Christmas look, the layering technique is versatile and works beautifully for other holidays and occasions. All you need to do is change the color combinations and the scent.
Here are a few ideas to help you get started:
- Orange and white for Creamsicle-inspired summer soap
- Green and white for winter forest or Christmas tree soap
- Purple and white for lavender fields
- Blue and white for ocean waves or winter wonderland
- Pink and white for Valentine’s Day or spring blooms
Play with Scents
If you want a twist on the classic candy cane aroma, try experimenting with different essential oil blends:
- Eucalyptus and peppermint for a spa-like shower experience
- Orange and peppermint for a refreshing citrus-mint blend
- Spearmint and lime for a mojito-inspired scent
- Wintergreen and vanilla for a sweeter candy cane alternative
Keep total essential oil dilution around 1% for a balanced, skin-safe fragrance.
Play With Shapes
Swap out your regular bar mold for holiday-themed molds like snowflakes, hearts, or stars. Mini candy cane or snowflake molds look especially charming when paired with matching bath bombs or scrub bars.
Personalize for Gifting
For a thoughtful touch, name your soaps creatively. Try “Peppermint Bliss,” “Frosted Candy Cane,” or “Winter Wonderland Swirl.” Add a small tag listing the scent and ingredients for a boutique-style presentation.
Christmas Candy Cane Soap Creative Packaging & Gift Basket Ideas
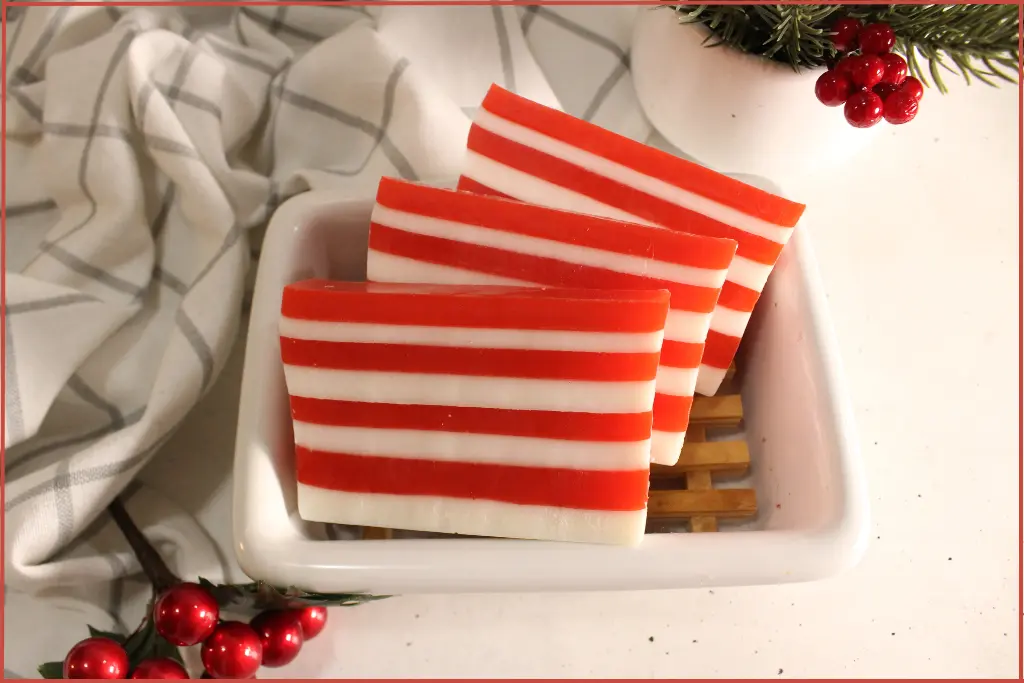
Your candy cane soap bars already look festive on their own, but with a little creative packaging, they can become the highlight of any holiday gift.
These soaps are ideal for teacher gifts, holiday party favors, stocking stuffers, or as part of a larger gift basket. The vibrant stripes and refreshing scent make them feel special and thoughtful without requiring expensive wrapping.
Festive Packaging Ideas
Keep The Classic Candy Cane Look: Wrap each soap bar in clear shrink wrap or wax paper so the red and white stripes are visible. Tie with a red-and-white baker’s twine or a satin ribbon for a polished finish.
Add Natural Touches: Slip a small sprig of pine, rosemary, or holly under the ribbon to give it a rustic, aromatherapy-inspired look.
Attach Holiday Tags: Attach a mini gift tag with the scent name, “Candy Cane Bliss” or “Peppermint Vanilla Swirl”, to add a personal touch.
Create Mini Gift Sets: Stack two or three soaps together and secure with a ribbon for an easy, ready-to-give stocking stuffer.
Candy Cane-Themed Gift Basket Idea
Create a cohesive, red-and-white themed basket that looks straight out of a Christmas market. Line a small wicker or tin basket with crinkled paper or shredded white tissue, then add your handmade items in alternating pops of red and white for a festive layered look.
Begin with the star of the show: striped melt-and-pour soap bars that look like classic holiday treats. Tuck in a bottle of layered bath salts and a jar of layered sugar scrubs next. The sparkling crystals and red-and-white bands make it feel extra special.
Add a few festive bath bombs with soft swirls that fizz into a minty, sweet soak, perfect for a quiet winter evening. Slip in a tiny pot of candy cane lip scrub for gentle polishing, followed by a silky lip balm that keeps lips soft through chilly weather.
Finish with a homemade Christmas candle that glows softly and carries the same cozy holiday aroma through the room, tying the whole experience together.
Once everything is arranged, wrap the basket in cellophane and tie it with a wide red satin ribbon or a striped bow. Add a simple tag that reads, Warm Wishes & Candy Cane Kisses, for a final festive flourish.
That’s it! You’ve now got a gift that looks and feels handcrafted with love.
Winter Wonderland Gift Basket Idea
For a more varied gift idea, put together a winter-themed self-care basket featuring a mix of your DIY holiday creations.
Use a frosted white or silver container, then add a soft layer of shredded tissue. Arrange each item so the colors flow, with lighter pieces up front and deeper tones tucked behind for added depth.
Start with a few individually wrapped bath bombs. Their Christmas-tree shapes and cheerful green color make the basket feel instantly festive.
Slip in a stack of sugar snowflake scrub bars next. The delicate details and gentle exfoliation look pretty and feel spa-like.
Add a snowflake pillar candle in the center to cast a soft winter glow when the basket is opened. Beside it, place a jar of gingerbread whipped body butter. The rich, cozy scent pairs beautifully with chilly weather and helps dry skin feel pampered.
Tuck in a cocoa lip balm for an extra touch of comfort, then brighten things up with penguin soap bars. The cute, wintry design adds a bit of whimsy without overpowering the calm palette.
For lips that need a deeper refresh, include a small pot of coffee lip scrub; the light polish and hint of roast make a nice contrast to sweeter scents.
Complete the look with a soothing hand cream in a clean, winter-forward fragrance. Add a matching room spray to mist linens or entryways for an instant seasonal mood.
Nestle in a few mini scented pinecones, a sprinkle of faux snowflakes, and a couple of cinnamon sticks for texture and charm. Finish by wrapping the basket in sheer organza or frosted cellophane, then tie a silver ribbon on top. The result feels calm, cozy, and gift-ready.
Storage & Shelf Life
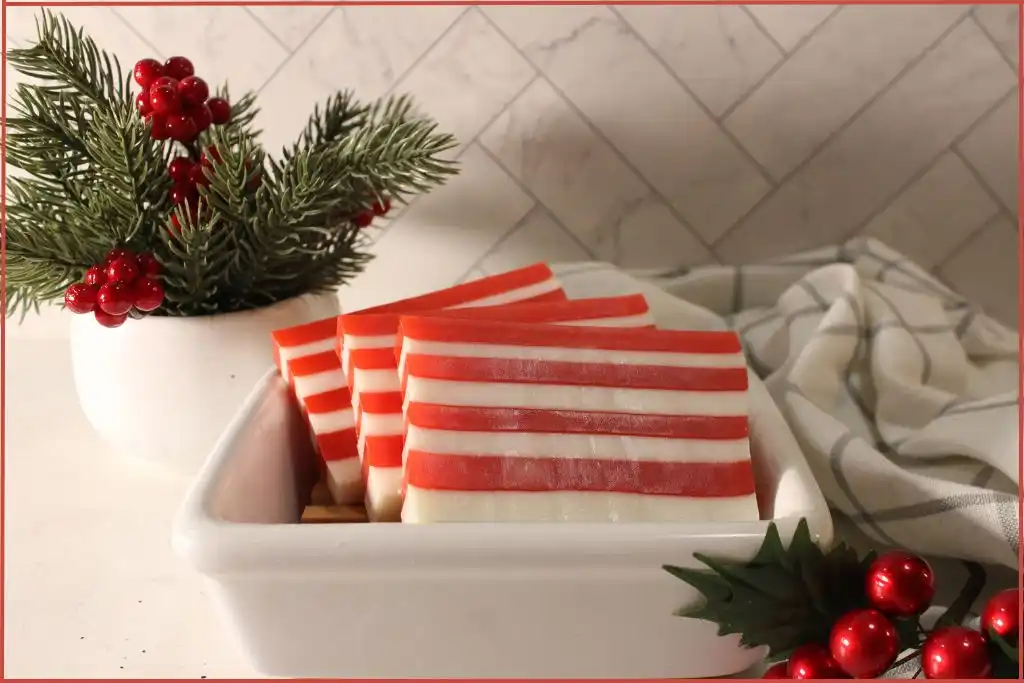
Proper storage ensures your candy cane soaps stay fresh, fragrant, and beautiful until you’re ready to use or gift them:
Melt and pour soap is hygroscopic, meaning it absorbs moisture from the air. To prevent your soaps from becoming sticky or “sweating”, store the bars in a cool, dry place away from humidity. Wrap individual bars in plastic wrap or store in airtight containers.
Avoid storing your homemade soap bars in bathrooms. The shower steam and humidity can cause them to sweat or get sticky quickly.
If your soap develops tiny water droplets on the surface (sweating), pat them dry with a paper towel.
You’ll know it’s time to replace your soap if:
- The scent has faded significantly or smells “off”
- The colors have faded or changed dramatically
- The soap has developed an unusual texture or coating
- The soap has cracked or become brittle (usually from being too dry)
Generally, these soaps will be used up long before any of these issues occur, especially during the holiday season when that refreshing peppermint scent is most appealing!
Making candy cane melt and pour soaps is a fun and festive way to celebrate the season while filling your home with the sweet, refreshing scent of peppermint and vanilla.
The vibrant red and white stripes bring instant holiday cheer to your bathroom or kitchen sink, while the invigorating peppermint essential oil transforms an everyday shower or handwash into a refreshing, aromatherapy experience.
Every time you lather up, you’ll enjoy that cool, tingly sensation and crisp, clean scent that peppermint is famous for.
The layering technique might take a bit of patience, but it’s far easier than it looks—and once you’ve made your first batch, you’ll be amazed at how professional they turn out.
Once you’ve mastered the basic technique, try experimenting with new colors, molds, or scents to create a variety of soap bars tailored to different seasons.
DIY Candy Cane Melt & Pour Soap Bars: FAQs
What’s the best soap base for this candy cane soap recipe?
A goat milk melt-and-pour base gives you creamy white layers that contrast beautifully with the red mica. If you prefer a vegan option, shea butter or coconut milk bases work wonderfully too. Clear glycerin bases will give you a more translucent, candy-like look.
Can I double or halve the recipe?
Definitely. This recipe is easy to scale. Just maintain the same 1% dilution ratio for essential oils — that’s about 60 drops per pound of soap base.
Can I use a different essential oil blend instead of candy cane?
Absolutely! If you don’t have a pre-made candy cane blend, use this essential oil blend recipe for a similar sweet-mint aroma. For a softer scent, try a mix of peppermint and lavender for a cooling, soothing effect.
Can I make smaller versions for stocking stuffers?
Yes! Pour the soap into mini molds or silicone ice cube trays for adorable small bars. These are great for teacher gifts, party favors, or holiday markets.
Can I use fragrance oil instead of essential oils?
No, I strongly recommend using good-quality essential oils from a reputed brand as you’ll be using this on your skin. Learn more about fragrance oils and how they are different from essential oils.
Will the mica powder stain my skin or sink to the bottom?
When mixed thoroughly, mica stays evenly dispersed and doesn’t stain skin. If you notice settling, stir again before pouring and allow it to cool slightly before layering
