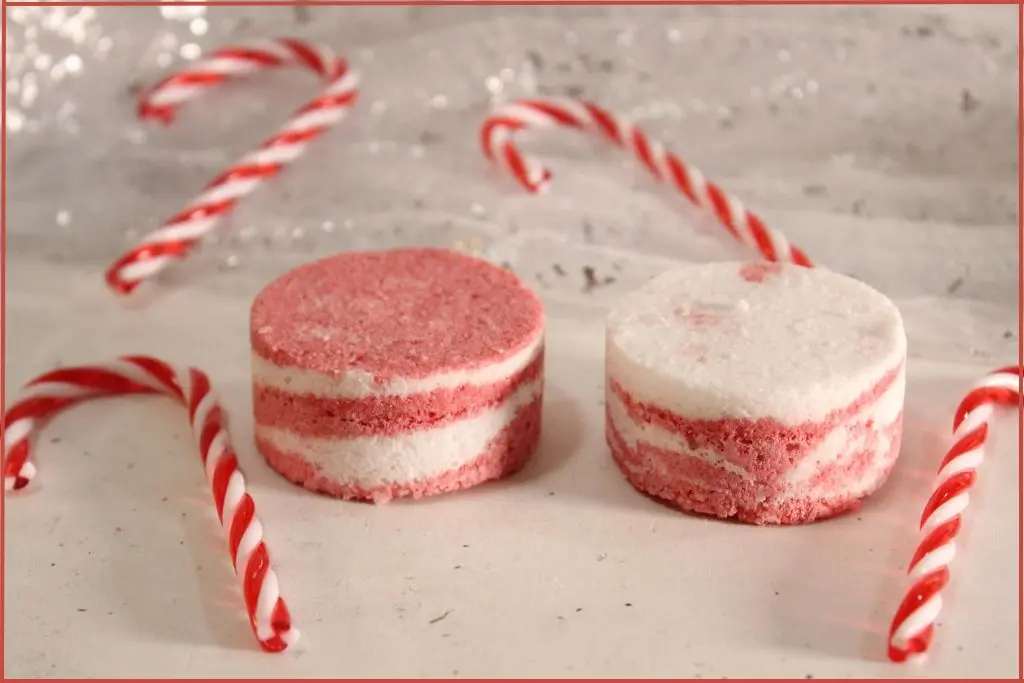
Candy cane bath bombs bring cozy holiday vibes to your tub, with cheerful red and white swirls and a bright peppermint scent. They fizz as soon as they hit warm water, releasing refreshing aroma and skin-softening oils for a relaxing soak.
Imagine sinking into a warm bath as the fizzy red-and-white layers swirl around you, releasing that classic candy cane aroma. Instant Christmas magic!
✨ Get 12 Free Holiday Diffuser Blends — Printable PDF
Instantly make your home smell like Christmas with these festive, ready-to-use recipes.
These DIY candy cane bath bombs are beginner-friendly, quick to make, and perfect for gifting or a little self-care when the season gets busy. With their festive stripes, peppermint scent, and skin-softening oils, they look as good as they smell.
Whip up a batch for yourself and a few extras for stocking stuffers, teacher gifts, or holiday care packages.
Table of Contents
Affiliate Disclosure: Some links on this site are affiliate links. I may earn a small commission if you purchase through them, at no extra cost to you. See the full affiliate disclosure.
Why You’re Sure To Love These Homemade Bath Bombs
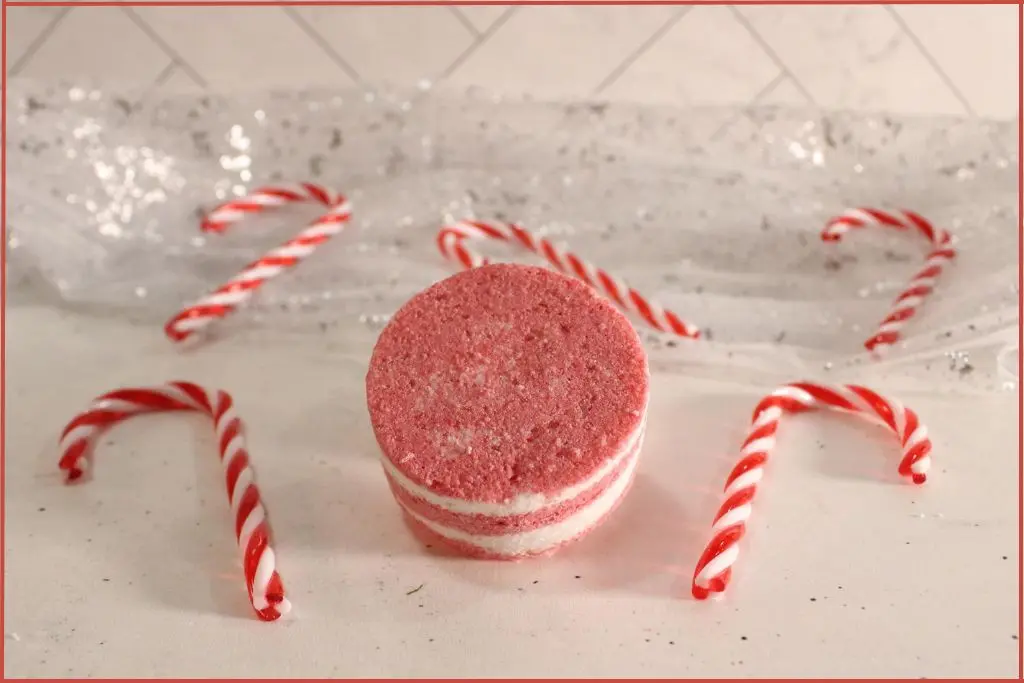
There’s a lot to love about these homemade red-and-white striped bath fizzies:
They look like Christmas in a fizzy bath bomb: The red-and-white stripes are pure festive joy. They’ll remind you of candy canes, Christmas stockings, and cozy winter mornings.
Fill the space with holiday happiness: The candy cane essential oil blend fills your bathroom with that cool, refreshing peppermint scent everyone loves this time of year.
Gentle and moisturizing: A touch of almond oil helps leave your skin soft and smooth after your soak — no dryness, just silky holiday glow.
Super easy to make: You only need a few simple ingredients and a silicone mold – no special tools or fancy equipment.
Perfect for gifting: Wrap a few in clear cellophane with a red ribbon, and you’ve got an instant handmade gift that feels thoughtful and luxurious.
This homemade candy cane bath bomb fizzes with festive essential oils and skin-softening oils, creating a relaxing and refreshing holiday soak.
Ingredients You’ll Need To Make Red & White Christmas Bath Bombs

You only need a handful of simple ingredients to make these festive fizzers – most of them are pantry or craft staples!
- ¼ cup Baking Soda: The base that gives the bath bomb its signature fizz when it meets citric acid.
- 2 tablespoons Citric Acid: The essential partner to baking soda for that bubbly, fizzy reaction.
- 2 tablespoons Corn Starch: Softens the fizz and helps hold the shape.
- 2 tablespoons Epsom Salt – Adds a soothing, spa-like feel to the water, creating a relaxing soak.
- ¼ teaspoon Almond Oil: A light carrier oil that adds a gentle moisturizing touch.
- 4 drops Candy Cane Essential Oil Blend: Gives bath bombs that distinctive cool, minty-sweet Christmas scent.
Ingredients For Color & Molding
- Red Mica Powder: Cosmetic-grade color to achieve the red, candy cane swirl effect (use as much or as little as you like).
- Spray bottle with water: Binds the mixture in small bursts without setting off the fizz too soon.
- Round Silicone Mold: Helps form smooth, even bath bombs.
Tools & Supplies
- Mixing bowls (one large, one small)
- Measuring spoons and cups
- Whisk or spoon for mixing
- Silicone mold
- Gloves (optional — they keep your hands from turning pink while mixing the mica!)
This recipe makes approximately 5 bath bombs when using standard round silicone molds (about 2-3 inches in diameter). The exact yield may vary slightly depending on the size of your molds and how firmly you pack the mixture.
How to Make Candy Cane Bath Bombs: Step-By-Step
Step 1: Combine the Dry Ingredients
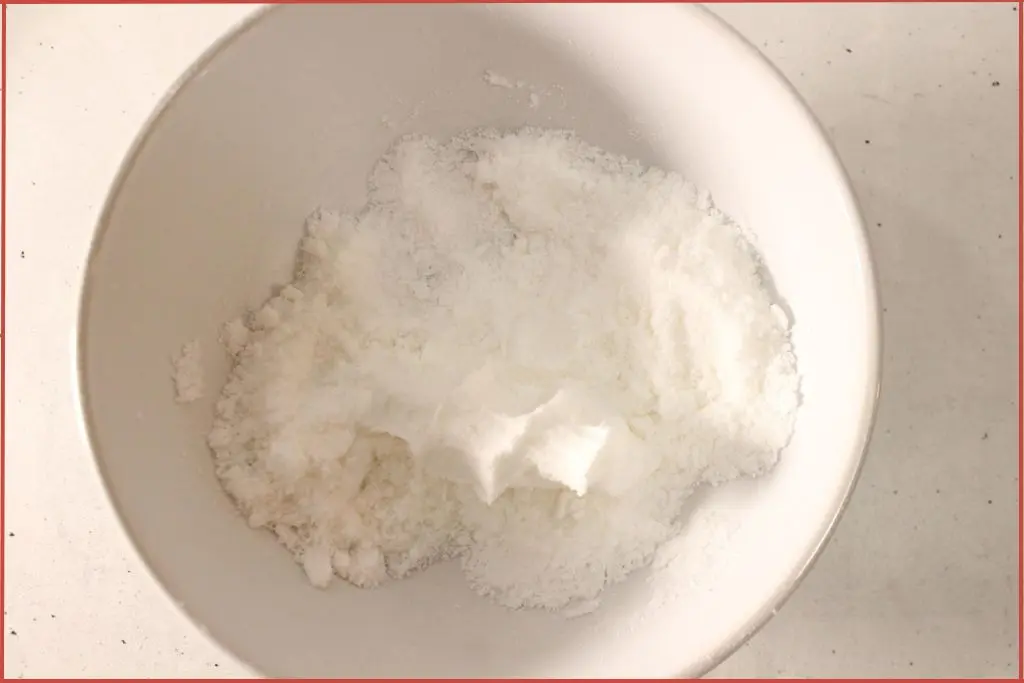
In a large mixing bowl, add the baking soda, citric acid, Epsom salt, and corn starch. Use a whisk or fork to mix these ingredients thoroughly, breaking up any clumps that form.
This is the base of your bath bomb. When the bath bombs come into contact with moisture, the baking soda and citric acid react to create the fizz, while the cornstarch helps slow the reaction so your bath bomb doesn’t fizz out too quickly.
Taking the time to mix well at this stage ensures that your bath bombs will fizz evenly and have a consistent texture throughout. Make sure everything is well-blended before moving on to the next step.
Step 2: Add Candy Cane Blend To Almond Oil
Combine the almond oil and candy cane essential oil blend in a small bowl.
Stir gently so the blend is evenly distributed throughout the bath bombs rather than creating concentrated pockets of scent.
The almond oil acts as a carrier, helping to disperse the essential oils uniformly through the dry ingredients when you combine them later. It also acts as an important dilutant, preventing concentrated essential oils from coming in direct contact with your skin.
Step 3: Add the Oils to the Dry Mix
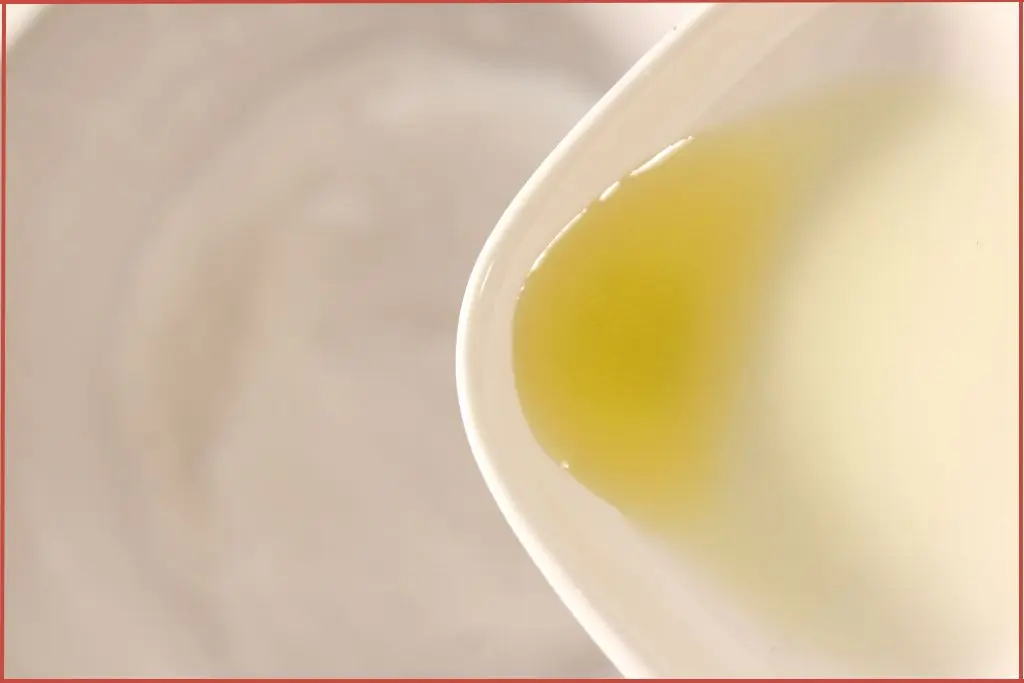
Slowly pour the oil mixture into the bowl of dry ingredients, stirring constantly and gently as you pour. Mix thoroughly to distribute the oils as evenly as possible throughout the powder. The key is to stir the ingredients very gently so the citric acid and baking soda don’t start fizzing prematurely.
At this stage, the mixture will still look quite powdery and dry. This is exactly what you want. The oils should be well incorporated, but the mixture shouldn’t feel wet or damp yet. Continue stirring until you can no longer see any oil pooling and everything appears uniformly mixed.
Step 4: Spritz Water To Dampen The Mixture
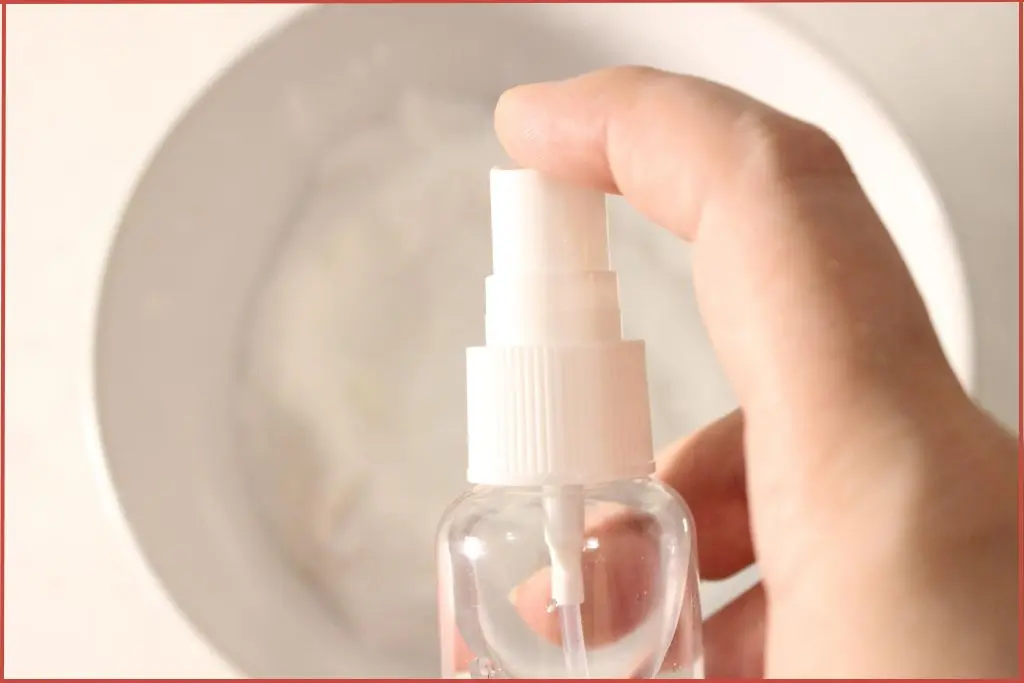
This is the trickiest step in the entire process. You want to activate the mix just enough so it holds its shape but doesn’t fizz.
Hold your spray bottle about 6-8 inches above the bowl and lightly spritz the mixture with water – just one or two spritzes.
Stir well after each spray to distribute the moisture. The mixture may fizz slightly, and that’s okay. This is normal, but you do want to minimize it, so be careful. Do not add too much water at a time.
Continue this process, spraying once and mixing thoroughly before spraying again. For this recipe, approximately 6 sprays should be sufficient, but the exact amount may vary depending on humidity and the thickness of the spray nozzle.
You’re aiming for a texture that resembles damp sand or wet snow. The mixture should clump together when you squeeze it in your hand, but still feel somewhat crumbly.
If you can form a ball that holds its shape when you squeeze it, you’ve reached the perfect consistency. Be patient and add water gradually—it’s much easier to add more water than to fix a mixture that’s too wet and fizzing prematurely.
Step 5: Create Two Batches – One Red, One White
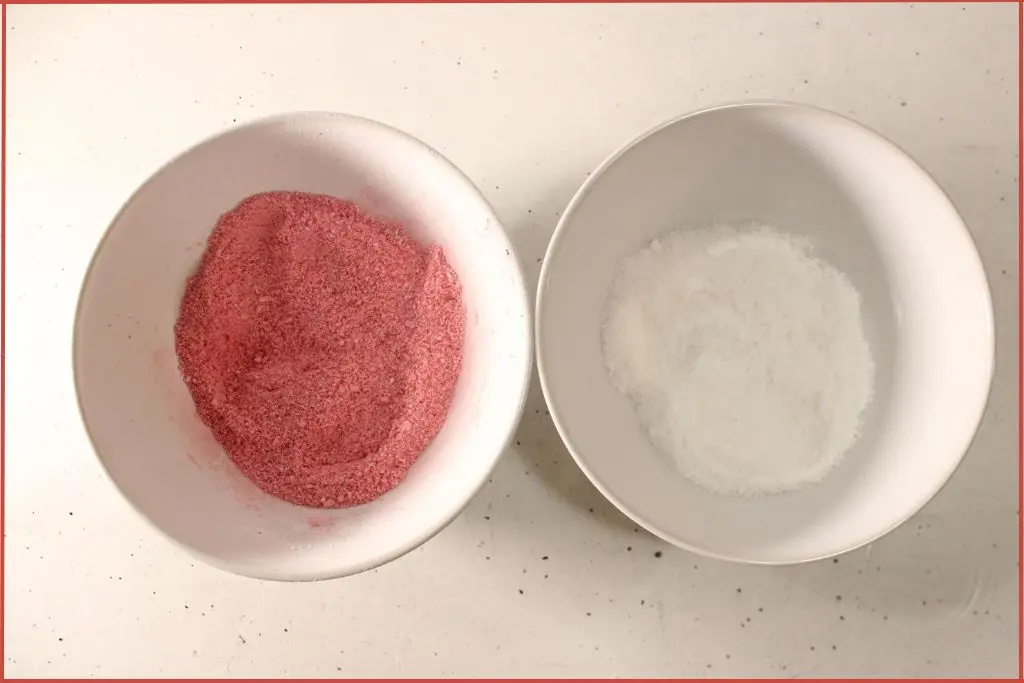
Once your mixture has the right consistency, divide it evenly between two separate bowls. Leave one bowl as is – this will be your white layer.
To the other bowl, add a small amount of red mica powder. Start with just a pinch and stir thoroughly.
Mica powder is very pigmented, so a little goes a long way. Continue adding small amounts and mixing until you achieve your desired shade of red.
For a classic candy cane look, aim for a bright, vibrant red that will contrast beautifully with the white layers.
Pro move: Mix your mica into a tiny portion of the dry base first. Then blend that into the larger batch for even color.
Step 6: Alternate Red & White Layers
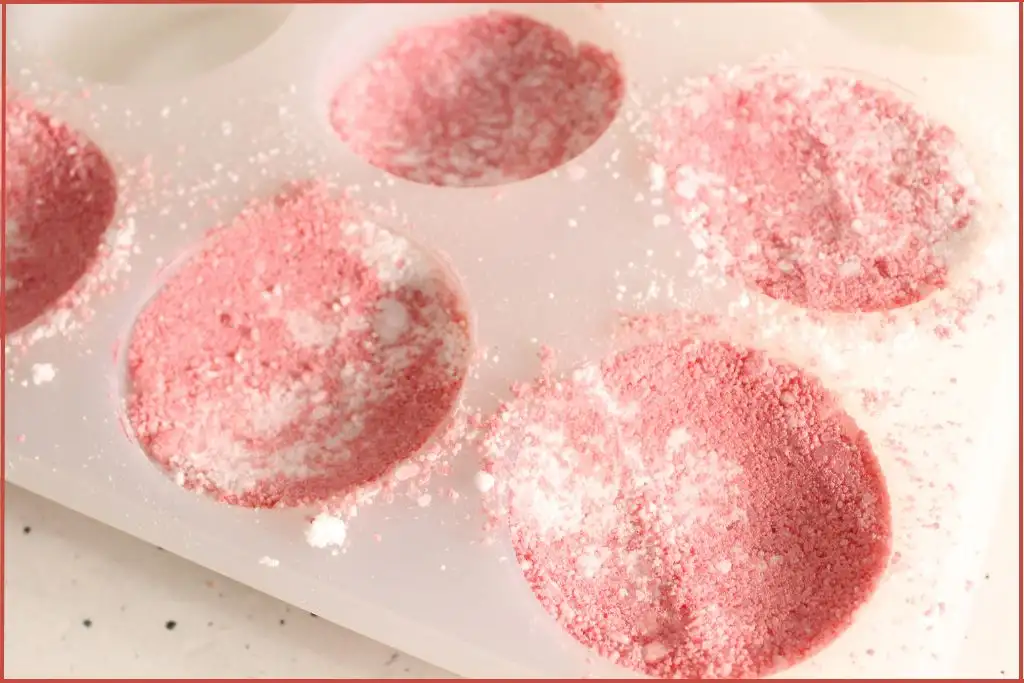
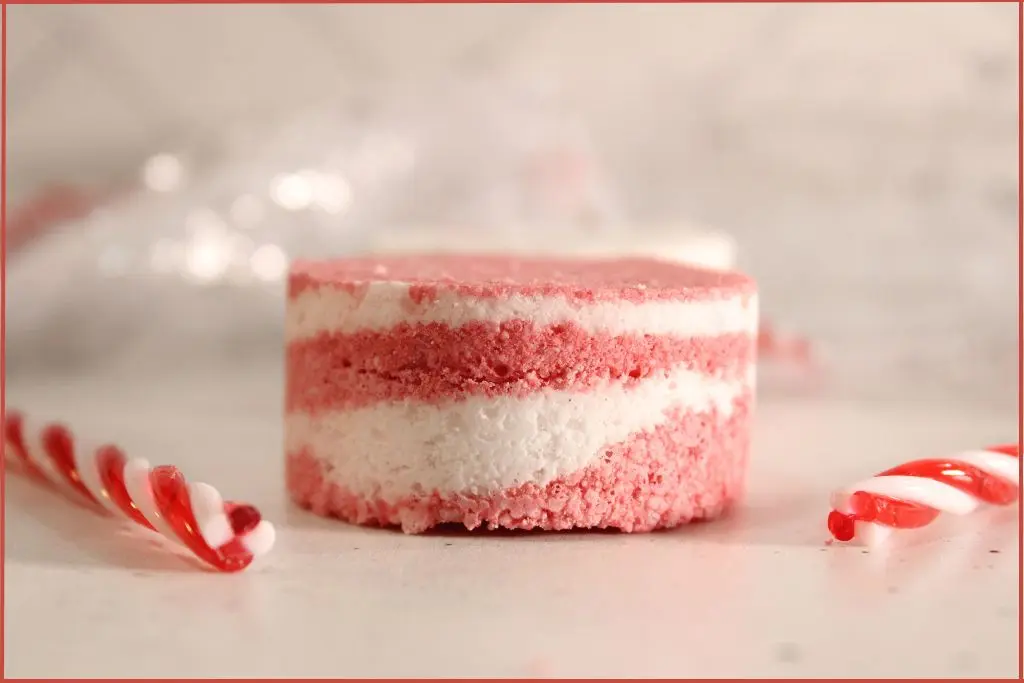
Now comes the fun part – creating those signature candy cane stripes! You will alternate your plain white mix and your red mix to mimic a candy cane. Aim for thin, even layers so the pattern shows clearly once unmolded.
Start by adding a spoonful of either the red or white mixture to the bottom of the silicone mold.
Gently press the layer flat with your fingertips or the back of the spoon. Tighter packing means stronger bath bombs.
Next, add a layer of the opposite color on top and press down firmly again. Pressing each layer locks the mix, which prevents color bleeding and crumbling later.
Keep layers even so the stripes look clean.
Continue alternating between red and white, pressing firmly after each addition, until the mold is slightly overfilled. End with a firm press to compress all layers.
You can create as many or as few stripes as you like – thinner layers will give you more stripes, while thicker layers create a bolder look.
Close the mold, twist, and tap the sides to help the layers settle.
You can create perfect stripes or a swirled marble effect depending on how you scoop and press the layers – both look gorgeous!
Step 7: Set Filled Molds Aside to Dry
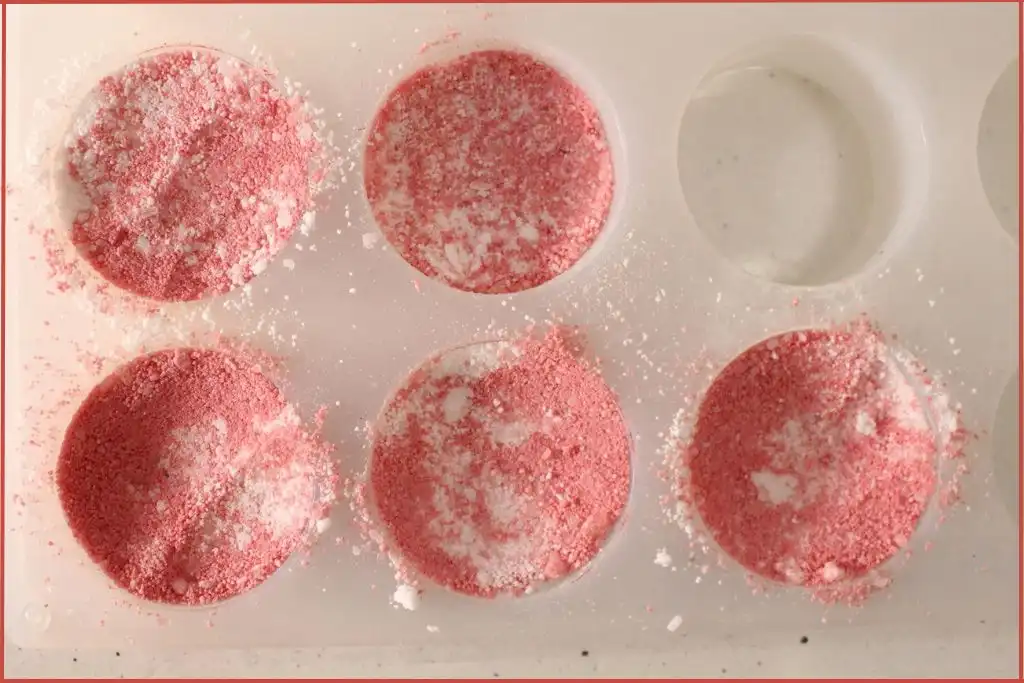
Now it’s time to practice patience – the biggest challenge when making bath bombs!
Leave your molds undisturbed in a cool, dry place for at least 24 hours. Resist the temptation to check on them early, as disturbing them too soon can cause cracks or crumbling.
After 24 hours, gently touch the surface to test if they’re fully hardened. They should feel completely solid and dry to the touch. If they still feel soft or damp, give them another 12-24 hours.
Step 8: Unmold and Enjoy!
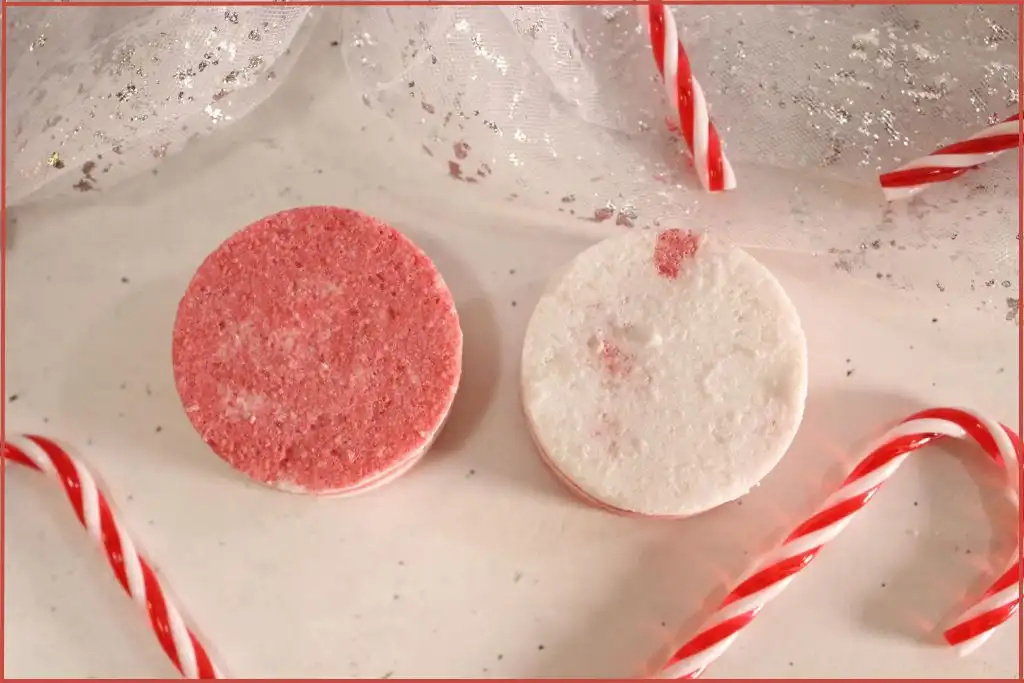
When the bath bombs are ready, carefully turn the mold over and gently press on the back to release each bath bomb. They should pop out easily.
If you meet resistance, try flexing the silicone mold gently rather than forcing them out, which could cause the bath bombs to break.
5 Tips for Creating Perfect Candy Cane Bath Bombs Every Time
1. Take It Nice & Slow When Adding Water
Less is more when it comes to adding water when making bath bombs. You can always add another spritz, but you can’t take water away once it’s been added.
If your mixture starts fizzing excessively, you’ve likely added too much water too quickly. Work slowly and mix thoroughly between each spray.
2. Pack The Mixture Tightly Into The Mold
The firmness with which you pack your mixture into the molds directly impacts how well your bath bombs hold together.
Don’t be shy about applying pressure. Use your thumbs, palms, or even a small tamper to really compress each layer.
This extra effort pays off with bath bombs that won’t crumble when you unmold them. If they’re too loosely packed, they might crumble when unmolded.
3. Mix Dye Well For Even Coloration
When adding the red mica, make sure it’s completely blended so there are no streaks or clumps. This gives you smooth, vibrant stripes instead of patchy spots.
4. Let Bath Bombs Dry In A Cool, Dry Place
Moisture is the enemy here! If your kitchen is humid, move the molds to a drier room or near a gentle fan. Do not keep bath bombs in the fridge or direct sunlight for drying. Too high or too low temperatures can cause cracking.
5. Unmold Carefully
After 24 hours, tap the edges of the mold lightly before removing. If it resists, give it a few more hours to harden completely. Patience makes perfect when making candy cane bath bombs.
Troubleshooting Common Issues When Making Bath Bombs
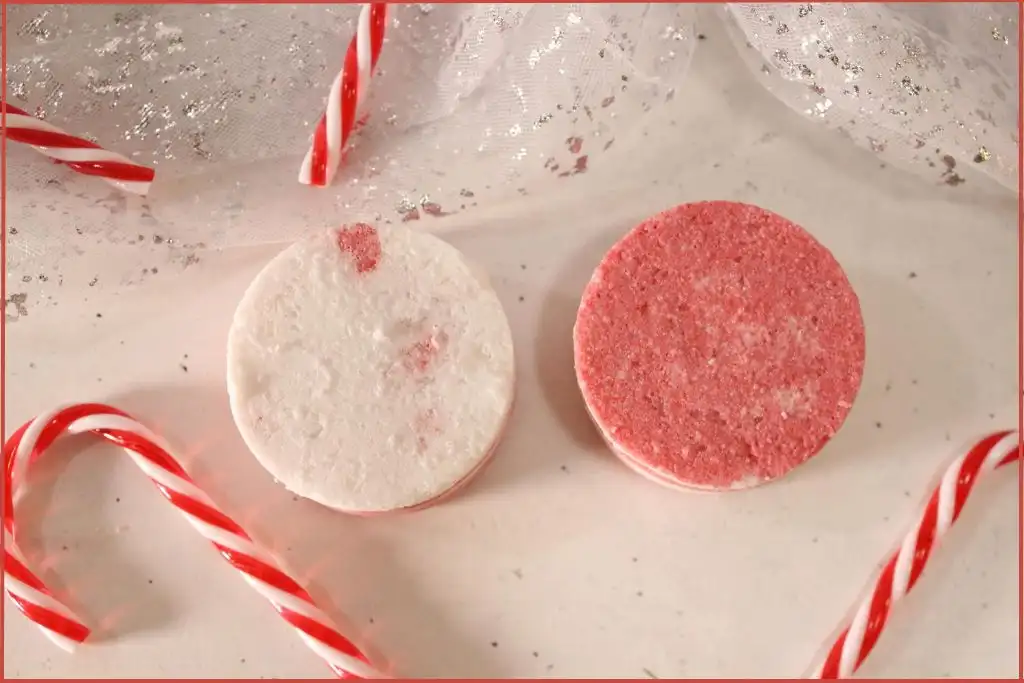
Even a good batch can act up. Use these quick fixes to keep your candy cane bath bombs sturdy and stripey.
Mixture is too dry or crumbly:
- Signs: It will not hold a squeeze, or the layers crack when pressed.
- Fix: Add one more spritz of water and compact the mixture again. Repeat as needed. Stop as soon as it clumps like damp sand.
Mixture is too wet:
- Signs: Hissing, early fizzing, or a sticky, slushy feel.
- Fix: Sprinkle in a little baking soda and corn starch, mix well, and test again. Add dry ingredients in small amounts to avoid dull fizz.
Colors bleed or stripes look muddy:
- Signs: Red smears into the white layers.
- Fix: Press each layer firmly and keep them thin. Use less mica and avoid over-spritzing while layering.
Bombs crack after molding:
- Signs: Splits along the middle or at the edges during drying.
- Fix: Pack more firmly, then let them dry longer in a cool, low-humidity space. If your room is humid, extend drying time beyond 24 hours.
Bath bombs stick to the mold:
- Signs: Half stays in the mold or breaks while unmolding.
- Fix: Tap the mold all around before opening. If it still sticks, wait another hour and try again. A touch more packing can help.
Bath bombs won’t hold their shape
Not enough compression is the usual culprit. When you’re packing the molds, use much more force than you think necessary.
How To Use Bath Bombs
When you’re ready for a relaxing soak, simply fill your bathtub with warm water and drop in one candy cane bath bomb.
Watch as it fizzes and swirls, releasing the refreshing scent throughout your bathroom.
The bath bomb will dissolve completely, leaving your bathwater softly scented and your skin feeling smooth from the almond oil.
Settle in for a luxurious, spa-like experience right in your own home. The aromatherapy blend creates a refreshing atmosphere perfect for unwinding after a long day.
Instant Christmas relaxation!
Check this handy guide to using bath bombs for more details on dos and don’ts to get the most from your homemade fizzies.
A few quick notes:
- Bath bombs are for use in the bath only. Do not use in the shower or as foot soaks as the oils can make surfaces slippery.
- Step in and out of the tub carefully. The almond oil may leave a light, moisturizing film that can make the surface a bit slick.
- Always store bath bombs in a cool, dry place until you’re ready to use them to prevent premature fizzing.
Want a simple refresher on how to enjoy your finished fizzies in the tub?
How To Customize Homemade Candy Cane Bath Bombs: Cool Ideas
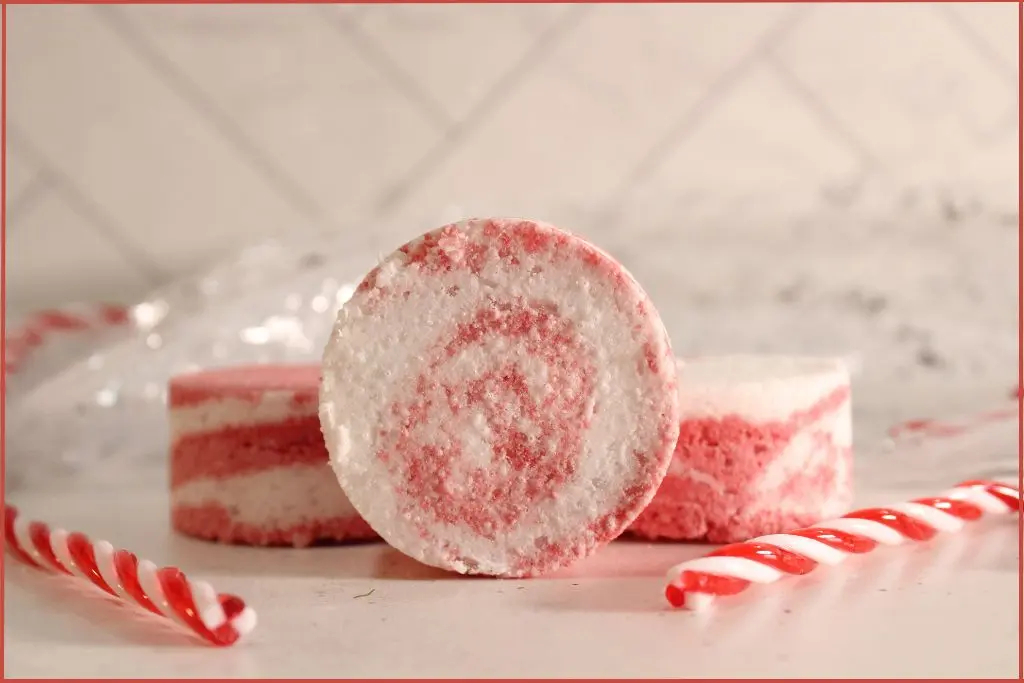
Change up the scent
Not a peppermint fan? Try a Vanilla Mint combo for something softer, or mix in a drop of Sweet Orange essential oil to create a Candy Cane Twist scent that’s bright and uplifting.
Play with colors
Keep the red and white classic, or try red and pale pink for a softer look. A dusting of shimmering mica on top makes them sparkle like freshly fallen snow.
Switch up the oils
You can replace almond oil with coconut or jojoba oil for a different feel — both add luxurious moisture to your holiday soak.
Explore color and stripe variations
You can keep the candy cane theme and still play with the look. Use cosmetic-grade mica and go easy to avoid tub residue.
- Thin stripes: Spoon smaller layers for a sharper pattern.
- Ombre red: Use a little mica for the first red layer, then add more mica to each new red layer as you go.
- Pink twist: Swap bright red for a soft pink for a cute, lighter vibe.
- Snow sparkle: Add a pinch of biodegradable glitter to the white mix.
- Hidden color: Keep the outside white, then tuck a red layer in the center.
Play with add-ins for texture and fun
Small extras add surprise without changing the fizz. Keep add-ins fine and sparse.
- Fine sugar sprinkles on top: Press gently into the first layer for a candy look.
- Red jojoba beads: Add a few for a soft pop of color that will not melt the pattern.
- Mini embeds: Hide a tiny red heart or star embed in the center for a burst of color in the tub.
- Biodegradable glitter: A tiny pinch in the red layers adds holiday sparkle.
- Dried peppermint leaf: Use a very small amount, crushed well, for a light speckled look.
Do not use large botanicals or heavy decorations. They can cause the bath bombs to crumble and may also clog the drain.
Ideas For Gifting Candy Cane Bath Bombs
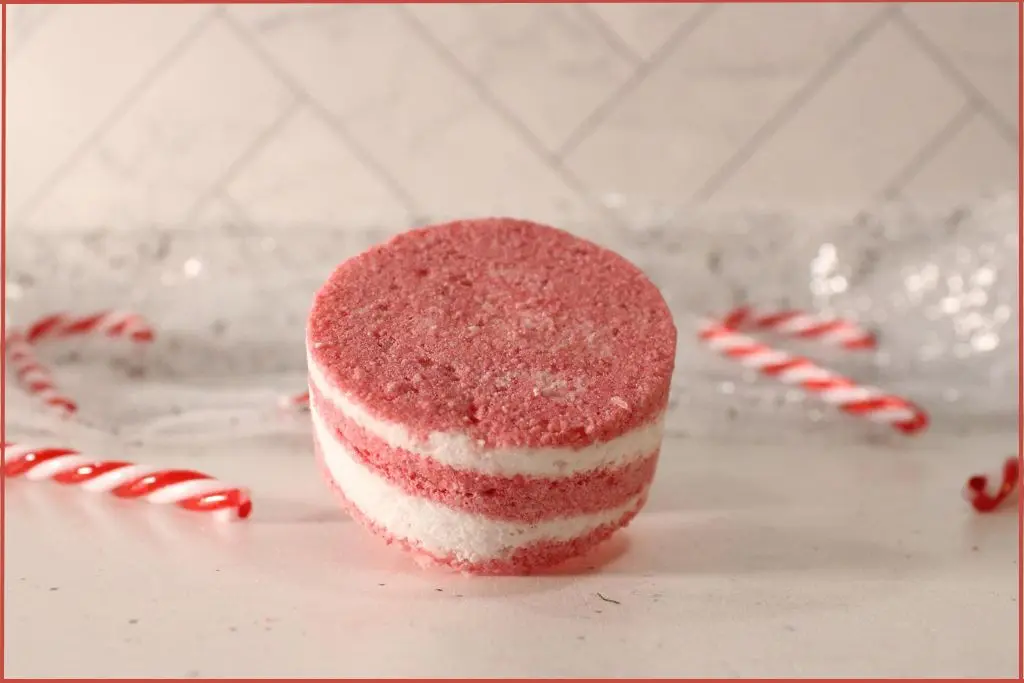
These candy cane bath bombs make wonderful gifts for everyone on your list. The handmade touch shows thoughtfulness and care that store-bought gifts simply cannot match.
Individual Presentation
For a beautiful presentation, wrap individual bath bombs in clear cellophane bags tied with festive ribbon. You can find these supplies at any craft store.
Add a small tag with usage instructions: “Drop in warm bath water and enjoy!” This simple packaging looks professional and protects the bath bombs from moisture until they’re ready to be used.
Candy Cane Themed Gift Set
Build a cozy bath bundle with your candy cane bath bombs, melt-and-pour striped soap bars, and a jar of red & white layered bath salts in the same scent. These two make a relaxing soak duo; fizz first, then soak longer for a peppermint spa night.
Add a little skin care next. A homemade sugar scrub gently polishes dry winter skin and leaves a soft glow. Pair it with a minty lip scrub to smooth chapped lips, then finish with a creamy lip balm to lock in moisture. Use the same candy cane colors and scent for all items in this set.
Slip in a hand-crafted Christmas soy candle in a jar for a clean burn and a fresh peppermint scent. Light it during bath time to tie the whole gift together.
Christmas Gift Baskets
Create holiday gift baskets by pairing several bath bombs with other self-care items. Pair these snowflake sugar scrub bars with a luxurious gingerbread whipped body butter and a scented candle.
Include a soft holiday washcloth and a box of herbal tea. Arrange everything in a decorative basket or gift box lined with tissue paper.
These thoughtful combinations make impressive gifts for teachers, neighbors, coworkers, or anyone who deserves a little pampering.
Stocking Stuffers
Bath bombs make excellent stocking stuffers. Their size is perfect for tucking into Christmas stockings, and they’re a delightful surprise for both kids and adults. They’re also ideal as hostess gifts when you’re invited to holiday parties – everyone appreciates the gift of relaxation.
Consider making larger batches to keep on hand throughout the season. Once you master the technique, you can produce multiple batches in a single afternoon, providing a steady supply of handmade gifts ready to go whenever you need them.
Tips for Storing Homemade Bath Bombs
Smart storage keeps your bath bombs fresh and fizzy:
- Store in an airtight container in a cool, dry spot away from sunlight.
- Wrap each bomb in parchment or shrink wrap to block moisture.
- Add a small silica gel packet to your storage tin if your home runs humid.
- Avoid bathrooms for long-term storage, since steam can trigger early fizzing.
- Label your batch and use within 6 to 8 weeks for best scent and fizz.
There’s something deeply satisfying about creating your own bath and body products. You know exactly what’s going into them, you can customize them to your preferences, and you get to enjoy the creative process along the way.
Whether you’re making them for yourself or for gifting, these candy cane bath bombs bring a touch of festive luxury to a regular bath. The refreshing aromatherapy blend, the skin-softening oils, and that magical fizzing action all combine to create a truly special experience.
So, gather your ingredients, put on some holiday music, and get ready to create something wonderful. Your future self (or lucky gift recipients) will thank you for taking the time to make these delightful treats.
DIY Bath Bombs: Frequently Asked Questions
Can I make candy cane bath bombs without a silicone mold?
Absolutely! While silicone molds make unmolding easier, you can use other options. Try 2-piece metal bath bomb molds, like the ones I used to make these rose bath fizzies, ice cube trays, or even small plastic ornament molds. You can also hand-form them into balls or use cookie cutters to create flat, shaped bath bombs. Just make sure whatever you use is non-porous and easy to release from.
Can I substitute the almond oil with another oil?
Yes! Many carrier oils work well in bath bombs. Try fractionated coconut, jojoba, or grapeseed oil if you have a nut allergy. Each oil has a slightly different feel—coconut oil tends to be more solidifying, while jojoba is lighter. Use the same amount as called for in the recipe.
Can I scent these with any other blend?
You can use just peppermint for a pure minty experience, or spearmint for a softer mint scent. You can also use eucalyptus for a completely different refreshing winter aroma.
Why did my bath bombs stick to the mold?
This can happen if the mixture was too wet or if you didn’t let them dry long enough. Make sure you only add water until the mixture barely holds together, and always wait the full 24 hours before unmolding. If you’re still having issues, try lightly spraying your silicone molds with a tiny bit of oil before filling them. Another trick is to place the molds in the freezer for 15-20 minutes before unmolding – this can help them release more easily.
Can I make these ahead for Christmas gifts?
Definitely! In fact, making them 2-3 weeks ahead is ideal. This gives them plenty of time to fully cure and harden, resulting in better quality bath bombs. Just make sure to store them properly—individually wrapped in cellophane or in an airtight container with parchment paper between layers to prevent them from sticking together.
Do I have to use Epsom salt, or can I skip it?
Epsom salt is optional but recommended. If you want to skip it, replace it with an equal amount of baking soda or a combination of baking soda and sea salt. The bath bombs will still fizz and work well, though the texture and bath experience will be slightly different. The Epsom salt adds a nice weight and texture to the finished product.
How long do homemade bath bombs last?
When stored properly in an airtight container away from moisture and humidity, these bath bombs can last 4-6 months. However, the essential oil scent will be strongest in the first 2-3 months. Always check for any changes in texture, crumbling, or loss of scent before use. If they’ve been exposed to moisture, they may lose their fizzing power.

