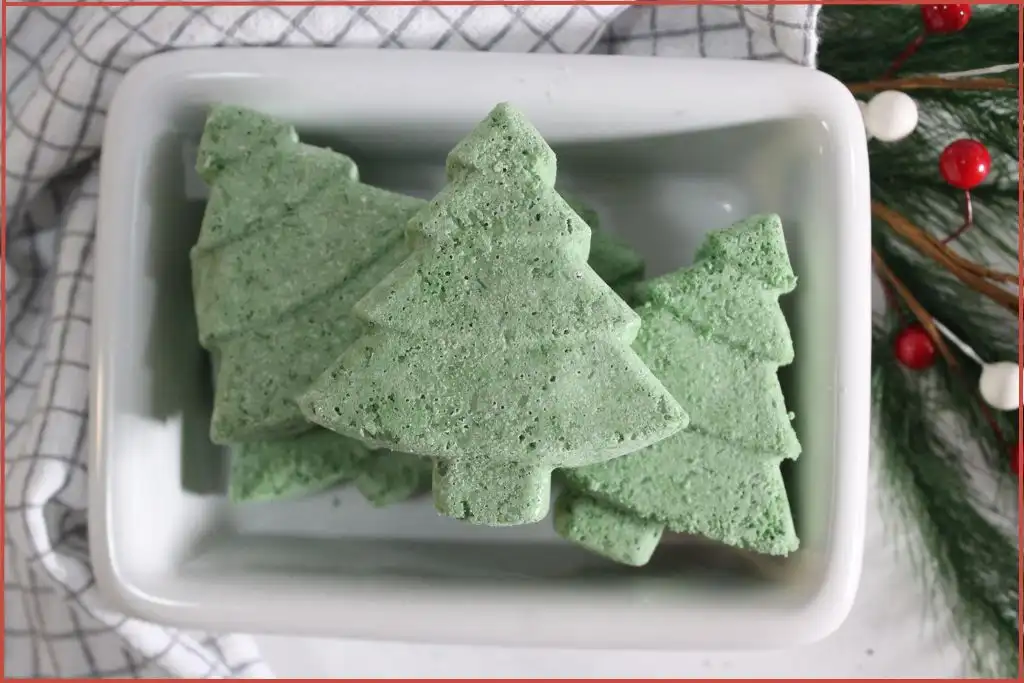
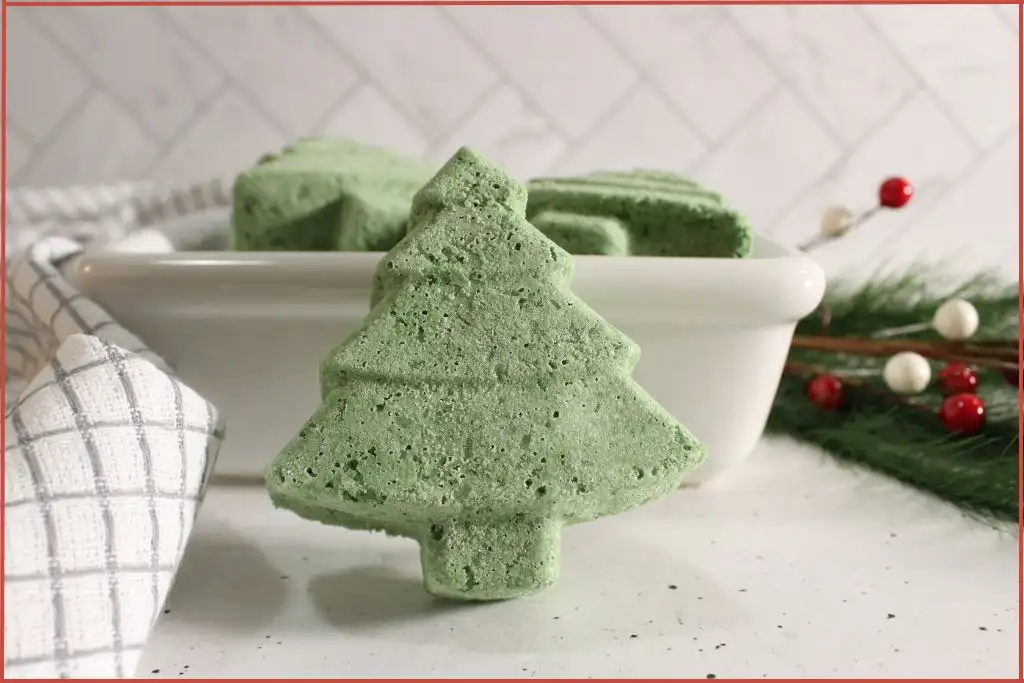
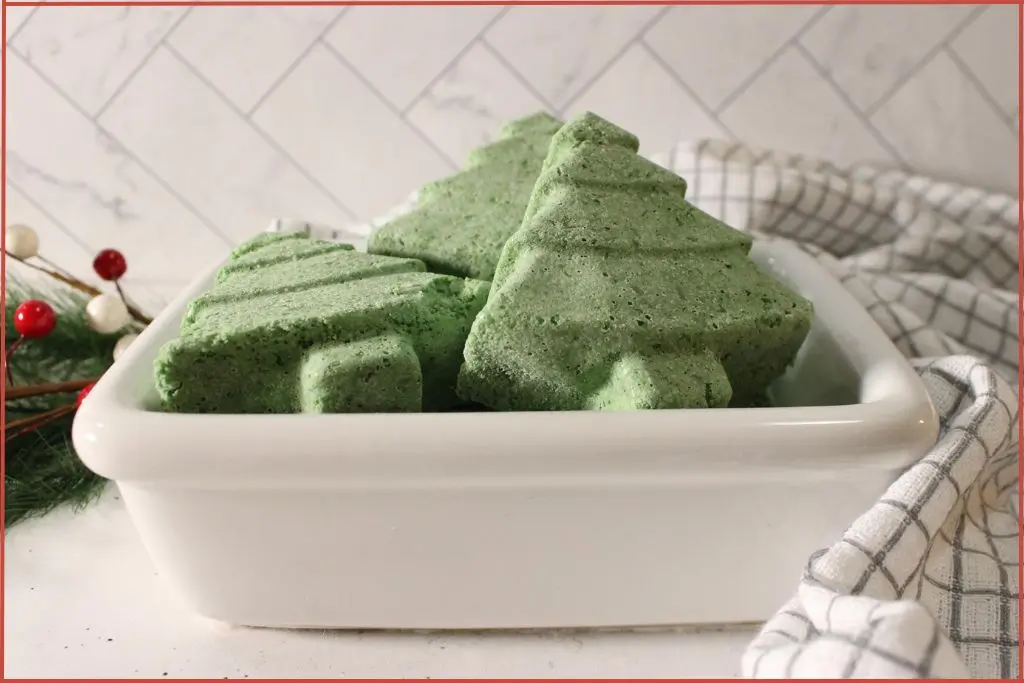
The holiday season is the perfect time to indulge in self-care rituals that bring comfort and joy. Picture a warm bath after a busy day of decorating, as a festive green bath bomb fizzes and swirls, releasing the crisp scent of a winter forest. That’s exactly what these homemade Christmas tree bath bombs deliver!
Shaped like tiny evergreens, these scented bath bombs fizz and bubble while turning bath time into a magical, spa-like moment at home.
✨ Get 12 Free Holiday Diffuser Blends — Printable PDF
Instantly make your home smell like Christmas with these festive, ready-to-use recipes.
Christmas tree bath bombs are simple to make, pretty to gift, and almost too cute to use. Press the mix into a tree mold, let it dry, then watch it sparkle and dance as it melts away on coming in contact with water.
Make a batch for stocking stuffers, teacher gifts, or a self-care night after wrapping presents.
Ready to stir up a little holiday joy? Let’s dive into this rewarding project and create five beautiful tree-shaped bath bombs that look professional and smell absolutely divine.
Table of Contents
Affiliate Disclosure: Some links on this site are affiliate links. I may earn a small commission if you purchase through them, at no extra cost to you. See the full affiliate disclosure.
DIY Christmas Tree Bath Bombs: Ingredients & Equipment
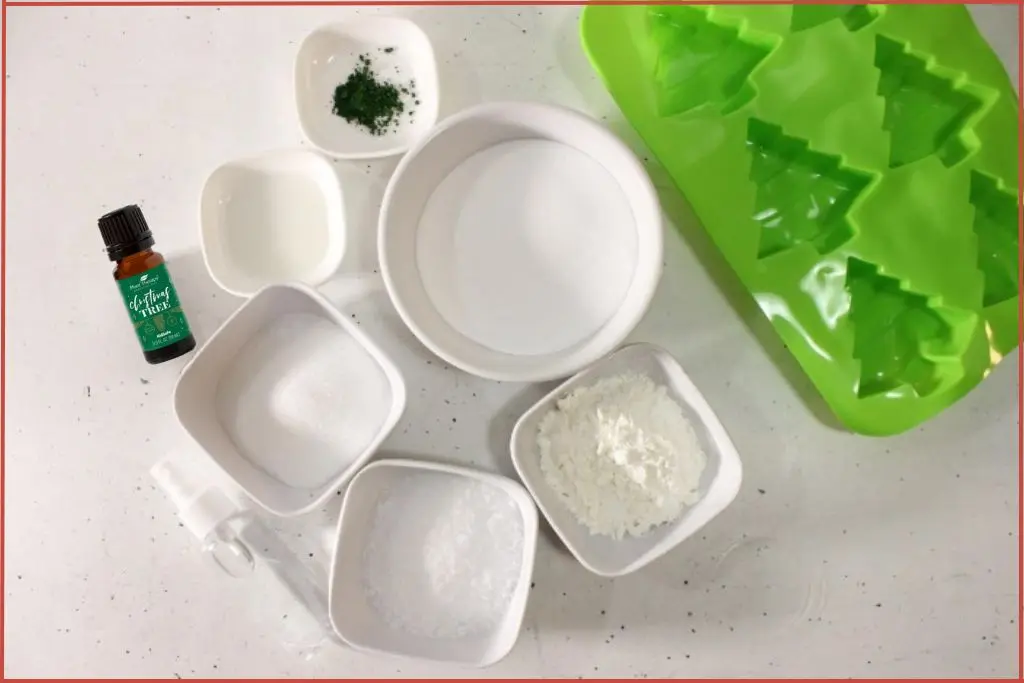
This recipe yields 5 bath bombs when using a standard Christmas tree silicone mold.
Ingredients
½ cup Baking Soda: The core of any bath bomb recipe, baking soda helps bind the mixture and creates that satisfying fizz when it hits the water.
¼ cup Citric Acid: Working together with baking soda, citric acid produces the effervescent reaction that makes bath bombs so delightful.
¼ cup Corn Starch: This acts as a binding agent, helping your bath bombs hold their shape and creating a silky feel in the water.
¼ cup Epsom Salt: Epsom salt offers a soothing touch when you soak, making your bath bombs feel extra pampering.
½ teaspoon Almond Oil: This is a lightweight carrier oil that moisturizes skin while evenly distributing your essential oils throughout the mixture.
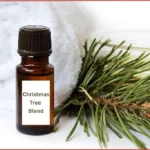
8 drops Christmas Tree Blend: The star of the show, this essential oil blend brings that authentic Christmas tree aroma to your bath bombs. You can also use pine essential oil for a simpler, fresh scent profile.
Green Mica Powder: Safe for skin, mica powder adds a festive holiday color to make the bath bombs look like mini Christmas trees.
Spray Bottle – Adding water with a spray bottle is the key to achieving the right consistency for molding – think wet sand, not soggy dough.
Christmas Tree Silicone Mold – The secret to getting that fun holiday shape while keeping the bath bombs easy to unmold.
Double or triple the recipe to make multiples of 5 for yourself or for gifting.
Equipment
Running around for missing equipment midway is no fun. Gather these simple tools before you start:
- Large mixing bowl for blending all the dry ingredients
- Small bowl for mixing essential oils and carrier oil
- Whisk or fork for mixing (it helps break up clumps)
- Spoons for measuring and stirring
- Gloves, if you prefer not to stain your hands with mica powder
- A tray or flat surface for letting the bath bombs dry
How To Make Christmas Tree Bath Bombs: Step-by-Step
Step 1: Prepare The Oil Blend
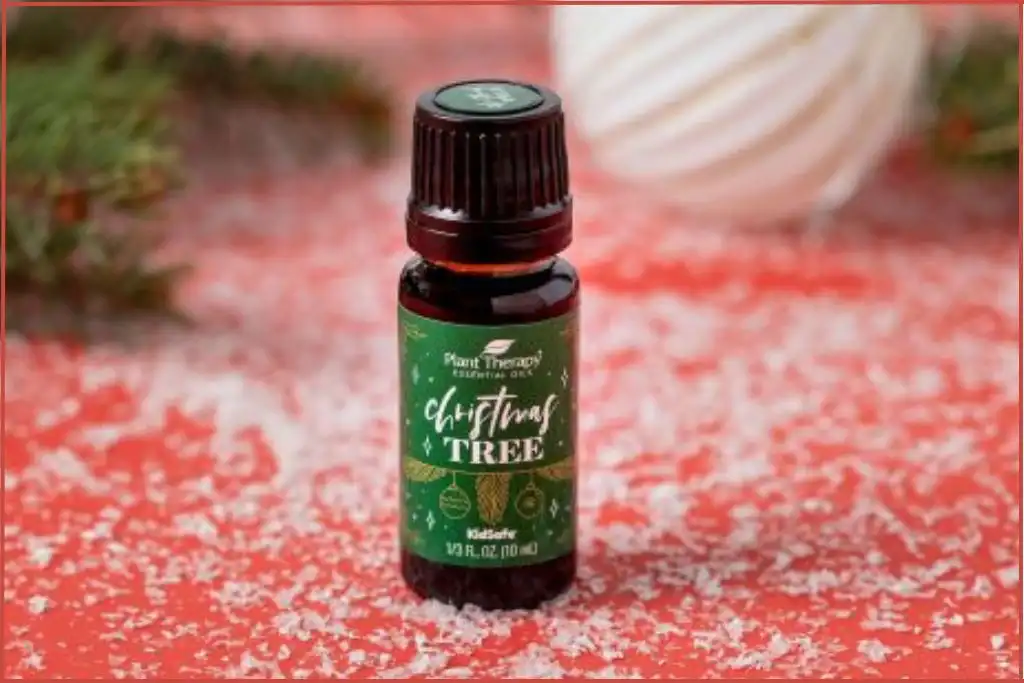
Add ½ teaspoon sweet almond oil and 8 drops Christmas tree diffuser blend in a small bowl. Stir gently to combine.
This crucial first step ensures that your essential oils will be evenly distributed throughout your bath bomb mixture rather than concentrated in one spot.
The almond oil acts as a carrier, helping the essential oils blend seamlessly into the dry ingredients.
Step 2: Combine The Dry Ingredients
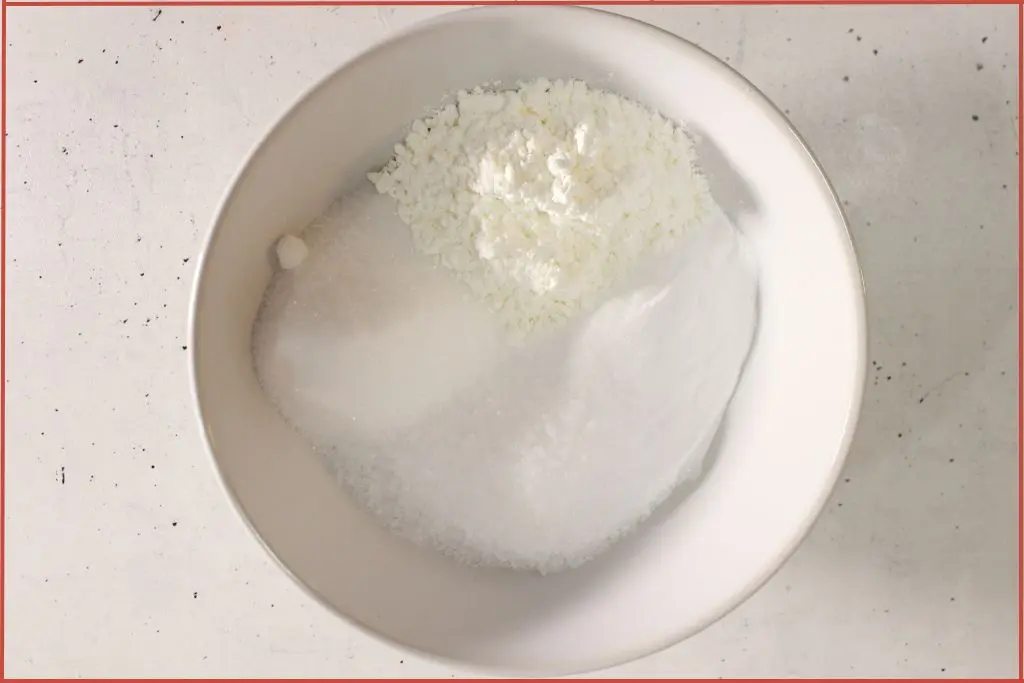
In a large mixing bowl, add the baking soda, citric acid, Epsom salt, and corn starch. Use a whisk or spoon to gently but thoroughly combine these ingredients, breaking up any clumps, so your bath bombs turn out smooth and uniform.
Combining all dry ingredients well ensures that all components are evenly distributed, so every bath bomb will fizz consistently and beautifully.
The mixture should look uniform and feel light and powdery. Take your time with this step. Well-mixed dry ingredients are the foundation of successful bath bombs.
Step 3: Add Green Mica Powder
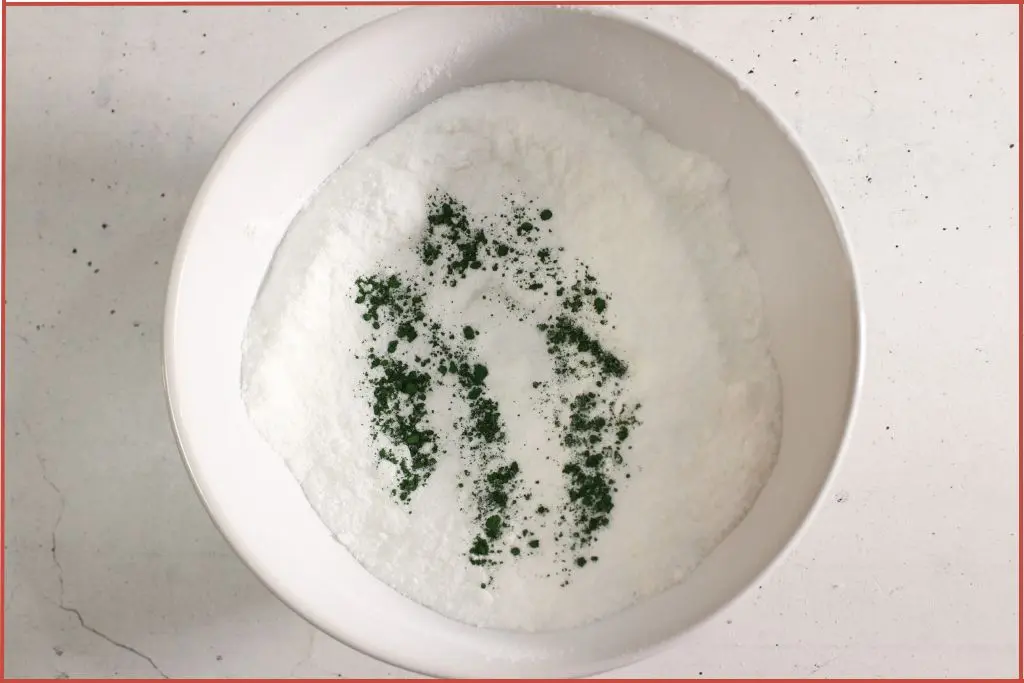
Sprinkle the green mica powder over your mixture. Start with a small amount. You can always add more, but you can’t take it away if you add too much. Stir well to distribute the color evenly throughout the mixture.
For a soft, pale green reminiscent of a Douglas fir, use very little mica powder. For a deep, rich evergreen shade, add more until you achieve your desired intensity. The color will appear slightly more vibrant when wet, so keep that in mind as you mix.
Don’t worry about achieving perfection. Natural variations in color can actually make your bath bombs look more artisanal and unique.
Wear gloves if mixing with your hands. Mica can temporarily stain skin.
Step 4: Add the Oil Mixture To The Dry Ingredients
Now it’s time to incorporate your prepared essential oil blend. Drizzle the almond oil and essential oil mixture over your dry ingredients.
Here’s where patience pays off: add the oils slowly and stir constantly as you pour. Adding it too quickly can cause the citric acid to react prematurely, so go slow and steady.
Mix thoroughly, using your hands if necessary to work the oils into every bit of the powder. You’ll notice the texture starting to change slightly – it should still be powdery but will feel more cohesive when you squeeze it.
This step distributes the moisturizing and aromatic properties throughout the entire batch.
Step 5: Spritz with Water to Achieve “Wet Sand” Texture

This is perhaps the most critical step in making successful bath bombs. Fill your spray bottle with water and gently spritz the mixture. After each spray or two, mix thoroughly with your hands, working the moisture through the powder.
You’re aiming for a texture that resembles wet sand at the beach – it holds together when you squeeze it but crumbles apart when pressed lightly. This typically takes about 10-12 sprays, but humidity levels in your environment can affect this, so trust your instincts.
To test the consistency, grab a handful and squeeze it firmly. When you open your hand, the mixture should hold together in a compact clump.
If it immediately crumbles apart, it’s too dry. Spritz a little more water.
If it feels wet or sticky, you’ve added too much water. This is easy to rectify by adding a bit more of the dry ingredients in the same proportions to balance it out.
Important Note: Add water slowly and sparingly. Too much water will cause your mixture to start fizzing prematurely, and there’s no way to reverse that reaction. When in doubt, err on the side of too dry rather than too wet.
Step 6: Fill The Christmas Tree Molds
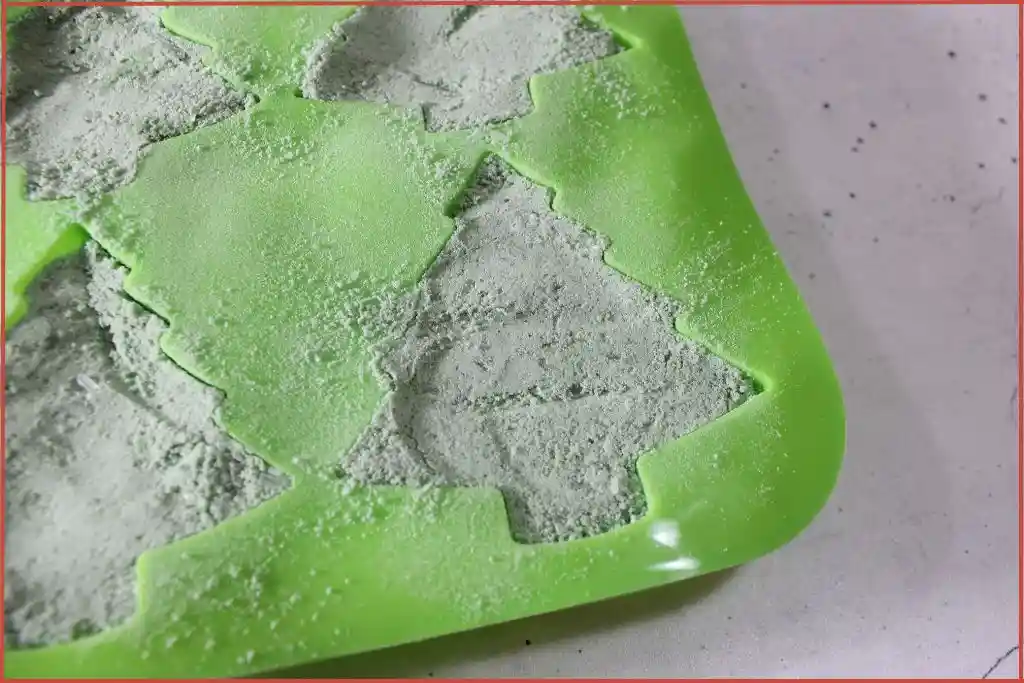
Now for the satisfying part – filling your Christmas tree molds. Take small handfuls of the mixture and press them firmly into each cavity of the silicone mold. Really pack it in there, using your thumbs to press down hard and your fingers to push the mixture into all the fine details of the tree design.
Fill each mold slightly overfull, creating a small mound, then press down firmly to compress the mixture. The more you compress, the sturdier your final bath bombs will be. Use the back of a spoon or your palm to flatten the backs of your bath bombs, creating a stable base.
Step 7: Let the Bath Bombs Dry In The Molds
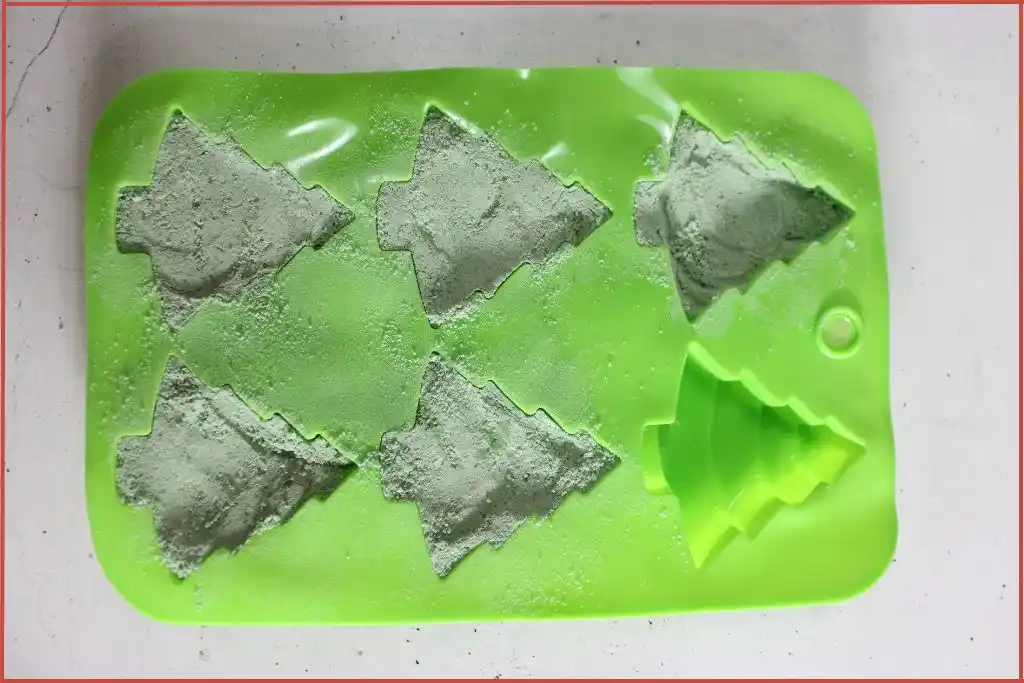
Patience is key at this stage. Place your filled molds in a cool, dry location where they won’t be disturbed. Avoid humid areas. Too much moisture in the air can cause premature fizzing.
Let them sit for at least 24 hours. This drying time allows the mixture to harden completely, so the bath bombs keep their shape when unmolded. Resist the temptation to check early; disturbing them before they’re fully set can cause cracks or crumbling.
Step 7: Unmold Each Bath Bomb Carefully
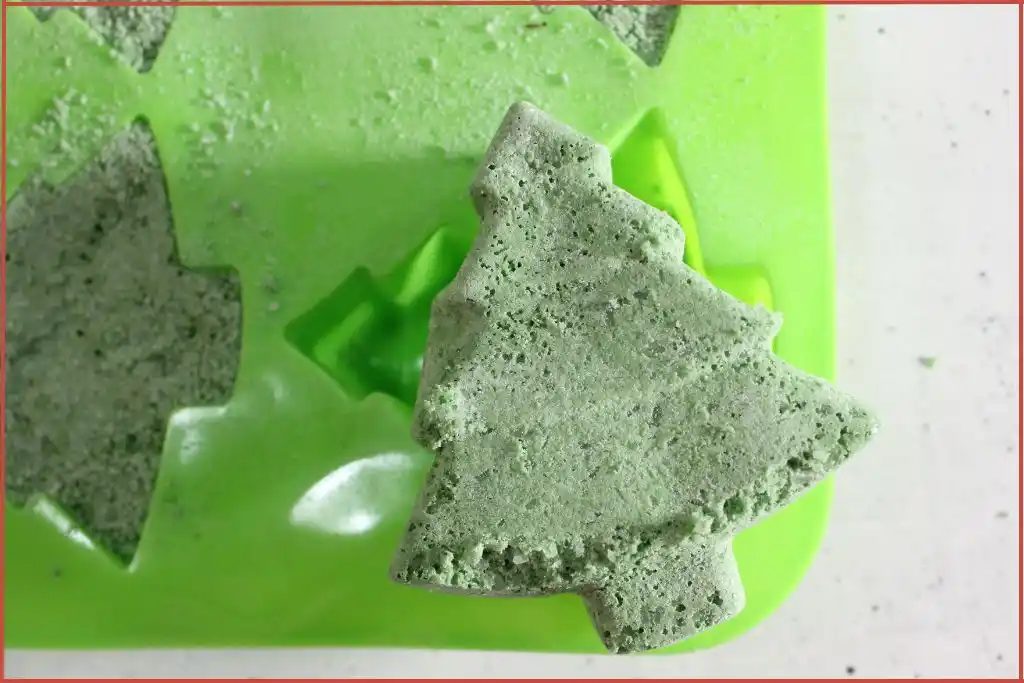
After 24 hours, gently press on the back of the silicone mold to release each bath bomb. The bath bomb should slide out easily without crumbling. If you encounter resistance, the bath bomb may need more time to set.
Your bath bomb should feel rock-solid. If it still feels soft or gives when pressed, let it sit for another 12-24 hours.
Handle your freshly unmolded bath bombs gently for the first few hours, as they’ll continue to harden slightly over the next day or two.
Tips For Making Perfect Bath Bombs At Home
Work in low humidity
Humidity is the enemy of bath bomb making. If possible, make your bath bombs on a dry day. High humidity can cause the citric acid and baking soda to react, resulting in premature fizzing. If your kitchen is humid, run a dehumidifier or keep this DIY project for a dry day.
Spritz Water Gently & S.L.O.W.L.Y.
Use a spray bottle and spritz gently, a little bit at a time – I cannot emphasize this enough. Do not pour the water. You only need a little bit.
If the mixture starts fizzing in the bowl, it’s too wet. Add a little more of the dry ingredients to balance it out quickly.
Test the Texture Frequently
Throughout the mixing process, stop and squeeze a small amount of mixture in your hand to check the consistency.
The mixture should hold together when squeezed in your hand, like damp sand. Too crumbly? Add one or two more sprays of water. Too wet? Add a spoonful of baking soda and mix again.
Mix Thoroughly
Take the time to really mix your ingredients well at each stage. Uneven distribution can lead to bath bombs that fizz inconsistently or have patches of concentrated color or scent.
Pack Molds Firmly
Press the mixture in tightly so your bath bombs don’t crumble when unmolded. Loose packing is the number one cause of bath bombs falling apart.
Drying Time Matters
Let bath bombs harden for at least 24 hours. If they still feel soft, give them another 12–24 hours before unmolding.
Test for Readiness
Before unmolding all your bath bombs, try releasing just one. If it crumbles, you know to give the others more time to set.
Store Properly
Once unmolded, store your bath bombs in an airtight container in a cool, dry place. Exposure to moisture in the air can cause them to lose their fizz over time. They’ll stay fresh for several months when stored properly.
3 Common Troubleshooting Tips
1. Mixture Too Wet or Too Dry
Hitting the right moisture level is the secret to a perfect bath bomb. The mix should feel like damp sand that holds a shape but doesn’t feel soggy.
Mixture is too wet: If your mixture is too wet, you may notice fizzing as you add water, or the texture may feel like paste.
Fix: Add a small spoonful of baking soda and cornstarch. Mix well and check again. Work fast, as the reaction will continue to progress.
Mixture is too dry: If your bath bombs crumble when squeezed or when you try to unmold them, your mixture was likely too dry.
Fix: Lightly spritz with water (one spray at a time), mix, then test the consistency.
Pro tip: Use a spray bottle, not a bowl of water, to avoid overdoing it. You want a crumbly, moldable texture, never sticky.
2. Bath Bombs Crack After Unmolding
Cracked bath bombs can feel like a holiday letdown, but the fix is simple.
Common causes: Either the mix was too dry when pressed into the mold or you removed them from the mold too quickly.
What to do:
- Try misting the mixture with a little more water before molding.
- Pack the mixture firmly into the mold for even shaping.
- Let the bath bombs sit in the mold for at least 24 hours in a cool, dry place. Rushing the process invites cracks.
If you still get cracks, gently press the pieces back into the mold, give a light spritz of water, and let them rest another day.
3. Bath Bombs Don’t Unmold Easily
No one wants to break apart the perfect little evergreen fizzy when trying to get it out of the mold.
Helpful strategies to avoid breakage:
- Tap the mold gently on a counter to loosen up the edges.
- Stretch or flex silicone molds to ease out the bath bomb.
- If it’s really stuck, leave the mold in the freezer for 10 to 15 minutes. Chilling helps bath bombs pop right out without breaking.
Remember, practice makes perfect, and bath bombs are forgiving. If something goes sideways, just crumble the mix and start again – no waste, just more fizz for your next batch.
Christmas Tree Bath Bomb Customization Ideas
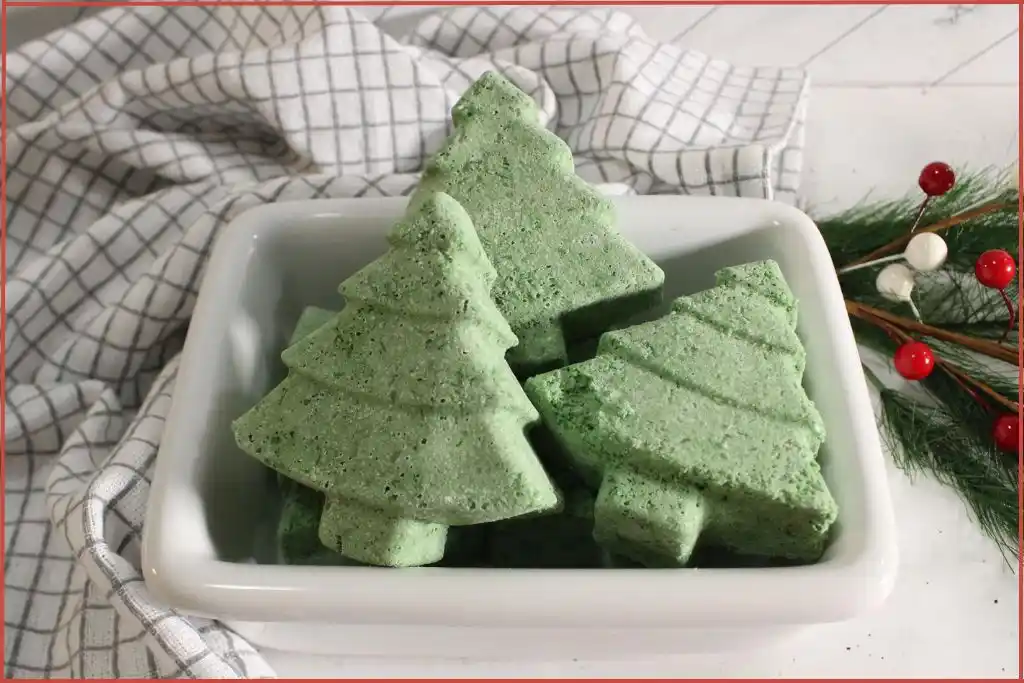
While these Christmas tree bath bombs are perfect as-is, don’t be afraid to make them your own! Take your bath bombs from basic to brilliant by switching up color, fragrance, texture, or even shape.
With just a few tweaks, you can create a whole collection of festive bath treats that look and smell truly one-of-a-kind.
Here are some creative ways to customize your holiday bath bombs so they fit your spirit and style.
Scent Ideas for Christmas Tree Bath Bombs
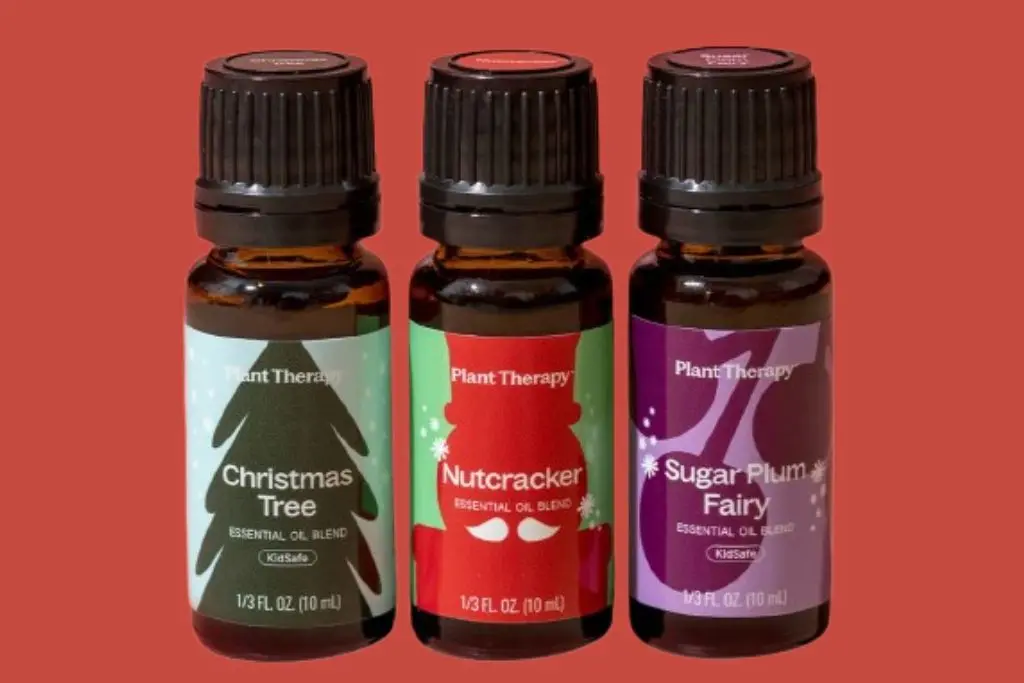
Classic Evergreen: Pine essential oil is the top choice for that classic evergreen scent. You can also add 6 drops fir + 2 drops cedarwood or any of these Christmas tree essential oil blends for a fresh, tree-like aroma.
Cozy & Spiced: Add 6 drops sweet orange + 2 drops cinnamon for a warm holiday scent or any of these gingerbread diffuser blends for a cozy bakery aroma.
Fresh and minty: Use 8 drops of candy cane blend for that classic Christmas vibe or 4 drops peppermint + 4 drops pine for a crisp wake-you-up blend.
Elegant and traditional: 5 drops frankincense + 3 drops myrrh for a classic holiday feel, or any of these myrrh diffuser blend recipes.
Make it yours: Blend a few oils to create a signature fragrance or explore these premixed Christmas blends by Plant Therapy. Test small batches first to see how the scent evolves.
Adjust scent intensity: Reduce the essential oils to 5-6 drops for a subtler aroma. For a more powerful scent experience, increase to 10 drops, though be mindful that some essential oils can irritate sensitive skin at higher concentrations.
Safety note 1: Cinnamon, clove, and nutmeg are strong. If you have sensitive skin, reduce spice by 1 drop and add 1 drop of orange or fir.
Safety note 2: Use skin-safe essential oils and recommended dilutions. If unsure about pairings or strength, start with a small test batch.
Color Variations
A classic green tree is festive, but there’s no reason to stop there. Change up your mica powder for an eye-catching twist:
Snow-dusted trees: Swirl in some white mica or sprinkle a bit on the mold first. It gives a frosty effect, perfect for a wintry vibe.
Jewel tones: Try blue, purple, or deep red mica for a dramatic holiday look. Mixing a bit of silver or gold adds an elegant shimmer.
Layered designs: Pour in different shades for a striped or ombre effect or create two-tone bath bombs by layering red and green for a fun holiday look.
Multicolor accents: Use a fine paintbrush to add tiny “ornaments” with bright colored mica before unmolding.
Short on colorants? A pinch of dried calendula petals or blue cornflower petals pressed into the mold creates a soft, natural accent.
Shape and Size Tweaks
If you feel like changing things up, use other silicone molds you have on hand:
Mini trees: Pour the mixture into smaller molds for stocking-stuffer-sized bath bombs. Mix and match tree sizes for bundles, or use stars as decorative toppers for your largest bath bombs.
Assorted festive shapes: Try assorted festive molds shaped like snowflakes, stars, ornaments, or gingerbread men to create a mix-and-match holiday bath bomb set. Mix and match colors and scents so each shape has its own festive personality.
Different molds, different holidays: While we’re focusing on Christmas trees here, this same recipe works beautifully with any silicone mold. Think snowflakes, stars, ornaments, or even traditional round molds decorated with winter designs.
Texture & visual interest
Sprinkle biodegradable glitter on top of your mixture before pressing it into molds for extra sparkle.
Add dried lavender buds, rose petals, or chamomile flowers for a botanical touch (make sure they’re finely chopped so they don’t clog your drain).
Dab a little silver or gold mica on the tree’s “branches” for shimmer.
Decorations can be subtle or bold, depending on your gift-giving style. It’s important that everything you add is skin-safe and dissolves cleanly in water.
Customizing your bath bombs makes them more fun to create, while also letting you put together themed gift sets that look like they came from a boutique.
How To Use Homemade Bath Bombs

When you’re ready to enjoy your creation, simply drop one Christmas tree bath bomb into a warm bath and watch the magic happen. The moment it hits the water, it will begin to fizz and swirl, releasing clouds of soft green color and the invigorating scent of pine.
As your bath bomb dissolves, the Epsom salt and almond oil will disperse through the water, creating a soothing and lightly moisturizing bath experience. The essential oils will fill your bathroom with their aromatic benefits, helping you unwind and embrace the peaceful side of the holiday season.
Take your time in this self-care ritual. Light a few candles, play some soft music, and let the stress of holiday preparations melt away. The pine scent can be particularly grounding and refreshing, helping clear your mind and restore your energy.
Each bath bomb is designed for a single use in a standard-sized bathtub. If you have a particularly large tub, you might want to use two for a more intense experience.
Homemade Christmas Tree Bath Bombs: Gift Giving Ideas
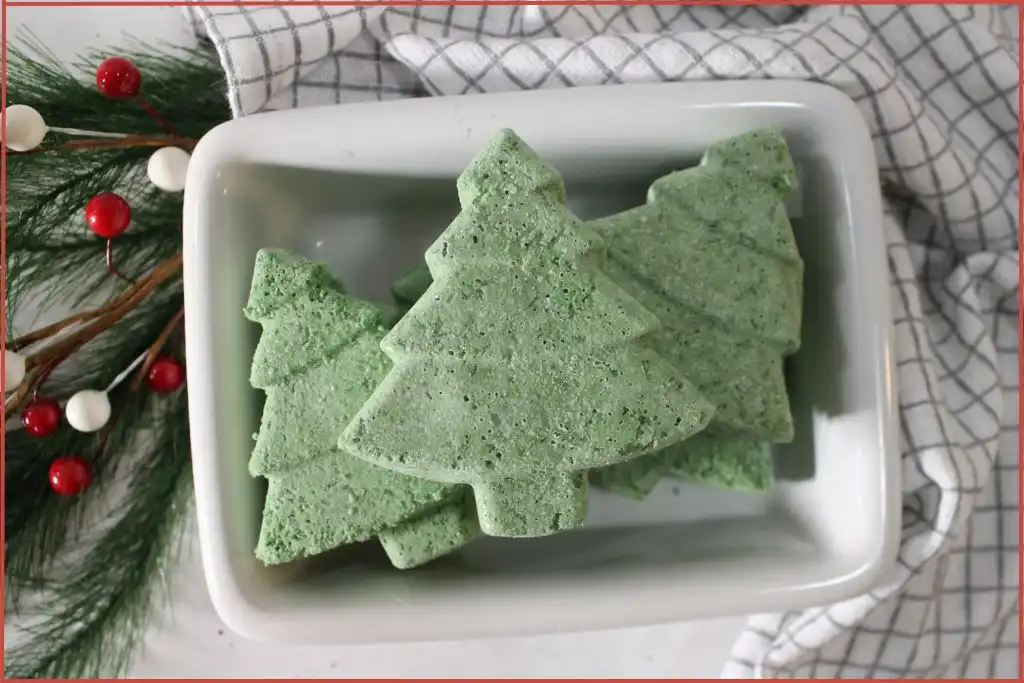
These Christmas tree bath bombs make absolutely delightful gifts, and the fact that they’re handmade adds a special personal touch that store-bought gifts simply can’t match.
Packaging Suggestions – Wrap each fizzy tree in a clear cellophane bag tied with festive red or green ribbon. Nest the wrapped bath bombs in small holiday tins or boxes lined with tissue paper, or arrange a few in a decorative jar with a kraft paper label and a bow for a rustic, cozy feel.
Presentation Ideas – Arrange several bath bombs and a jar of Christmas tree sugar scrub on a small decorative tray or in a wooden box for a beautiful display gift. Add some dried botanicals or cinnamon sticks for extra visual appeal. Or arrange a set of bath bombs in a decorative tin or box lined with tissue paper for an elegant touch.
Creative Gift Set Ideas
Pair your bath bombs with other handmade aromatherapy products like sugar scrubs, bath salts, or room sprays for a complete spa experience. Include a small card with usage instructions and the ingredients list.
Here are a few cozy gift set themes:
Winter Relaxation Set: Package a few bath bombs with a homemade Christmas-scented soy candle, a gingerbread whipped body butter, and a candy cane scented lip scrub and lip balm set.
Spa Night Basket: Include a pair of fuzzy socks, luxurious hand cream, and a calming linen spray.
Aromatherapy Treat: Pair bath bombs with an essential oil roll-on perfume, a beautiful snowflake pillar candle, cozy Christmas blend, and an aromatherapy diffuser for a complete sensory treat.
DIY Spa Gift Basket: Combine your Christmas tree bath bombs with homemade gingerbread sugar scrub, red & white striped soap bars, and a holiday-scented soy candle in a jar for a thoughtful self-care set.
Stocking Stuffers: Tuck one or two bath bombs with a few snowflake sugar scrub bars into a stocking for a little extra holiday surprise.
Mix and match items to suit the recipient’s style. With a little planning, you’ll have gifts ready for teachers, coworkers, friends, or anyone who could use a bit more holiday glow.
Add personal touches for a memorable gift. Handwrite a message on a gift tag, choose custom scents, or tuck in a note about what makes this gift meaningful to you. These simple details transform your bath bombs from a simple gift into a loving memory.
How To Store Homemade Bath Bombs to Preserve Freshness
Proper storage is key to preserving the fizz, scent, and color of your homemade bath bombs.
Store bath bombs in a cool, dry place away from the kitchen or bathroom. Humidity is their enemy, causing them to fizz before ever hitting the bath. Skip bathrooms for long-term storage. The shower steam and temperature changes can activate bath bombs a little at a time, making them less fizzy in the tub.
Avoid direct sunlight and heat, which can fade colors and alter the scent blend.
Use airtight containers or jars. Seal them up to keep out moisture and preserve the scent. Glass jars, metal tins, or food storage boxes are great options.
Single-layer storage works best. If you stack them, place a bit of parchment paper between each bath bomb to prevent accidental sticking or crumbling.
If giving bath bombs as gifts, remind recipients to store them similarly until they’re ready to enjoy bath time.
Don’t store in plastic bags alone. Plastic traps moisture, especially if the bath bomb hasn’t fully dried. Use bags labeled “air-tight” or pick reusable silicone or glass containers for better results.
Watch for signs of aging. Old bath bombs may lose scent or start to get soft. They’re still safe to use if they look okay, but expect the best results with fresher batches.
If you’re making these gifts in advance, individually wrap each bath bomb in plastic wrap before placing it in its final packaging to protect it from humidity.
Precautions When Using Bath Bombs
- Always use skin-safe essential oils and avoid adding more drops than recommended.
- If making for sensitive skin, do a quick patch test with the chosen oil before gifting or using.
- Bath bombs can make tubs a little slippery — remind users to rinse the tub after use.
Making Christmas tree bath bombs is a fun and festive way to celebrate the season while adding a touch of holiday self-care. With their refreshing scent, cheerful shape, and soothing fizz, they’re a treat to use and a joy to gift. Whether you tuck them into stockings, package them in holiday tins, or keep a few for your own cozy winter baths, these little bath bombs are sure to spread Christmas cheer.
So gather your ingredients, put on some holiday music, and enjoy the process of creating these little aromatherapy fizzies.
Ready to explore more festive aromatherapy ideas? Don’t forget to check out my guide on creating the perfect Christmas tree essential oil blend to take your holiday bath bombs and sugar scrubs to the next level.
Homemade Christmas Tree Bath Bombs: FAQs
How long do these homemade bath bombs last?
When stored properly in an airtight container in a cool, dry place, your homemade bath bombs will stay fresh and fizzy for 3-6 months. Keep them away from humidity and moisture to maintain their quality. If you live in a very humid climate, consider adding a small silica gel packet to your storage container.
Can I use other essential oils instead of pine?
Absolutely! While pine creates that authentic Christmas tree scent, you can substitute it with any essential oil you prefer. Popular holiday alternatives include peppermint, cinnamon leaf, sweet orange, eucalyptus, or fir needle. For a more complex aroma, use these essential oil blends that smell like a Christmas tree.
It’s important to keep the total amount at 8-10 drops for the batch, and always use skin-safe essential oils suitable for bath products.
Why are my bath bombs crumbling when I unmold them?
Crumbling usually means the mixture was too dry or it wasn’t compressed firmly enough in the molds. Always let your shaped bath bombs sit undisturbed in the mold for at least 24 hours for maximum strength. If you notice cracks, try misting your mixture a little more next time, and pack it down firmly so it holds its shape.
Can I make these bath bombs without citric acid?
While citric acid is what creates the signature fizzing action, you can substitute with cream of tartar (use double the amount). However, the fizz won’t be quite as dramatic. Citric acid is readily available online or in the canning section of most grocery stores, and it’s worth seeking out for the best results.
Are these bath bombs safe for sensitive skin?
This recipe uses gentle, natural ingredients that most people tolerate well. However, if you have sensitive skin, consider reducing the essential oil drops or choosing a milder oil such as lavender. You can also substitute the almond oil with jojoba or coconut oil if you have nut allergies. Always test a small area first if you have concerns.
Are homemade bath bombs safe for kids?
Bath bombs made with gentle, skin-safe ingredients are usually safe for kids’ bath time. Skip any harsh colorants, glitter, or strong essential oils for little ones with sensitive skin. If you’re looking for more ways to keep bath bombs family-friendly, stick with the classic recipe and use KidSafe essential oils.
Can I double or triple the recipe?
Yes, it is easy to scale the recipe for bigger batches or holiday gifting. Simply multiply each ingredient by the number of batches you want to make. Mix well so everything is evenly distributed, then fill your molds as usual.
Why did my mixture start fizzing while I was making it?
This happens when too much water is added too quickly, or if you’re working in a very humid environment. The moisture causes the citric acid and baking soda to start reacting prematurely. If this happens, work quickly to get the mixture into molds before the fizzing action is completely spent. For future batches, add water more gradually and consider using a dehumidifier if you live in a humid climate.
What should I do if my bath bombs don’t fizz?
If your bath bombs aren’t fizzing, check the age and freshness of the baking soda and citric acid – old ingredients lose their fizz. Also, ensure you didn’t add too much water, which can reduce the reaction. Next time, try using a spritz bottle for more control when adding water, and stop as soon as the mix holds together. A good fizz usually means the balance between baking soda and citric acid is just right.
Can I add soap or bubble bath to make these more sudsy?
While you can add a small amount of liquid castile soap, keep in mind that bath bombs aren’t designed to create bubbles – they’re all about the fizz, aroma, and skin-softening properties. If you want both bubbles and fizz, it’s better to use the bath bomb in combination with a separate bubble bath product rather than incorporating soap into the recipe.
