As an Amazon Associate I earn from qualifying purchases. See Full Disclosure Here
Let’s start with the good news – making beeswax candles with essential oils is really easy.
Scented beeswax candles burn with a soft, flickering glow and give out a lovely, soothing aroma that adds a wonderful sense of warmth and coziness to your surroundings.
Regular candles scented with perfumes also feel cozy and fill the space with a nice scent but these candles contain paraffin, a mineral oil that is highly refined from petroleum. Breathing in these paraffin vapors can be toxic in large doses.
Beeswax candles are a healthier alternative. Not only are they non-toxic and safe to use but they actually reduce indoor pollution.
So how exactly do beeswax candles purify the air? These candles emit negative ions when they are lit. These negative ions neutralize positively charged ions that are present in the air, reducing indoor pollution.
When you make your own beeswax candles with essential oils you can customize the scent to your preference. As an added bonus, you get the therapeutic benefits of the oil too.
Is making your own beeswax candles complicated? No, you only need a few, simple ingredients to make your own beeswax candles with essential oil as you will see below.
Things to Know About Beeswax Candles
Candles made from beeswax emit a subtle sweet scent that is similar to honey but gentler.
There’s an endless variety of beeswax candle scents you can use for scenting your homemade candles.
The color of your DIY beeswax candles may vary depending on where the raw material is sourced from. Just like there are darker and lighter-colored varieties of honey, there are also darker and lighter-colored beeswax varieties.
You can use either one. The color of the beeswax will not affect either its burn time or its benefits. It will only affect the color of your finished candles.
You can buy or make your own. Making your own is easy but if DIY is not your thing, scroll to the bottom and you will find a few top-rated beeswax candles you can buy.
What You Need to Make Candles at Home: Candle-Making Supplies
- 1 lb. Organic Beeswax Block or Pellets
- ¼ cup Organic Coconut Oil
- 2 teaspoons of your favorite essential oil or blend (see options below)
- Glass jars – 4 oz. or 8 oz.
- 60 ply cotton braided wick #4
- Large saucepan to use as a double boiler – this is the one I use
- Metal pitcher to melt the wax (an old large coffee can will do just as well)
- Candle Wick Centering Device – this helps to center the wick and keep it in place while the candle hardens
- Scissors, wooden spoon, spatula, tape
With this recipe, you can make two large 12-ounce candles. If you prefer to make smaller candles either for yourself or to give away as gifts, use smaller jars to make three 8-ounce or six 4-ounce candles.
For a cool gift set, make one 12-ounce, one 8-ounce, and one 4-ounce candle and scent each one using different essential oils.
Note: Beeswax can be difficult to remove from the container. Using an old coffee can or buying a metal container especially for this purpose will save you a lot of trouble.
Before getting into how to make beeswax candles with essential oils, here’s a look at each of the materials used. Understanding the why of using these specific materials, will help you better understand how to use them to create beautiful candles.
Beeswax
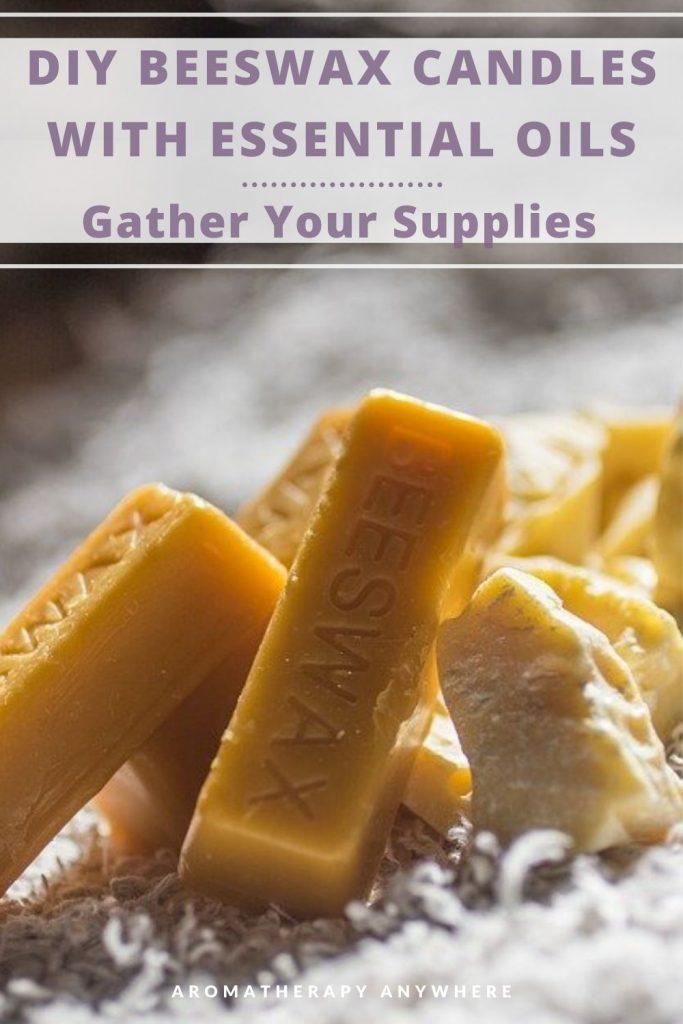
You can buy beeswax for your candles in the form of a solid block or small pellets.
Pellets are easier to use. You just measure how much you need and put it in the container with the coconut oil.
The block is too solid and dense to use as is. It will take a long time to melt. To quicken the process, you will need to shred the block using a cheese grater.
In its natural form, beeswax has the same golden-yellow color as honey. Although a little rare, you can also find white beeswax. If you prefer to use white beeswax, look for those that are bleached naturally using the sun and air instead of using chemical bleach.
Coconut Oil
Coconut oil may seem like an unusual ingredient for making candles. Here’s how it helps. Beeswax can be expensive. Making candles from pure beeswax can work out to be very expensive.
Also, pure beeswax tends to burn very quickly so your homemade candles won’t last very long. Coconut oil helps to slow the burn time so your candles last longer.
The third benefit of adding coconut oil is to increase the lasting power of the essential oils that you use in your homemade candle.
Essential Oils
Essential oils and essential oil blends make the best beeswax candle scents. Not only will they give your homemade candles a wonderful aroma but they are also nontoxic and have therapeutic properties. Definitely avoid using synthetic beeswax candle scents as these often contain toxic components.
Essential oils have strong aromas. A little bit can go a long way so that is something to keep in mind when using essential oils to scent your homemade beeswax candles. Use only the recommended amount. If you want a stronger scent, increase the quantity one drop at a time.
These are my favorite essential oils to use as beeswax candle scents
Grapefruit– refreshing aroma, also helps keep hunger pangs at bay
Lavender– calming and relaxing
Sweet Orange– excellent mood-lifting scent
Lemon– fresh, energizing aroma
Fir Needle– crisp forest scent
Citronella – fresh scent that supports the respiratory system
These are a few fun blends that I’ve used when making beeswax candles to give away as gifts:
Bouquet Essential Oil Blend – Combination of floral, citrusy, and woodsy aromas that will lift your senses and brighten your day
Blues Buster Synergy Blend – Blend of cheerful aromas that work together to lift your mood
Tropical Passion Synergy Blend – Delightfully bold and fruity aroma that evokes the feeling of a summer party
Joyful Moments Essential Oil Blend – Woodsy aroma with fruity undertones that’s harmonious and uplifting
Calming Essential Oil Blend – Promotes a peaceful, tranquil state of mind, perfect for use at the end of the day or while relaxing in the bath
Set of 3 Dessert Scents – With 3 blends that smell like Chocolate Truffle, Key Lime Pie, and Lemon Cupcake, this is a hugely popular set for scenting candles.
Citrus Passion Essential Oil Blend – a delicate, lively aroma of citrus infused with warm vanilla to add a little something extra to your day.
Balance Synergy Blend – Calming, floral blend that promotes emotional balance
Assorted Thanksgiving Diffuser Blends – use any of these essential oil recipes to scent your homemade candles and fill your home with warm and wonderful Thanksgiving aromas.
If you want to experiment with different scents or create your own, I highly recommend buying a set of essential oils instead of buying individual oils. With a set of oils, you will have a wider assortment of oils to experiment with. Buying a set works out much cheaper too.
I use Plant Therapy’s Top 14 Essential Oil Set for all my DIY projects using essential oils. With 10ml each of 14 100% pure, high-quality essential oils, this set offers the best value for money.
The 7 & 7 Essential Oil Set includes 7 single oils and 7 essential oil blends, which is also great for diffusing as well as adding to your DIY projects.
If you want to explore even more options, check out this list of Best Essential Oil Sets – Save Money On High-Quality Oils
Cotton Wicks
The main function of the wick is to draw the wax upwards toward the flame so that it burns continually. A wick works because it is made of braided natural fibers that burn easily but not as quickly as a string of thread would.
How well a candle will burn depends a lot on the thickness of the wick. A wick that’s too thick will sputter, flicker, and eventually burn out. One that’s too thin will produce a weak flame that won’t stay lit for long.
Candle-makers carefully select the wick size and length depending on the type and size of the pillar candle that they are creating or the size of the container when making container candles. A candle created with the right type and size of wick will burn long and steady without sputtering or excessive flickering.
The length of the wick is just as important as its width. A wick that’s trimmed to a proper height will give you the longest-lasting burn time.
When making beeswax candles at home, it is important to choose the right size and type of wick for the container you’ll be using.
Best Candle Containers for Your Homemade Essential Oil Candles
Another key item in your list of candle-making supplies is the container. This is where you can go crazy and showcase your creativity.
There’s an endless variety of candle containers available in all shapes, sizes, and colors. The best choice for you will depend on the size of the candles you’re making and where you want to display them in your home.
Your choices may be slightly different if you’re making beeswax candles to give away as gifts.
There are a couple of things to keep in mind when looking for homemade candle containers:
– Glass jars or metal containers are the best for container candles. For pillar candles, you’ll use your molds.
– Do not use plastic, wood, or cardboard containers for your homemade candles. Plastic will melt with the heat and wood and paper will burn.
The ones listed above are just some of the many gorgeous candle containers I found on Amazon. Be prepared to spend some time checking them out – I know I did. The biggest problem for me was choosing just one from among the many absolutely stunning containers.
Best Candle Molds for Free-Standing Homemade Beeswax Candles
You don’t necessarily have to use containers for your homemade candles. The other option is to make free-standing pillar candles. Making free-standing beeswax candles is a fun option especially when you see the unique types of candle molds available.
If you decide to go with this option, you won’t need to buy glass containers. Instead, you will need to buy silicone candle molds. These are incredibly easy to use. You simply pour your pillar candles into a form and leave them there till completely dry.
Remove the candle from the form and place it in a candle holder or a candle dish.
Here are a few unique candle molds I found that are great for homemade Beeswax Candles.
How to Make Beeswax Candles with Essential Oils: Step-By-Step
 Step 1: Place the saucepan of water on the stove and bring the water to a boil.
Step 2: While the water is boiling, go ahead and put the beeswax and coconut oil into the coffee can or metal pitcher you’ve bought especially for this purpose.
Step 3: Lower the flame and place this container in the middle of the pan of warm water. Using the pan of water as a buffer between the direct flame and the wax forms an effective double boiler that helps the contents melt slowly and evenly. Let it heat on medium flame until the beeswax has melted completely. Beeswax is flammable so make sure you do not leave it unattended while it is on the fire.
Step 4: While you’re waiting for the beeswax and coconut oil to melt, start preparing your candle jars. Cut the wick a little more than you need, dip one end in the melting beeswax and stick that end at the bottom. The beeswax acts as glue. Press down on the beeswax with the blunt end of a pencil till it hardens or else it will get loose and peel away from the jar.
Step 5: When the beeswax is completely melted, take it off the stove. Stir gently to make sure the wax and coconut oil have mixed together well.
Step 6: Wait for the beeswax-coconut oil mix to cool down slightly before adding your chosen beeswax candle scent. Mix gently for a few seconds. Now it’s ready to be transferred into the container.
Step 7: Wrap the top end of the wick around a pencil or pen. Place the pencil across the opening of the jar so that the wick is taut and does not fall into the container. Pour the wax around the dangling wick, to the top of the jar or container.
Step 8: Allow candles to cool until the wax hardens. This can take a few hours. It’s best to leave the candle in a warmer room while it’s hardening to prevent any cracks from forming. If you keep it in a cold room, the outer part of the candle will cool faster than the center and cracks will form on the top. The cracks won’t affect the performance of the candle and you can leave them as is.
Step 9: When the candle has cooled completely, snip wicks to about ½ inch. Be careful not to trip the wick any shorter than ½ inch as it will result in a smaller flame, which will cause the candle to burn downwards creating a tunnel.
Wait at least 12 hours before lighting your beautiful and aromatic homemade beeswax candle with essential oils.
P.S. – If you are making beeswax candles to give away as gifts and they crack in Step 7, these are easy to fix. Melt a little bit of beeswax using the double boiler method as before. Pour this gently over the top of your prepared candle and let it cool. This layer will harden smoothly and cover the cracked surface.
Want the benefits of beeswax candles with essential oils but don’t want to make your own? Check out these beautiful beeswax candles that you can buy.
Beeswax Candles to Buy
Candle by the Hour 80-Hour Vertical Candle, Eco-friendly Natural Beeswax with Cotton Wick
Bee Hive Candles 100% Pure Beeswax Pillar Candle 2″ x 3″ (3-Pack)
Candle by the Hour 50-Hour Beehive Candle, Eco-friendly Natural Beeswax with Cotton Wick
Making Beeswax Candles with Essential Oils for Christmas
When making beeswax candles to give away as gifts during the Holiday season you can use individual seasonal scents, such as cinnamon or vanilla or you can make your own seasonal blends using a combination of oils. Alternatively, you can also use pre-made holiday blends.
These scents are perfect for the holiday season:
Cinnamon
Nutmeg
Fir Needle
Sweet orange
Clove
Ginger
Black Spruce
Peppermint
Frankincense
Myrrh
Add Some Festive Holiday Touches to Your Homemade Christmas Candles
If you plan to use these candles to decorate your home for the holidays or give as holiday gifts, then you may wish to add embellishments. Some easy ways to add a bit of holiday decorating style:
Add ribbon. Burlap ribbon wrapped around candle tins and Mason jars create a rustic look. Red and green plaid gives a country Christmas feel. Velvet bows in a deep scarlet hue make for a rich presentation.
Paint your votives. Use red, white, green, brown, and black acrylic paint to add holiday pinecones, red-painted ribbons, berries, holly, and pine bows to your collection of Christmas candles.
Homemade candle gifts are quick, easy, and fun to make. You can try this project with your children while supervising the use of the stove of course. This type of natural, homemade gift from the heart makes a perfect holiday present for family, friends, and even school teachers, sitters, child care providers, and bus drivers.
Whatever you do, be sure to have fun and relax while doing your homemade, candle-making project. With any luck, you’ll soon be a pro at this.
Interested in more DIY projects using essential oils? Check these out:
Make Your Own Reed Diffusers With Essential Oils
DIY Gifts & Things To Make With Essential Oils
DIY Relaxing Pillow Spray With Essential Oils
Make Scented Room Sprays With Essential Oils
Make Your Own Customized Perfumes With Essential Oils

Disclaimer: This information is not intended to serve as medical advice. Please consult your physician before using essential oils. See Full Disclaimer here.


