As an Amazon Associate I earn from qualifying purchases. See Full Disclosure Here
Melt and pour soap making with kids is a fun and safe craft activity that kids of all ages are sure to love. After all, which kid (or adult) wouldn’t be excited about creating their own soaps in their favorite colors and shapes!
Testing out different scents and color combinations using different kid friendly melt and pour soap recipes makes for many hours of creative fun.
As for melt and pour soap molds … the sheer variety available is mind-boggling. You can find soap molds in just about any shape and size to suit any occasion or theme.
Why Melt And Pour Soap Making Is The Perfect Kid-Friendly Activity

Here’s why melt and pour soap making is the perfect kid-friendly DIY project:
It’s fun. It’s safe. It uses all kid-friendly ingredients, supplies, and techniques. It doesn’t use lye, which is a caustic substance used in traditional soap making.
Melt and pour soap base is essentially pre-made soap that is sold in blocks. All you need to do is melt it down and add your own colors, fragrances, and other ingredients.
Letting your child choose their own colors and fragrances is a great way to allow them to express their creativity. The satisfaction they’ll get from creating their own homemade personalized soap bars can be immensely rewarding.
If your child is very young, you can help them with one or two of the steps that involve cutting and heating. For older children, you can give them more responsibility, such as stirring the melted soap base or adding the colors and fragrances.
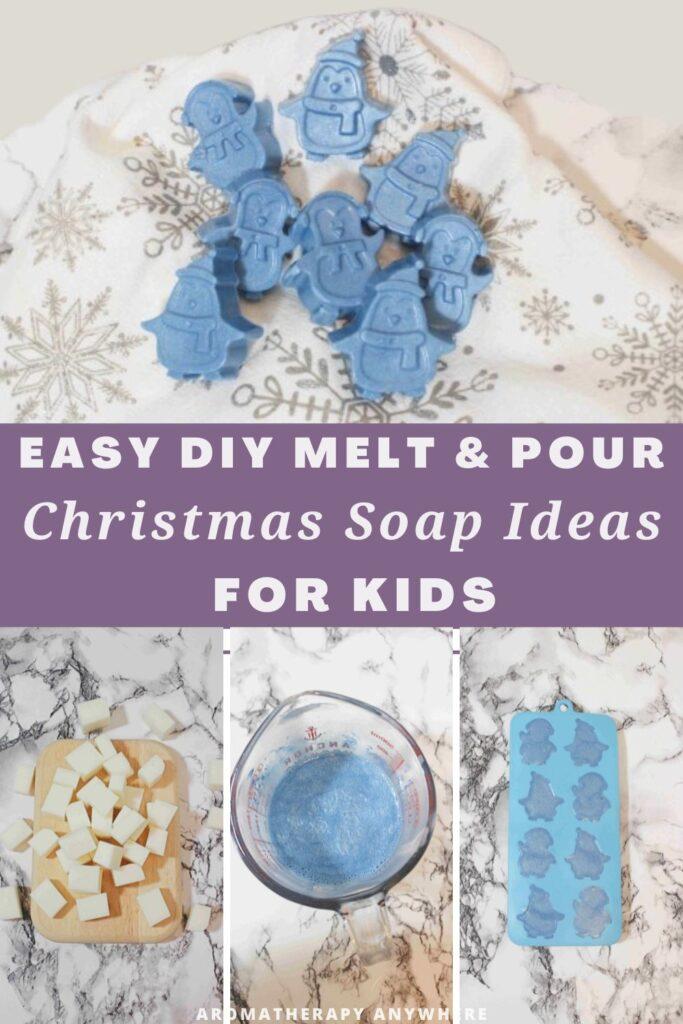
Here’s a fun and easy melt and pour soap recipe for kids that does not require lye or other hazardous ingredients typically used in soap making.
If you’re looking for homemade Christmas soap ideas – this is it!
After Christmas, just switch out the penguin soap mold with another shape and you can make kid friendly melt and pour soaps all year round. Scroll below for lots of personalization ideas.
Melt And Pour Soap Ingredients

All you need are 4 ingredients for this DIY kid friendly melt and pour soap. The quantities are sufficient to make 16 little penguin soaps using this mold
– ½ pound of goat’s milk melt-and-pour soap base
– 1 tablespoon blue mica powder
– 10 drops KidSafe Lavender essential oil or a calming blend safe for kids
– Soap mold
Melt and Pour Soap Base for Kids: Goat’s milk melt and pour soap base is organic, skin-friendly and safe for kids to work with and use in the bath. Opting for an organic soap base ensures that you are using a product that is free from harmful chemicals.
Essential Oils: Essential oils are optional but they do serve two purposes. They give your homemade melt and pour soaps a delightful scent and your kid will also get the benefit of the oil used. Lavender is the best essential oil to use in melt and pour soap for kids because of its relaxing properties. Bath time is a great time to get kids to wind down and get ready for bed and adding lavender aligns with that perfectly. Besides, it’s gentle on kid’s skin.
Silicone Soap Molds: Select fun and playful molds that will appeal to your kids. Any soap mold will work. You can find a wide variety of molds, including shapes like animals, Lego figures, and more. I was making these as stocking stuffers this Christmas hence the penguin shape.
Liquid Soap Dye or Mica Powder: Liquid soap dyes and mica powder are both excellent options for adding vibrant colors to melt and power soap for kids. Look for child-safe dyes that are specifically designed for soap making. If your child has extra sensitive skin, avoid using dyes altogether.
Microwave-Safe Containers or a Double Boiler: Depending on your preference, you can either use microwave-safe containers or a double boiler to melt the soap base. Ensure that the containers are suitable for the microwave if you choose this method.
Now that you’ve gathered your supplies, it’s time to dive into the step-by-step process of making melt and pour soap making with kids.
Stp-By-Step Melt And Pour Soap Making With Kids
Step 1: Prepare the Soap Base

To begin, cut the melt and pour soap base into approximately 1-inch square cubes This will help the soap melt evenly and quickly. The smaller the cubes, the faster they will melt.
If you’re working with very young kids, don’t worry too much about cutting the soap cleanly with a knife. The soap base is going to melt in the next step so it’s okay to let them break it into rough pieces.
Step 2: Melt the Soap Base
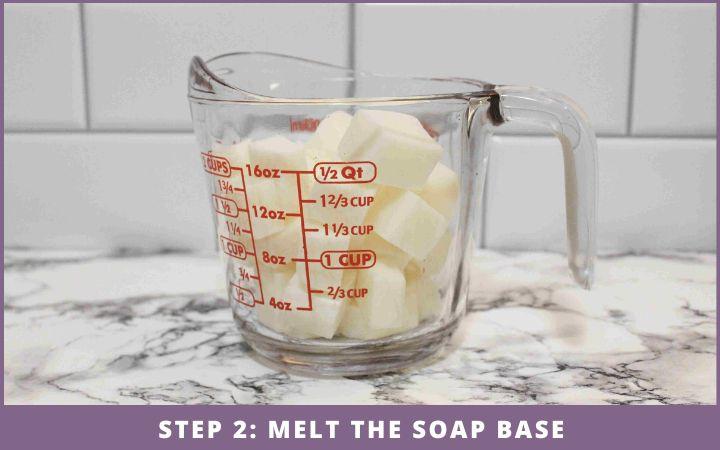
There are two methods you can use to melt the soap base: the microwave method or the double boiler method.
Choose the method that works best for you and your kids.
Microwave Method: Place the soap cubes in a microwave-safe container and heat them in short bursts. Start with 30 seconds and continue heating in 20-second intervals until the soap melts completely. Be cautious not to overheat the soap, as it may get burnt or develop an unpleasant smell. Stir the soap occasionally to ensure even melting.
Double Boiler Method: If you prefer a more controlled melting process, you can use a double boiler. Fill a pot with water and bring it to a boil. Place a heat-safe glass container on top of the pot, ensuring that it fits snugly. Add the soap cubes to the glass container and stir gently until they melt completely.
Step 3: Add Your Chosen Essential Oil Or Blend

Once the soap base has melted, it’s time to add fragrance and color to your soap bars. This step is optional but adds an extra touch of personalization to your creations.
Add 10 drops of your choice of KidSafe essential oil to the melted soap base. Plant Therapy KidSafe essential oils are specially formulated for younger children and are a safe choice when making homemade items for kids.
Stir gently to distribute the fragrance evenly throughout the soap. Remember to choose scents that are safe for kids and avoid using citrus essential oils, as they may deteriorate the plastic molds.
Step 4: Add Your Selected Color

Since I was making penguin soaps, I chose this blue mica powder. You can choose any color depending on the shape of the soap or if you’re making generic shapes, dye them in your child’s favorite colors.
Start with a little bit of dye and gradually increase the intensity until you achieve the desired color. Stir the soap base gently to ensure the color is evenly distributed. If your kids want to make soaps with multi-colored swirls or splotches, then definitely skip this even color distribution.
Step 5: Pour the Soap into Molds
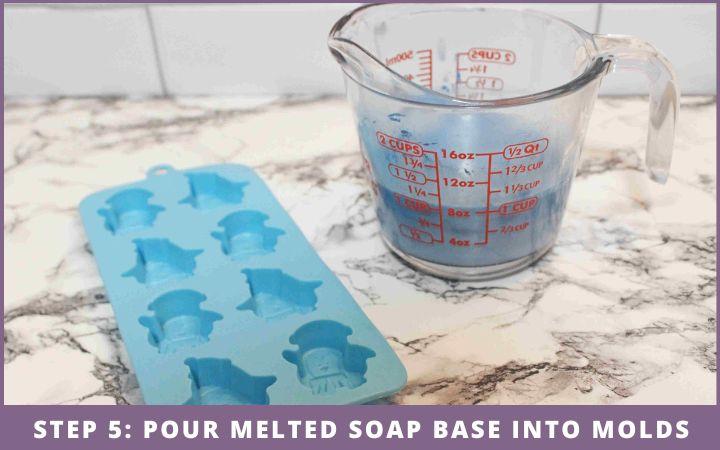
This is the messiest but also the most fun part of melt and pour soap making with kids – pouring the melted soap into the molds.
Make sure to place an old cloth or newspaper over the tabletop so you don’t have to fret over unavoidable spills.
Fill each mold about halfway with the soap mixture.
Optional: If you notice any air bubbles on the surface of the soap, lightly spritz them with isopropyl alcohol. This will help eliminate the bubbles and give your soap bars a smoother finish.
Step 6: Let the Soap Cool and Set

Allow the soaps to cool and set completely before removing them from the molds. This may take a few hours, depending on the size and depth of your soap bars.
Patience is key during this step, as premature removal may result in misshapen soap bars. Letting the soaps harden in the molds overnight will give you the best results.
Step 7: Unmold the Hardened Soaps

Once the soap has hardened, gently remove it from the molds. If you encounter any resistance, try flexing the sides of the mold or tapping it lightly to release the soap.
Homemade Christmas-shaped melt and pour soaps with essential oils are great for giving as gifts for all ages, whether you’re looking for unique items to use as stocking stuffers or you’re looking for additions to your Aromatherapy gift basket. Just choose the color and shape to suit the recipient.
Kid Friendly Melt And Pour Soap Customization Ideas
Here are some ideas for melt and pour Christmas soap scents and colors:
First choose the soap molds. Then choose the scent and colors to complement the shape.
These Christmas essential oils are great to re-create the scents of the season. When it comes to colors, red, green, white, gold and silver are great options for Holiday soaps.
You can also add different embellishments to your melt and pour Christmas soap, such as nontoxic glitter, dried herbs, or soap colorants.
Melt and pour soap making with kids is not just a Christmas activity. During other times of the year, use soap molds or ice cube trays in other shapes for year-long soap making fun!
Soap making is a fantastic way to engage kids in an activity that nurtures their creativity as they experiment with creating their own vibrant, fragrant soaps, transforming an ordinary bath into a canvas of colors and scents
Remember to prioritize safety at all times. Tailor the instructions for melt and pour soap making with kids to your kids’ ages. The two steps to be most careful about are cutting the soap base and melting the soap base. If your kids are very young, you may want to do these yourself.
Looking for more DIY projects using essential oils?
Kid-friendly soothing bath playdough recipe with essential oils
Natural Christmas-scented potpourri recipes
Christmas-scented sugar scrub recipes
How to create a cozy hygge Christmas: 12 easy ideas
Disclaimer: This information is not intended to serve as medical advice. Please consult your physician before using essential oils. See Full Disclaimer here.


