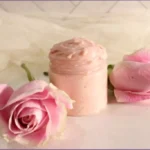
This rose whipped body butter combines the deep moisturizing power of shea butter and coconut oil with delicately scented rose-infused oil for a luxurious treat your skin will love.
The whipped texture feels incredibly light and absorbs beautifully, leaving skin soft and subtly scented without any greasy residue.

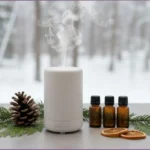
✨ Get 12 Free Holiday Diffuser Blends — Printable PDF
Instantly make your home smell like Christmas with these festive, ready-to-use recipes.
The best part? You have complete control over what goes onto your skin.
No synthetic fragrances, no mystery ingredients… just pure, nourishing oils and butters that you can customize with your favorite essential oil blends.
Whether you’re making this for yourself or creating thoughtful handmade gifts, this recipe delivers impressive results with surprisingly simple techniques. Let’s dive into creating your own batch of cloud-like rose body butter.
Table of Contents
Affiliate Disclosure: Some links on this site are affiliate links. I may earn a small commission if you purchase through them, at no extra cost to you. See the full affiliate disclosure.
What Makes Rose Whipped Body Butter Special

This isn’t your average body butter recipe.
This rose body butter blends rich, nourishing butters with a soft floral scent to deeply moisturize the skin and leave it smooth, radiant, and delicately scented.
The combination of ingredients and technique creates something uniquely luxurious:
The whipped texture sets this apart from regular body butters. By incorporating air through the whipping process, you create a light, mousse-like consistency that glides smoothly onto the skin. It feels indulgent without being heavy.
Rose-infused oil brings natural floral notes to the recipe. Instead of relying on synthetic rose fragrance, you’re extracting the essence directly from dried rose petals. This creates a softer, more authentic scent that many find more appealing than artificial alternatives.
The customizable aromatherapy aspect lets you personalize your body butter. You can enhance the rose scent, create complementary blends, or go in an entirely different direction based on your mood and preferences.
Simple ingredients mean you know exactly what you’re putting on your skin. Just a few natural butters and oils create a product that rivals expensive boutique body butters, at a fraction of the cost.
This recipe also makes a beautiful handmade gift. Package it in a pretty glass jar, and you have a thoughtful present that shows you put time and care into creating something special.
Ingredients To Make Rose Whipped Body Butter

Each ingredient plays a specific role in creating the perfect texture and nourishing properties:
- 1/2 cup Coconut Oil: This creates the fluffy, whipped base of your body butter. When solid, coconut oil whips beautifully, incorporating air to create that cloud-like texture. It provides lightweight moisture that absorbs well without feeling heavy on the skin.
- 2 tablespoons Shea Butter: Adding richness and depth, shea butter brings extra nourishing properties to the blend. It gives the body butter more body and staying power, helping it maintain its whipped texture over time.
- 2 tablespoons Rose-Infused Oil: This is where the signature scent comes from. By infusing dried rose petals in a carrier oil, you extract their delicate fragrance and beneficial properties. This creates a natural, subtle rose scent that feels sophisticated rather than overwhelming.
- 20 drops Essential Oil: Adding essential oils allow you to customize the aromatherapy experience. You can enhance the rose scent, complement it with other florals, or create an entirely different aromatic profile. Scroll below for essential oil blend options.
- 1/2 teaspoon Pink Mica Powder: Pink mica powder adds a soft rosy tint without affecting the texture or performance. This is purely aesthetic but creates a beautiful presentation.
- Vitamin E oil (optional): Adding a few drops of vitamin E oil can act as a natural preservative and help extend the shelf-life of your body butter.
How to Make Rose Whipped Body Butter: Step-By-Step
Yield: 6-8 ounces
Prep time: 15 minutes (plus 2-4 weeks for infusion)
Total time: 15 minutes active time
Step 1: Make Rose-Infused Oil

Begin by creating your rose-infused oil at least 2-4 weeks before you plan to make your body butter. This advance preparation is essential. You can’t rush the infusion process if you want a beautifully scented oil.
Place dried rose petals in a clean, completely dry glass jar. Moisture is the enemy here, as any water content can cause your oil to go rancid.
Fill the jar about halfway with dried petals, then cover them completely with a lightweight carrier oil like sweet almond, jojoba, or grapeseed oil.
The petals should be fully submerged, with at least an inch of oil above them to prevent any exposure to air.
Seal the jar tightly and place it in a warm, dark location like a kitchen cupboard. Sunlight can degrade the oil, so choose a spot away from windows.
Shake the jar gently every few days to help release the rose essence into the oil and redistribute the petals.
After 2-4 weeks, your oil should have taken on a beautiful rosy scent. Strain out all the petals using a fine-mesh strainer or cheesecloth, squeezing gently to extract every drop of your precious infused oil.
Store the strained oil in a clean jar until you’re ready to make your body butter.
Pro tip: Make a large batch of rose-infused oil so you always have some on hand for body butter, facial oils, or other DIY beauty projects. Get a detailed tutorial here on how to make rose-infused oil.
Step 2: Melt The Butter & Oils

Add the coconut oil, rose-infused oil, and shea butter to a double boiler.
Alternatively, place the oils and butter into a heat-safe glass jar or bowl. Create a double boiler by placing your container in a saucepan with a few inches of simmering water. Make sure the water level is low enough that it doesn’t touch the bottom of your jar.
The key here is gentle, even heat that melts everything without degrading the beneficial properties of your ingredients. You want the steam heat to do the work, not direct water contact.
Stir occasionally as everything melts, watching as the solid coconut oil and shea butter transform into a clear, golden liquid.
The double-boiler method is ideal because it provides low, controlled heat. This preserves the integrity of your oils and butters better than direct heat or high temperatures.
The process usually takes 5-10 minutes, depending on how solid your coconut oil is (this varies based on room temperature).
If you prefer to use a microwave, place your ingredients in a microwave-safe container and heat in 20-30 second intervals, stirring thoroughly between each burst. Stop as soon as everything is just melted -overheating can affect the final texture of your body butter.
Important: Avoid getting any water in your melted mixture. Even a single drop can affect the texture and potentially cause your body butter to spoil faster.
Step 3: Cool Melted Butters Until Just Solid

This step requires patience, but it’s absolutely crucial for achieving that perfect whipped texture. Remove your melted mixture from the heat and let it cool completely until it solidifies.
You have two options here.
- Leave it at room temperature for several hours or even overnight. This allows for very even crystallization, which produces a smoother final texture.
- Place your bowl in the refrigerator for about 45 minutes to an hour. While this is faster, it can result in a slightly grainy texture.
Check on it periodically. You’re looking for a consistency similar to softened butter – solid enough to hold its shape but not rock-hard. If you press your finger into it, it should leave an indentation.
If it’s too hard, which can happen if you refrigerate it too long, let it sit at room temperature for 10-15 minutes to soften slightly.
The cooling process allows the fats in the coconut oil and shea butter to crystallize in a way that makes them whippable.
If you try to whip the mixture while it’s still liquid or only partially solid, you won’t get that fluffy texture you’re after.
Temperature matters: If your kitchen is very warm, you may need to refrigerate even if you prefer the slow method. Coconut oil has a melting point around 76°F, so a hot kitchen can prevent proper solidification.
Step 4: Whip to Perfection
This is where the magic happens. Using a hand mixer or stand mixer fitted with the whisk attachment, begin whipping your solidified mixture on medium speed.
At first, the solid mixture will break up into chunks. Keep going. After a minute or two, it will start to come together and smooth out. Gradually increase your speed to high and continue whipping for 5-10 minutes total.
You’ll notice the transformation happening before your eyes.
The mixture will become paler in color as air is incorporated.
The volume will roughly double.
The texture will change from dense and compact to light, fluffy, and cloud-like. It should look like thick, whipped cream or frosting.
Stop occasionally to scrape down the sides of your bowl with a spatula, ensuring everything gets evenly whipped. The mixture at the bottom and sides needs to be incorporated, too.
Don’t rush this step. The longer you whip (within reason), the fluffier your body butter becomes.
The sweet spot is usually 7-10 minutes of whipping time.
If you whip for too long, say 15-20 minutes, you might notice the texture becoming slightly grainy as the fats break down too much.
Mixer speed matters: Start on medium to break up the solid mixture without splattering, then increase to high for maximum fluffiness.
Step 5: Add Essential Oils and Color

Once your body butter has reached that perfect, fluffy consistency, it’s time to add the finishing touches.
Add your chosen essential oil blend – about 20 drops total for this recipe. You can adjust this number based on how strong you want the scent to be.
For a subtle hint of fragrance, use only 15 drops. For a stronger scent, you can add up to 25 drops. Don’t add more than that.
Start with 20 and adjust in future batches based on your preference.
If you want a soft, rosy tint to your body butter, add approximately ½ teaspoon of pink mica powder at this stage. The mica powder is cosmetic-grade and safe for skin use, adding just a hint of color that makes the body butter even more visually appealing. You can adjust the amount to make it more or less pink.
Whip again briefly, just 30 seconds to a minute, to evenly distribute the essential oils and color throughout the mixture. You want everything well-incorporated but don’t want to overmix at this stage, as you’ve already achieved that perfect fluffy texture and don’t want to deflate it.
Scent tip: Essential oils smell stronger in the bottle than they will in the finished product, so don’t be alarmed if 20 drops seems like a lot. Once mixed into the body butter, the scent will be pleasant and subtle.
Step 6: Scoop Homemade Rose Whipped Body Butter Into A Glass Jar

Transfer your beautiful, whipped rose body butter to a clean, dry glass jar with an airtight lid. A wide-mouth jar works best, making it easy to scoop out the product.
Use a spatula to transfer the body butter, getting every last fluffy bit from your mixing bowl. Fill the jar, then tap it gently on the counter a few times to remove any air pockets and settle the product. You can smooth the top with a clean spatula or spoon for a professional-looking finish.
Seal the jar tightly and store it in a cool, dry place away from direct sunlight and heat sources. A bathroom cabinet or bedroom dresser works perfectly.
Avoid storing it in very warm locations. If the temperature exceeds 76°F regularly, your coconut oil will melt, and you’ll lose that whipped texture (though it will still be effective as a body butter, just not as fluffy).
Label your jar with the date you made it and the essential oil blend you used. This helps you track how long you’ve had it and remember which blend you loved for next time.
Storage reality: In summer months or warm climates, your body butter may soften or even partially melt. If this happens, place it in the refrigerator to re-solidify, then re-whip it. It’s not ruined, just temporarily affected by the temperature.
Best Essential Oil Blends For Homemade Rose Body Butter

The right essential oil blend can add depth, warmth, or freshness to your rose whipped body butter elevate it from lovely to extraordinary.
Here are four blend styles that pair beautifully with rose-infused oil.
Romantic Blends
Romantic blends feel soft, warm, and a little mysterious, like a classic rose perfume with extra depth. They pair rosy florals with smooth base notes to create a scent that lingers on the skin.
Browse my compilation of romantic essential oil blend recipes for more “date-night” style scent pairings.
Floral Blends
Floral blends amplify the fresh rose note and make the body butter smell like a full bouquet. These are great if you want a true floral scent that stays light, pretty, and easy to wear.
Get more sweet-scented pairings in this list of my favorite floral essential oil blends.
Luxurious Blends
Luxurious blends smell refined and spa-like, with layered notes that feel polished and expensive. They often combine rich florals with grounding notes for a smooth finish that does not fade too fast.
If you love that “high-end skincare” scent, you’ll like these luxurious essential oil blends.
Calming Blends
Calming blends keep rose gentle and soothing, perfect for an evening routine or a slow self-care day. They tend to lean soft, herbal, and comforting, without sharp or sugary notes.
For more unwind-and-reset options, explore these calming essential oil blends.
Feel free to adjust these ratios to suit your preferences or create your own unique combinations.
Troubleshooting Common Issues When Making Whipped Body Butter

Even with a simple recipe, questions sometimes come up. Here’s how to solve common issues:
Body Butter Is Too Soft Or Has Melted
This happens when the ambient temperature is too warm. Coconut oil melts at 76°F, so warm rooms or summer weather can turn your fluffy butter into liquid.
Place the jar in the refrigerator until it’s completely solid again (1-2 hours), then re-whip it with your mixer. It should fluff right back up.
Body Butter Is Too Hard
If your mixture solidified too firmly—perhaps you left it in the fridge too long before whipping—it can end up quite hard in the jar.
Let it sit at room temperature for 10-15 minutes before use. You can also scoop out a small amount and warm it between your palms before applying. The heat of your skin will melt it nicely.
Grainy Or Gritty Texture
Sometimes shea butter can develop a grainy texture if it cools too quickly or unevenly, or if it’s melted and re-solidified multiple times.
Try gently remelting your body butter completely, then allowing it to cool very slowly at room temperature (not in the fridge). Whip again once solid. This slow cooling helps the fats crystallize more evenly.
Not Fluffy Enough
If your body butter didn’t get a cloud-like texture, the mixture likely wasn’t solid enough before you started whipping, or you didn’t whip long enough.
Make sure the mixture is completely solid before whipping. It should be firm when you press it. Then whip for the full 7-10 minutes on high speed. If it’s still not fluffy, refrigerate until very firm and try whipping again.
Essential Oil Scent Is Too Strong Or Too Weak
Scent preference is very personal.
For your next batch, adjust the number of drops accordingly. Keep notes on what you used so you can perfect your ideal formula.
Remember that scent fades slightly over time, so what seems strong today may mellow in a week or two.
Oil Separates In The Jar
Occasionally, you might notice a thin layer of clear oil on top of your body butter.
Stir it back in with a clean spoon or spatula. This can happen with temperature changes but it doesn’t mean your body butter has gone bad.
How to Use Homemade Rose Whipped Body Butter
The timing and technique of application can make a big difference in how well your body butter performs:
Apply to slightly damp skin for best results. The ideal time is immediately after a shower or bath, when your skin is still a bit moist. Gently pat your skin with a towel until it’s just damp rather than dripping wet then apply the body butter. It helps seal in that moisture, maximizing hydration.
Start with a small amount. Body butter is concentrated, and a little goes a surprisingly long way. Scoop out about a dime-sized amount and warm it between your palms for a few seconds. This melts it slightly and makes it even easier to spread.
Focus on dry areas such as elbows, knees, heels, and any other spots that tend to get rough or flaky. The rich formula is perfect for these trouble spots that need extra care.
Massage in thoroughly using gentle, circular motions. Take your time and make it a mindful moment rather than rushing. This is part of your self-care ritual.
Allow a moment to absorb before getting dressed. The body butter absorbs relatively quickly, but giving it 30-60 seconds ensures it won’t transfer to your clothes. Many people find it perfect to apply before their evening routine. By the time they’re ready for bed, it’s fully absorbed.
Use as a nighttime treatment for hands and feet. Apply a generous amount, then slip on cotton gloves or socks to lock in the moisture overnight. You’ll wake up with incredibly soft skin.
Storage and Shelf Life Tips

Proper storage extends the life of your homemade body butter and keeps it performing beautifully:
Keep away from heat and light. Direct sunlight can degrade the beneficial properties of your oils, and heat will melt the coconut oil base. A closed cabinet or drawer is ideal—somewhere consistently cool and dark.
Use clean hands or tools. Every time you scoop out body butter, use clean, dry hands or a small spatula. This prevents introducing bacteria or moisture into the jar, which could shorten its shelf life. Some people keep a small cosmetic spatula or wooden spoon with their jar specifically for this purpose.
Watch for changes. Properly stored rose body butter typically lasts about 12 months. Signs that it’s time to make a fresh batch include: an off smell (fresh body butter should smell pleasant, like your essential oil blend and rose), separation of oils, or any change in color beyond the normal slight darkening over time.
Temperature fluctuations happen. If your body butter melts during a heat wave, don’t panic. Let it cool at room temperature or in the refrigerator until solid, then re-whip it. It may not be quite as fluffy as the first time, but it will still work beautifully.
Some people actually prefer to keep a summer jar and a winter jar—softer in winter when skin needs more moisture, firmer in summer.
Consider smaller containers. Instead of storing all your body butter in one large jar, divide it among several smaller containers. This means you’re only exposing one small jar to repeated opening and potential contamination, keeping the rest pristine.
Homemade Rose Whipped Body Butter Gift-Giving Ideas

Homemade rose body butter makes a thoughtful gift that shows you invested time and care:
Choose the right jar: Vintage glass jars create instant charm. Check thrift stores for interesting jars with lids, or use small mason jars with decorative fabric circles secured with twine or ribbon over the lid.
Add an appropriate label: Create custom labels with the name of the product, the date made, and a simple ingredients list. You can hand-write these on kraft paper tags or print pretty labels on your computer. Include the essential oil blend you used so the recipient knows what they’re enjoying.
Accessorize: Add a small wooden spoon tied to the jar with a ribbon. This gives the recipient a dedicated tool for scooping and adds a rustic, artisanal touch.
Create a gift set: Package with complementary items to create a complete gift set. Pair your rose body butter with homemade sugar scrubs, rose petal bath bombs, a rose-scented candle, and fabulous floral soap bars.
Perfect occasions: The rose theme makes this body butter especially suitable for romantic occasions such as Valentine’s Day or anniversaries. They are also great for Mother’s Day, birthdays, bridal showers, bridesmaid gifts, teacher appreciation, holiday gifts, or “just because” tokens of appreciation.
Make gift sets with variety. Create three small jars using different essential oil blends – perhaps the romantic, calming, and uplifting blends – so the recipient can choose based on their mood.
Presentation matters. Place the jar in a small gift box cushioned with tissue paper, or create a basket with the body butter as the centerpiece surrounded by other bath and body treats.
Creating your own rose whipped body butter is simpler than you might expect, yet the results feel luxuriously indulgent. You need only a few natural ingredients and some basic mixing to whip up a batch of silky, scented body butter that nourishes your skin and elevates your daily routine into something special.
The best part about making your own is the ability to customize every aspect, from the strength of the rose scent to the specific essential oil blend you choose. Each batch can be slightly different, letting you create exactly what your skin needs in each season or what your mood calls for on any given day.
Don’t be afraid to experiment once you’ve mastered the basic recipe.
Try different essential oil combinations, add a touch of vitamin E oil for extra skin benefits, or create seasonal versions with warming spices in winter or bright citrus notes in summer.
The possibilities are endless, and each batch you make teaches you something new about creating your perfect body butter.
Frequently Asked Questions About Rose Whipped Body Butter
Can I skip the rose-infused oil and use regular carrier oil instead?
Yes, you can, but the body butter won’t have the natural rose scent that makes this recipe special. You can substitute plain carrier oil and add rose geranium or rose absolute essential oil to achieve a rose scent.
Can I use different butters like cocoa butter or mango butter?
Absolutely! You can substitute other butters for the shea butter, though this may affect the final texture and scent slightly.
Can I double or triple this recipe?
Yes, it’s very easy to scale this recipe beautifully. The key is to maintain the same ratios as this recipe. If you’re making a large batch, you can whip the butter in batches depending on the mixer bowl size.
Can I use fresh rose petals instead of dried petals to make the infused oil?
No, fresh petals contain water, which will cause your oil to spoil quickly. Always use completely dried rose petals for infusing oil.
What’s the best carrier oil for making rose-infused oil?
Sweet almond oil, jojoba oil, and grapeseed oil all work beautifully. Choose one that’s lightweight and has a mild scent that won’t overpower the rose.
Why is my body butter melting in the jar?
Coconut oil melts at 76°F, so warm temperatures will soften or liquefy your body butter. Store it in a cooler location or refrigerate it during hot weather, then re-whip if needed.
Is this body butter safe for sensitive skin?
The base ingredients are generally gentle, but everyone’s skin is different. Patch test on a small area first, and be mindful of any essential oils that might irritate your particular skin type.
Why did my body butter turn grainy?
This happens when shea butter cools too quickly or unevenly. Gently remelt everything and allow it to cool slowly at room temperature, then re-whip.
Will this body butter stain my clothes?
When applied properly and given time to absorb, it shouldn’t stain. Apply to damp skin, use a small amount, and allow 30-60 seconds before dressing. Check on a small area before applying all over.
Can I use this whipped body butter on my face?
While the ingredients are skin-safe, coconut oil can be comedogenic (pore-clogging) for some people. If you’re prone to breakouts, test on a small area first or use it only on your body.