Are you a weekend warrior dealing with post-workout tension?
Ever bumped into a doorframe and ended up with a tender bruise?
I’ve had both happen to me! My go-to solution in both cases is this homemade arnica salve.

✨ Get 12 Free Holiday Diffuser Blends — Printable PDF
Instantly make your home smell like Christmas with these festive, ready-to-use recipes.
Arnica salve is a popular natural product known for its soothing, skin-nourishing qualities and is often used in wellness routines.
The basic arnica salve recipe combines the power of the arnica plant with a soothing base such as beeswax to create a smooth, spreadable balm.
Try this easy arnica salve recipe today and experience the comforting benefits of this natural DIY staple. It’s quick, easy, and perfect for anyone looking to make a soothing salve at home.
Table of Contents
Affiliate Disclosure: Some links on this site are affiliate links. I may earn a small commission if you purchase through them, at no extra cost to you. See the full affiliate disclosure.
Arnica Salve Recipe: Ingredients

1 ½ cups Arnica Infused Oil
2 tablespoons Beeswax Pellets
3 x 2 oz Salve Tins
Essential Oils (optional)
Vitamin E (optional)
This recipe yields approximately 3 2-oz tins.
How To Make Arnica Salve: Step-by-Step Instructions
Step 1: Prepare The Arnica-Infused Oil

It helps to make the arnica oil in advance, as it requires a few days to infuse. Get detailed step-by-step instructions on how to make arnica-infused oil.
If you haven’t already made arnica oil, add dried arnica flowers to a jar and cover them with your chosen carrier oil. I used avocado oil, but you can use any other carrier oil as listed in the arnica oil recipe.
Close the jar and heat in a double-boiler over low heat for around 6 to 8 hours, stirring occasionally. Keeping it on low heat is important to preserve arnica’s delicate healing compounds. High heat can damage these compounds.
Alternately, let the flowers infuse in a carrier oil for 4-6 weeks. Keep the jar in a cool, dark place and shake it occasionally to distribute the oil evenly over the flowers.
Strain the arnica oil into a clean glass jar or bowl using a cheesecloth or fine-mesh strainer.
Step 2: Melt the Beeswax

Using a double boiler, melt the beeswax pastilles. The general ratio is 1 ounce of beeswax for every 1 cup of infused oil, but you can adjust this to make the salve harder or softer based on your preference.
Beeswax helps to thicken the arnica oil and give it the solid consistency of a salve.
It also adds a protective barrier to the skin, which helps lock in moisture. Opt for organic, unrefined beeswax to avoid any synthetic additives.
Step 3: Add The Arnica-Infused Oil To The Melted Beeswax

Add the arnica-infused oil slowly into the melted beeswax. Stir the mixture gently until both ingredients are fully combined and smooth.
Step 4: Add Vitamin E Oil (optional)
Vitamin E oil helps extend the shelf life of homemade arnica salve. You need to add it only if you’re making a larger quantity or you use the salve sparingly.
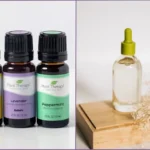
Step 5: Add Essential Oils (Optional)
Remove the melted beeswax and arnica oil from the heat and let it cool down a bit, then add
If you want to add essential oils for scent and extra benefits, do so when the base is slightly cooled. High heat damages the delicate properties of essential oils.
These essential oils complement the arnica salve recipe and enhance its soothing qualities:
- Lavender: Widely appreciated for its calming scent and skin-soothing properties.
- Tea Tree: Often used in natural skincare for its cleansing and purifying characteristics.
- Eucalyptus: Known for its refreshing aroma and is often included in massage blends to promote a sense of ease after physical activity.
- Chamomile: A gentle oil traditionally used in skincare to help comfort sensitive or irritated skin.
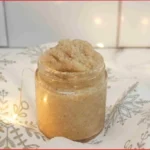
Step 6: Pour into Salve Containers & Let it Set

Sterilize containers before use by washing in hot, soapy water and wiping them down with alcohol when completely dry. This helps prevent contamination and ensures the homemade salve stays fresh and safe longer.
Carefully pour the melted mixture into a glass jar or salve tin. Allow the salve to cool and harden at room temperature. This may take 30 minutes to an hour depending on the size of your containers and the room temperature.
Do not move the containers while the salve is cooling to prevent cracks or uneven surfaces from forming.
Once set, your arnica salve is ready to use.
How to Use Arnica Salve

Homemade arnica salve can be a valuable addition to your natural first-aid kit, as it offers a variety of benefits for external use.
Here are some common ways to use it:
Soothe Tired Muscles and Joints
After a strenuous workout or a long day of physical activity, massage arnica salve into tired muscles and joints to promote relaxation and comfort.
If you’re a weekend warrior like me, you know how those occasional workouts can leave you feeling sore and achy for days. I massage homemade arnica salve after my occasional rigorous workouts to help unwind and feel more at ease.
Many people incorporate arnica into their routines as part of a natural self-care ritual after physical exertion.
Support Skin Comfort After Bruising
Arnica is widely used in natural skincare routines and is believed to support the appearance of skin after minor bruising.
If you have a minor bruise, gently apply the salve to the area a few times a day. It may help reduce the appearance of discoloration and support overall skin comfort.
Note: Arnica should only be applied to unbroken skin. Do not apply if your bruise is accompanied by broken skin, as this may cause irritation.
For Occasional Sprains or Strains
In India, arnica is commonly used as an infused oil or salve as part of traditional self-care.
Some people use it to massage areas of minor strain or tension as part of their wellness practices.
Calm Skin After Bug Bites
For occasional skin irritation from insect bites or stings, apply a small amount of arnica salve to calm the skin and support a soothing sensation.
It’s often appreciated for its gentle, comforting feel on the skin.
Gentle Care for Minor Burns
Arnica salve is sometimes used to soothe the skin after mild sun exposure or minor surface discomfort.
Gently rub it over the area to support skin hydration and comfort.
Note: This is NOT a substitute for medical care if you have severe burns.
Any salve gets contaminated every time you use your fingers to scoop out a small amount to use. If you make a large batch, transfer small amounts to a smaller tin for use and store the rest. This way you can add a fresh batch when you’ve used up the older batch.
When stored correctly, your arnica salve should remain potent for several months. Check the salve periodically for any changes in texture, smell, or color, which may indicate that it’s time to make a fresh batch.
Safety Tips and Precautions

Safety Tips and Precautions
Do Not Apply to Broken Skin or Open Wounds: Arnica should never be used on cuts, open wounds, or broken skin, as it may cause irritation. Only apply the salve on intact skin for general comfort and care.
For External Use Only: Arnica should only be used topically and never ingested. Internal use of arnica can be toxic. Keep arnica salve away from children and pets to prevent accidental ingestion.
Allergic Reactions and Patch Test: Although arnica is generally well-tolerated, it’s advisable to perform a patch test before using a new salve. Apply a small amount to the inner arm and wait 24 hours to check for irritation.
This easy arnica salve recipe is a convenient, natural addition to your self-care routine.
Keep a jar in your home for when you need some comfort or share it as a thoughtful, homemade gift!
If you’re looking for more infused oil recipes for the skin, check out these easy step-by-step instructions on how to make yarrow-infused oil, calendula-infused oil, and coffee-infused oil.