Looking for ways to bring the fresh, clean scent of the forest into your home? Pine needle-infused oil captures that crisp, woodsy aroma while creating a versatile base for DIY body care products, massage oils, and aromatic blends.
Unlike pine essential oil, which requires steam distillation, this is a gentle home infusion that combines pine needles with a carrier oil to extract their natural aroma and color. The result is a beautifully scented oil that feels almost like bringing the forest indoors.
✨ Get 12 Free Holiday Diffuser Blends — Printable PDF
Instantly make your home smell like Christmas with these festive, ready-to-use recipes.
Pine needle-infused oil is versatile. It can be used in a wide range of projects from homemade candles and scrubs to body oils and bath blends, adding a naturally fresh, woodsy aroma to your creations. It can also be used on its own as a massage or skin oil.
This infusion is a lovely way to slow down, reconnect with nature, and fill your home with the scent of the season.
Table of Contents
Affiliate Disclosure: Some links on this site are affiliate links. I may earn a small commission if you purchase through them, at no extra cost to you. See the full affiliate disclosure.
What Is Pine Needle Infused Oil?
Pine needle-infused oil is a naturally scented oil made by steeping fresh or dried pine needles in a carrier oil over time.
During the infusion, the carrier oil absorbs the refreshing, resinous aroma of the pine needles along with their subtle green hue, resulting in a beautifully fragrant oil that captures the spirit of the forest.
Difference Between Pine Needle Infused Oil And Pine Essential Oil
It’s important to understand that pine needle-infused oil is not the same as pine essential oil.
Essential oils are highly concentrated and extracted through steam distillation, requiring specialized equipment and large quantities of plant material. They are highly concentrated and should not be applied to the skin without diluting.
Infused oils are much gentler extractions made by steeping plant material in carrier oil over time. They’re less concentrated, safer for direct skin application, and easy to make at home. The scent of the infused oil is softer and more nuanced, making it perfect for creative DIY projects and everyday use.
While pine infusion can be made at home without any special equipment, it is inadvisable to make pine essential oil at home. In addition to specialized equipment, essential oil extraction requires precise measurements and temperatures.
What You’ll Need To Make Pine Needle Infused Oil
Here’s everything you’ll need to create your own bottle of forest-scented oil:
- Fresh or Dried Pine Needles: Enough to fill your jar halfway to three-quarters full.
- Carrier Oil: Enough oil to completely cover your pine needles, plus about an inch of extra oil on top.
- Vitamin E Oil: (Optional) A few drops can help extend shelf life by acting as a natural preservative.
A pint jar (16 oz) filled halfway with needles and topped with oil will yield approximately 10-12 oz of finished oil. A quart jar will yield approximately 22-26 oz
You’ll lose some volume during straining as the plant material absorbs oil. To maximize yield, squeeze your cheesecloth thoroughly during straining.
Equipment
- Clean, dry Glass Jar with a tight-fitting lid for infusing the oil (mason jars are perfect)
- Fine mesh strainer or cheesecloth to separate the needles after infusion.
- Dark amber or cobalt glas jar or bottle for storing your finished oil and protecting it from light.
- Small funnel (optional) makes transferring the oil cleaner and easier.
- Chopstick or wooden skewer (for releasing air bubbles)
Important Notes About the Ingredients
If you’re collecting pine needles outdoors, make sure they are from a safe pine species, rinse them lightly to remove any debris, and let them dry completely before use. Trapped moisture can cause your oil to spoil. (See FAQs for more on safe pine species to use for infusions).
Regardless of the method, cut or break your pine needles into smaller pieces, roughly 1-2-inch segments, for best results. This increases surface area and allows for better infusion and a stronger scent.
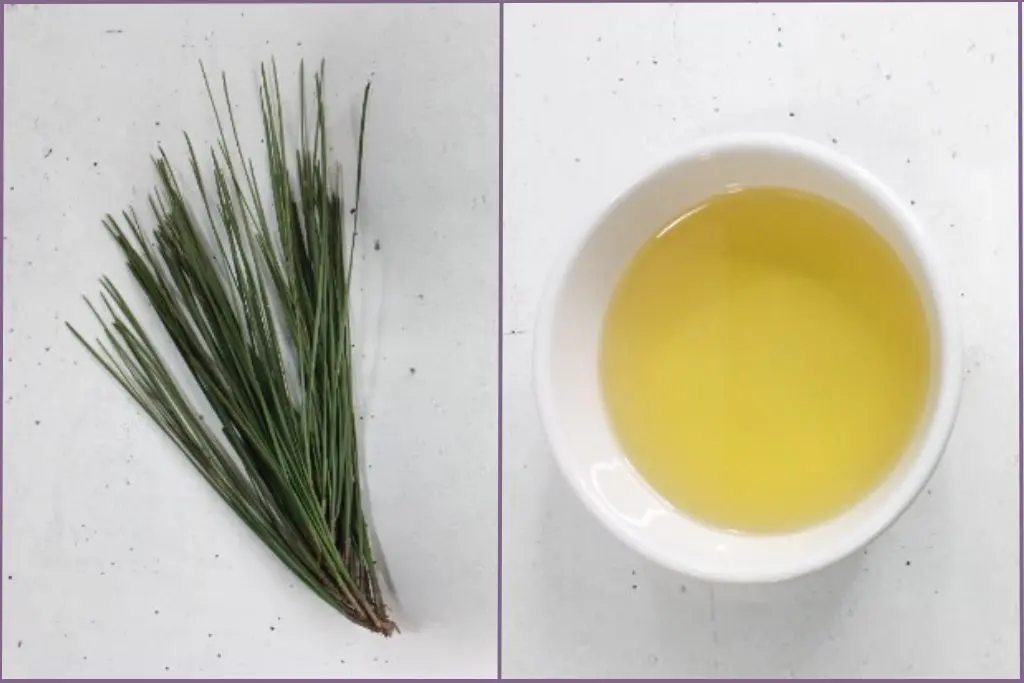
I wanted to experiment with full and cut pine needles. For this infusion, I used the full needles, and yes, it did make a difference. The infused oil had a lighter scent.
For the carrier oil, choose a light, skin-friendly oil that won’t overpower the pine scent. Good options include:
- Jojoba Oil – Longest shelf life, absorbs easily, excellent for skincare applications
- Sweet Almond Oil – Light, easily absorbed, moisturizing, pleasant for overall use and as a massage oil
- Fractionated Coconut Oil – Light, non-greasy, and odorless
- Olive Oil – Nourishing, adds a richer, earthy note (ideal for home or craft use).
Method 1: Cold Infusion Method To Make Pine Needle-Infused Oil

The cold infusion method is the traditional, time-tested approach that produces a beautifully aromatic oil with no risk of heat damage. It involves 4-6 weeks of infusing time with minimal active time.
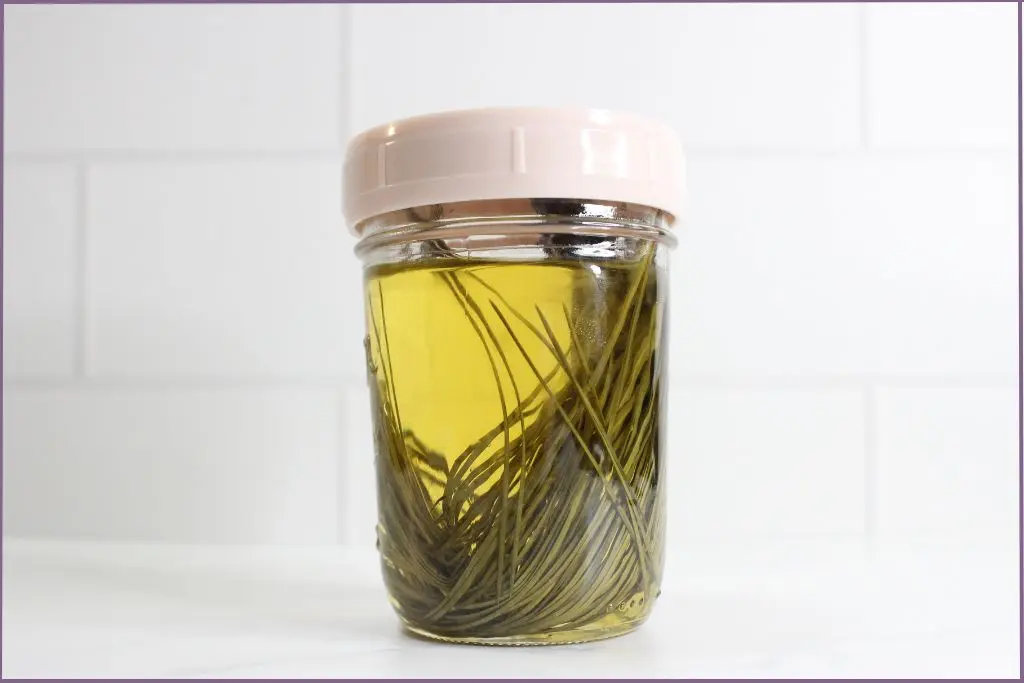
Step 1: Fill Your Jar
Place your prepared pine needles into a clean, dry glass jar. Fill the jar between halfway and three-quarters full. Don’t pack them too tightly. You want the oil to circulate around the needles.
Step 2: Add Your Carrier Oil
Pour your chosen carrier oil over the pine needles until they’re completely submerged. Continue pouring until you have about 1 inch of oil above the top layer of needles. This ensures all plant material stays submerged throughout the infusion process.
Step 3: Release Air Bubbles
Use a clean chopstick or wooden skewer to gently stir and poke around in the jar, releasing any trapped air bubbles. Air pockets can lead to mold development, so take your time with this step.
Step 4: Label Your Jar
Write the date, contents, and oil type on a label and attach it to your jar. Trust me, after a few weeks, you’ll be glad you labeled it!
The date is important to keep track of the shelf life. The oil type is important if you’re make different types of herbal infusions.
Step 5: Choose Your Infusion Location
You have two options here:
- Sunny Spot Method: Place your jar in a warm, sunny windowsill. The gentle warmth from the sun helps the infusion process. Check daily for condensation on the inside of the jar, which can indicate moisture issues.
- Cool, Dark Method: Keep your jar in a cool, dark cupboard. This method takes slightly longer but eliminates the risk of sun damage or heat-related degradation of the oil.
Step 6: Shake Daily
Once a day, give your jar a good shake. This redistributes the plant material and ensures even infusion. It’s also your opportunity to check for any signs of mold or spoilage.
Step 7: Monitor Your Infusion
Check your jar every few days for:
- Bubbles rising to the surface (could indicate fermentation)
- Cloudiness (could indicate moisture)
- Mold growth (fuzzy spots on needles or surface)
- Unpleasant odor (should smell fresh and piney)
If you notice any of these issues, discard the batch and start fresh. Do not attempt to salvage moldy pine-infused oil. The mold spreads quickly throughout the contents and is impossible to remove completely once it forms.
Step 8: Strain After 4-6 Weeks
After 4-6 weeks, your oil should have taken on the rich, forest-like scent of pine. The needles will likely have lost most of their color. Time to strain!
Place a cheesecloth or muslin cloth over a clean bowl or measuring cup. Pour the oil and needles through the cloth. Gather up the edges of the cloth and squeeze firmly to extract every last drop of infused oil from the needles.
Step 9: Bottle and Store
Using a funnel, pour your finished oil into dark glass bottles. Amber or cobalt blue glass protects the oil from light degradation. Label with the contents and date.
Tips for Success When Using The Cold Infusion Method
Prevent water from entering the infusion: Moisture is the enemy. Any water introduced to your infusion can cause mold. Make sure everything is completely dry before starting and that no water accidently enters the infusion.
Shake the bottle with the infusion every day: Daily agitation ensures even infusion and helps prevent settling.
Be patient: Avoid the temptation of straining the infusion early. Keeping the needles steeped in coil for the full 4-6 weeks allows for maximum infusion of aromatic compounds.
Double infusion for stronger oil: After straining, you can add fresh pine needles to the already infused oil and repeat the process for a more concentrated result.
The cold infusion method produces a light, delicate scent that feels natural and balanced, perfect for body care recipes and massage oils.
Method 2: Heat Infusion (Quick Method)
If you don’t want to wait 4-6 weeks, the heat infusion method produces usable oil in just a few hours. While the aroma may be slightly less complex than cold-infused oil, it’s still beautifully fragrant and perfectly effective.
This method involves a few hours infusion time but about 2 to 4 hours active time during the process.
Step 1: Set Up Your Heat Source
You can use either:
- Double boiler: Place a heat-safe glass or ceramic bowl over a pot of simmering water
- Slow cooker: Set to the lowest setting (ideally “warm” if available)
Step 2: Combine Needles and Oil
Add your prepared pine needles to your heat-safe container, then pour carrier oil over them using the same ratios as the cold infusion method (needles should be completely submerged with extra oil on top).
Step 3: Heat Gently
This is the critical step: you want to keep the temperature between 100 -120°F (38 – 49°C). Any hotter and you risk degrading the aromatic compounds and the carrier oil itself.
- If using a double boiler, keep the water at a bare simmer (not a rolling boil)
- If using a slow cooker, check the temperature with a thermometer and adjust as needed
- Never let the mixture bubble or simmer
Step 4: Infuse for 2-4 Hours
Let the mixture infuse gently for 2-4 hours, stirring occasionally. You’ll notice the oil taking on a greenish tint and the pine aroma intensifying. Some people prefer to do multiple short sessions (1 hour on, 1 hour off) to prevent any risk of overheating.
Step 5: Strain While Warm
When your infusion time is complete, strain the oil while it’s still warm (it flows more easily). Use the same cheesecloth method described in the cold infusion section, squeezing to extract all the oil.
Step 6: Cool and Bottle
Allow the oil to cool completely before bottling in dark glass containers. Hot oil can create condensation when bottled, which introduces moisture.
With the heat infusion method, your pine needle oil will be ready to use in hours instead of weeks, and the results will be reliable and predictable. This is a great option for last-minute gift projects.
The downside is that it requires active attention during the process to prevent the risk of overheating.
Best Practices for Heat Infusion
- Use a thermometer: Don’t guess at the temperature—invest in an inexpensive kitchen thermometer
- Stay nearby: Check the temperature every 20-30 minutes
- Don’t rush: Lower and longer is better than hotter and faster
- Test frequently: After 2 hours, strain a small amount and test the scent. If it needs more time, continue heating
he warm method gives a stronger scent and deeper color, ideal for candles, scrubs, and holiday-themed crafts.
If the infused oil doesn’t smell very strong, it could be due to a couple of different factors:
- Not enough plant material – try filling your jar 3/4 full next time
- Infusion time too short – give it the full 4-6 weeks
- Old or improperly stored needles – use fresh or recently dried needles
- Wrong pine species -some varieties are less aromatic than others
Quick solution: Try a double infusion. Strain the first infusion, add fresh needles, and infuse for another 4-6 weeks.
How To Store Homemade Pine Needle-Infused Oil
Once your pine oil is ready, proper storage will help preserve its fresh forest scent and extend its shelf life.
These are the best practices for storage:
Store in Dark Glass Bottles: Transfer your strained oil into a dark amber or cobalt glass bottle. These protect it from sunlight, which can fade both the color and scent over time. Avoid clear containers unless the oil will be kept in a dark cabinet.
Keep It Cool and Dry: Store your bottle in a cool, dark place such as a pantry or drawer away from direct sunlight, moisture, or heat sources like the stove. Ideal storage temperature is room temperature or slightly cooler.
Label and Date: Always label your bottle with the date and type of pine used. This makes it easy to track how long it’s been stored and to compare scent variations if you make multiple batches.
The shelf life of the infusion oil depends on the carrier oil you use:
- Jojoba or fractionated coconut oil: up to 12 months
- Sweet almond or olive oil: around 6–9 months
If the oil starts to smell “off” or cloudy, it’s time to make a fresh batch.
Tip: Keep a small portion in a dropper bottle for everyday use, and store the rest tightly sealed until needed. This prevents the entire batch from getting spoit prematurely due to contamination.
X Ways to Use Pine Needle Infused Oil
Once you’ve made your pine needle-infused oil, there are several ways to enjoy its clean, grounding scent. Its subtle forest aroma makes it a wonderful addition to aromatherapy-inspired crafts, natural home blends, and DIY self-care recipes.
Here are some of the most popular and creative ways to pine oil infusion grouped into categories:
For Aromatherapy & Home Fragrance
Add to a reed diffuser
Use this infused oil in place of your regular carrier in a reed diffuser blend.
If it feels too thick, thin with a little alcohol-based diffuser base such as perfumer’s base or ethanol alcohol. Alcohol thins heavier oils, so the blend wicks through reeds. It also helps lift the aroma into the air through evaporation.
For a richer aroma, add a few drops of a complementary essential oil like cedarwood, fir, or juniper. Link to your full reed diffuser guide for ratios and steps.
Note: Do add infused oil into an ultrasonic or portable diffuser. Use pine essential oil for those devices.
Use In An Oil Warmer
Add a tablespoon of pine needle-infused oil to your oil warmer. The gentle heat releases a soft, forest-fresh aroma. If the oil feels thick, thin it with a little perfumer’s alcohol or isopropyl alcohol so it warms evenly. For a deeper scent, add 1–3 drops of cedarwood or fir essential oil.
Refresh wooden surfaces
Use your infused oil as a natural wood polish for cutting boards or wooden furniture. It adds a soft sheen and a light pine fragrance that feels like the outdoors brought inside.
Natural Air Freshener
Simmer a few tablespoons in a small pot of water on the stove for a natural air freshener. This is especially lovely during the holidays or when you want to bring the scent of evergreens indoors.
Drawer or closet sachets
Dab a teaspoon of infused oil onto wool dryer balls or small cotton pads. Tuck into drawers or closets for a soft forest scent. Refresh monthly.
To prevent the oil from coming in contact with your clothes or other surfaces, keep the cotton pads in a small glass bowl or open jar.
Car diffuser
Add a few drops to an unscented felt or wood vent clip. Reapply weekly for a steady, subtle aroma.
For DIY Body Care
Massage oil
Use pine needle-infused oil as your base massage oil. It’s grounding and fresh. For extra glide, blend with sweet almond or fractionated coconut oil.
Warm a small amount between your palms and massage into your shoulders, back, legs, or anywhere that feels tense.
Optional: add 2–4 drops cedarwood or fir essential oil per tablespoon for a rejuvenating body oil that smells clean and woodsy.
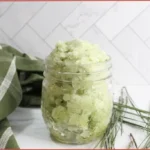
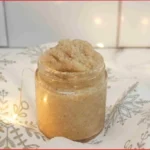
Sugar Or Salt Scrubs
Use the infusion as the base for homemade scrubs. It pairs beautifully with ingredients like brown sugar, sea salt, or crushed herbs. (You can link internally to your Pine Sugar Scrub Recipe here.)
Whipped Body Butter
Add it to your next batch of whipped body butter for a natural, earthy fragrance with a touch of the forest.
Bath oil
Stir 1–2 teaspoons into a warm bath for a nature-inspired soak that leaves skin lightly scented with pine. For better dispersion, mix the oil first with a little liquid castile soap or polysorbate 20.
The scent is especially wonderful during cold months when you’re craving a connection to nature.
Body Oil
Apply a small amount after showering while skin is damp. It seals in moisture and leaves a clean, forest-fresh scent. Patch test if you have sensitive skin.
Hair and Scalp Treatment
The cleansing aroma of pine makes this oil appealing for hair care. Massage into scalp before shampooing, or add a small amount to damp hair ends as a leave-in treatment.
Salve Base
Pine needle-infused oil creates wonderful salves for outdoor adventures. Combine with beeswax and optional calendula oil for a protective balm.
Melt infused oil with beeswax pastilles, pour into tins, and allow to solidify.
For Crafting & Gifting
Scented Ornaments
Soak wooden ornaments or pine cones in pine needle-infused oil for a few hours. Let the excess drip off on a rack, and place on parchment to dry before stringing. Hang your pine ornaments on the Christmas tree as naturally scented decorations.
Refresh with a few drops as needed.
Add to handmade soap recipes
Incorporate pine needle oil into cold process or melt-and-pour soaps for a gentle pine aroma that’s perfect for winter or cabin-themed collections.
Pair with cedarwood or orange essential oil for extra lift.
Pine Needle Oil Benefits
What makes pine so special is its versatility across the seasons. In winter, the fragrance feels cozy and comforting, evoking images of snow-covered trees and crackling fires. In spring or summer, it adds a clean, outdoorsy freshness to your DIY blends and home projects.
Here are a few ways this handcrafted oil adds value and atmosphere to your home and self-care routine:
Naturally refreshing aroma: Bright, resinous scent that makes rooms feel open, clean, and connected to nature, especially during the colder months when you spend more time indoors.
Calm and grounding: Evokes the quiet stillness of evergreen forests, perfect for mindful moments that help you slow down and reconnect with your surroundings in baths, balms, or candles.
Seasonal project boost: Adds authentic, woodsy depth to soaps, scrubs, and winter crafts, giving your creations a natural, forest-inspired scent that feels both cozy and elegant.
Thoughtful gifting: Makes handmade items feel personal, intentional, and cozy for the holidays – perfect for holiday gifting or nature-inspired gift sets
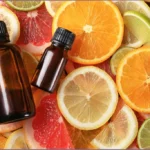
The aroma pairs beautifully with other seasonal scents such as sweet orange, cedarwood, clove, cinnamon, and frankincense, making it an ideal base for festive diffuser blends, body scrubs, and candles.
Just a few drops of pine infused oil can instantly transform a simple project into something that smells like a walk through a forest after fresh snowfall.
Pine needle-infused oil is more than a DIY, it’s a way to bring the calming, refreshing energy of nature into your everyday moments.
Gift Ideas Using Pine Needle Infused Oil
Pine needle-infused oil makes a beautiful addition to handmade gifts, simple, natural, and full of cozy, forest charm.
Whether you bottle it on its own or include it in a themed set, it’s a thoughtful way to share the scent of the season.
Forest-Inspired Aroma Gift Set
Pour your homemade infusion into an amber dropper bottle, tie it with twine, and label it Forest in a Bottle. Slip in a tiny card with blend ideas, like pine + cedarwood for calm evenings or pine + orange + clove for cozy mornings. Add a small roller bottle so they can carry the scent on the go.
Winter Forest Spa Gift Set
Build a simple ritual for cold days: pine bath salts, a pine sugar scrub, and your infused oil to seal in moisture after a warm soak. Pack everything in a rustic wooden box lined with shredded paper. Finish with jute twine, a pine sprig, and a cinnamon stick for a quiet holiday touch.
Maker’s Bundle
For DIY lovers, pair your pine infusion with a recipe card for salves, balms, or massage blends. Include a small tin, a wooden spoon, and a handful of beeswax pellets to get them started. Add a short list of scent pairings like fir, eucalyptus, and sweet orange to spark ideas.
Cabin Shelf Set
Create a display that looks good and gets used. Bottle the oil in pretty glass, add a tiny vial of whole pine needles, and tuck in a bar of pine soap wrapped in kraft paper. Nest the pieces in a shallow tray or basket so they can live on a bathroom shelf as useful decor.
DIY Soap Maker’s Gift
For friends who love crafting, package a melt-and-pour soap base with a small bottle of your pine-infused oil for a gentle, skin-friendly boost. Add a few essential oils like orange, clove, or cedarwood, plus simple silicone soap molds. Include a quick card: melt base, stir in a small amount of infused oil and a few drops of essential oil, pour, and cool.
Safety and Precautions When Making & Using Homemade Pine Infused Oil
While pine needle-infused oil is generally gentle, a few simple precautions will help keep your projects safe and enjoyable:
Choose Safe Pine Varieties: Only use non-toxic pine species such as Scots pine, white pine, or ponderosa pine. Avoid yew, Norfolk Island pine, and other ornamental evergreens that can be toxic.
Patch Test Before Use: If using on skin, always do a small patch test on the inner arm first to ensure there’s no irritation or sensitivity.
Keep It Clean and Dry: Ensure pine needles are fully dry before infusing to prevent mold or spoilage. Always use clean, dry jars and bottles for the best results.
Store Safely: Keep your finished oil in a cool, dark place and out of reach of children and pets.
Avoid Internal Use: This oil is intended for external use only — in crafts, topical blends, or home fragrance projects.
Sun Sensitivity: While pine infused oil itself is not photosensitizing, some carrier oils may increase sun sensitivity. If using on skin before sun exposure, choose a non-photosensitizing carrier like jojoba or fractionated coconut oil.
Making your own pine needle-infused oil is a simple, rewarding way to capture the scent of the forest and bring it into your home. With its crisp, woodsy aroma and natural freshness, this oil adds a grounding, outdoorsy touch to your DIY body oils, scrubs, and candles.
The key to success is proper identification of safe pine species, thorough drying of materials, and patience during the infusion process. Start with a small batch to familiarize yourself with the process, then scale up once you’re confident. Before you know it, you’ll have a collection of pine-scented products that would make wonderful gifts or additions to your personal care routine.
Related Posts You’ll Love
If you enjoyed making infused oil with pine needles, try these other easy pine-inspired DIYs to fill your home with the fresh scent of the forest:
DIY Pine Sugar Scrub – Exfoliate and refresh your skin with the clean, woodsy scent of pine.
How to Make Pine Soap – A gentle, aromatic soap that captures the essence of winter forests.
Pine Diffuser Blends – Bring the outdoors in with fresh, uplifting diffuser combinations.
Essential Oils That Smell Like Christmas Trees – Discover more evergreen scents that create a cozy, festive atmosphere.
Each of these recipes pairs beautifully with your homemade pine infused oil, perfect for natural self-care, gifting, or simply enjoying the scent of nature indoors.
FAQ – Pine Needle Infused Oil
Should I use fresh or dried pine needles for the infusion?
Both work well. Fresh needles produce a more vibrant aroma but must be wilted or air-dried first to reduce moisture content. Dried needles are safer for beginners because they carry no risk of introducing water to your oil.
If you’re just starting out, dried needles are the better choice.
Can I use any type of pine needles for infusion?
No, not all pine species are safe for topical use. Stick to known safe varieties like Eastern White Pine, Scots Pine, and Red Pine. Avoid Ponderosa Pine, Norfolk Island Pine, and Yew (which isn’t a true pine but is often confused with one). Always positively identify your pine species before harvesting.
Also make sure the tree is a true pine (not spruce or fir) and that it hasn’t been sprayed with pesticides or chemicals.
Can I infuse pine cones or bark along with needles?
While you can technically infuse other parts of the pine tree, needles are preferred because they contain the highest concentration of aromatic compounds and are easiest to harvest sustainably. Pine cones contain a lot of resin that can make your oil sticky, and bark requires more extensive knowledge to harvest without harming the tree.
Can I combine pine needles with other herbs?
Absolutely! Pine pairs beautifully with:
– Rosemary for an invigorating blend
– Lavender for a more relaxing aroma
– Cedar for enhanced woodsy notes
– Eucalyptus for a refreshing combination
Make sure all plant materials are properly dried or wilted before infusing.
How long after making it can I use the oil?
You can use it immediately after straining and bottling. The infusion process is complete once you’ve strained out the plant material.
Can I reuse the pine needles after straining?
No, the needles would have given up their aromatic compounds and should be composted or discarded. They won’t produce a second effective infusion.
Can I use pine essential oil instead of infusing needles?
You can but the two have different features, purposes, and precautions. Pine essential oil is more concentrated and works well for stronger fragrance in candles or room sprays. But the infused oil offers a softer, more natural scent ideal for body oils and gentle DIY recipes.
How do I know if my oil has gone bad?
Trust your nose, rancid oil smells distinctly “off” rather than fresh and piney. Other signs include cloudiness, visible mold, or unusual texture. If you notice any of these signs, discard the oil and make a fresh batch.
My oil developed mold. Can I remove the mold and use the remaining oil?
No, discard any batch that shows signs of mold. Mold in oil can be dangerous and the spores may have contaminated the entire batch even if you don’t see visible growth throughout. Start fresh with completely dry materials.