Rich, nourishing, and customizable, DIY cuticle balm with shea butter brings together the best of natural ingredients in a form that feels indulgent yet practical.
Our hands go through a lot every day. Frequent washing, exposure to the elements, and constant use often leave cuticles feeling dry and nails looking dull. While a light cuticle oil is perfect for quick daily hydration, sometimes your hands need something richer and more indulgent.
This DIY cuticle balm, formulated with shea butter, is designed for luxurious nail care.

✨ Get 12 Free Holiday Diffuser Blends — Printable PDF
Instantly make your home smell like Christmas with these festive, ready-to-use recipes.
With its creamy texture and nourishing blend of shea butter, beeswax, and natural oils, this balm melts into the skin to soften rough cuticles, condition nails, and leave your hands feeling cared for. Think of it as a spa treatment you can keep in a tiny container, luxurious, portable, and completely natural.
Whether you’re pampering yourself before bed, protecting your nails during winter, or creating thoughtful handmade gifts, this cuticle balm is the perfect way to elevate your nail care routine.
Table of Contents
Affiliate Disclosure: Some links on this site are affiliate links. I may earn a small commission if you purchase through them, at no extra cost to you. See the full affiliate disclosure.
Why Choose Cuticle Balm Vs Cuticle Oil?
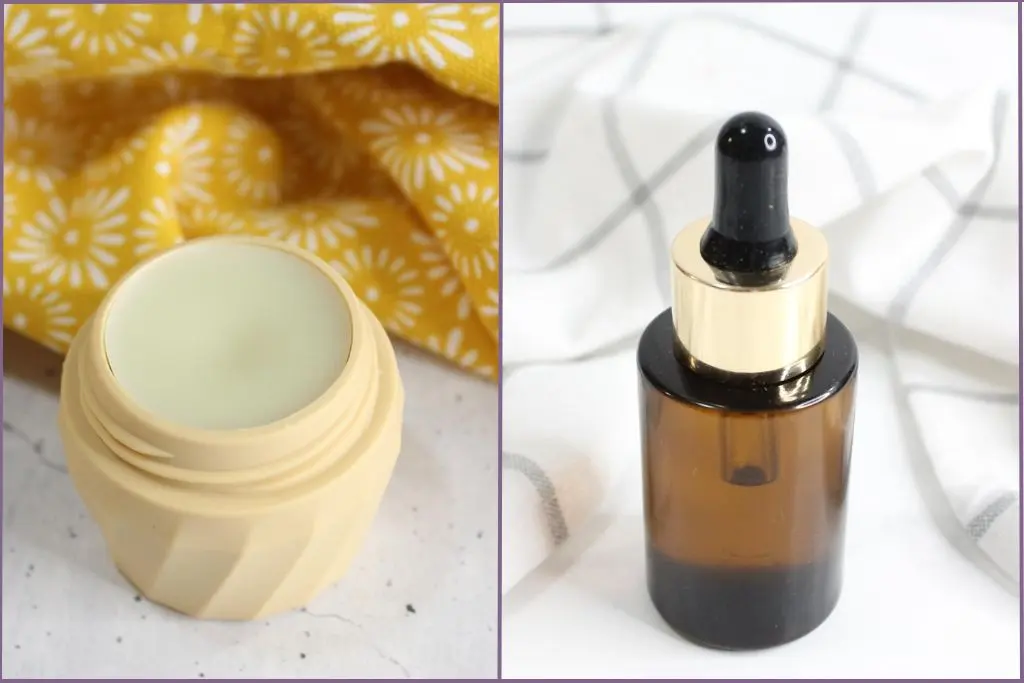
When it comes to nail care, both cuticle oils and cuticle balms have their place.
A cuticle oil is lightweight, liquid, and absorbs quickly. It is a convenient option for everyday use.
A Cuticle Balm has a thicker, richer texture and a stronger protective barrier thanks to ingredients like shea butter and beeswax.
This makes it the better option for:
- Intensive hydration – Perfect for repairing dry, cracked, or rough cuticles.
- Long-lasting protection – Beeswax creates a natural barrier, locking in moisture and shielding against dryness.
- Seasonal care – Especially helpful in winter when hands are prone to extra dryness.
- At-home spa feel – The creamy consistency makes application feel indulgent, like a mini treatment for your hands.
Think of cuticle balm as your overnight treatment or winter companion, while cuticle oil is your daily quick fix. Having both means your nails and hands always get the right kind of care.
DIY Cuticle Balm: Key Ingredients and Their Benefits
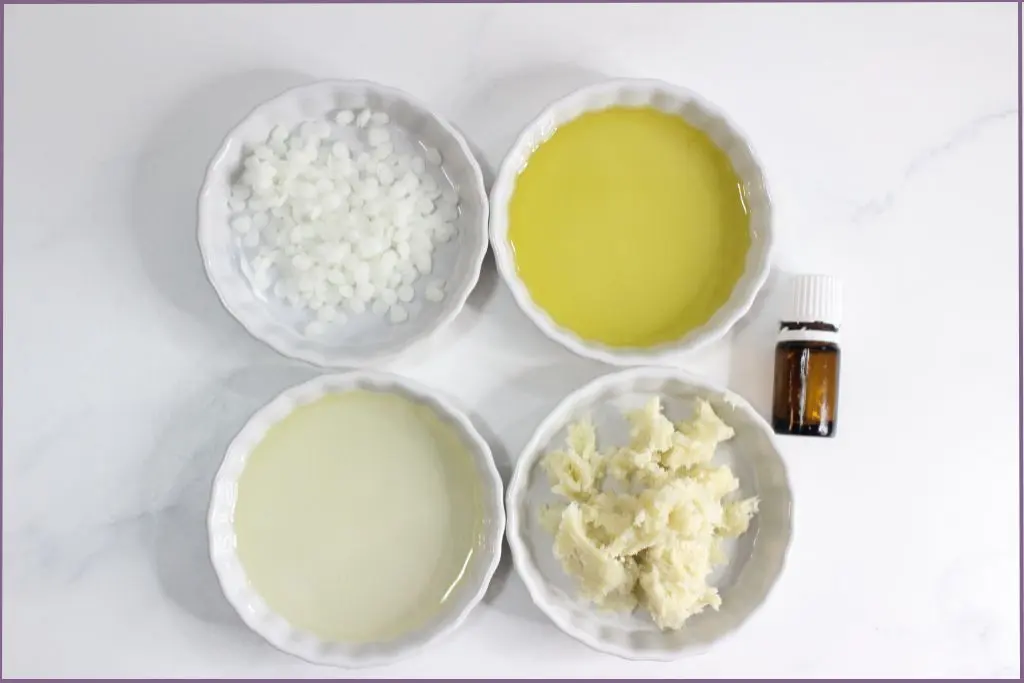
Measure these ingredients for approximately 2 ounces of balm. This amount will fill several small tins or tubes, perfect for keeping one at home and another in your bag.
- 2 tablespoons Shea Butter
- 2 tablespoons Argan Oil
- 2 tablespoons Jojoba Oil
- 1 ½ tablespoons Beeswax Pellets
- 10 drops Essential Oil
- Small Balm Containers
What makes this DIY cuticle balm so effective is the blend of rich butters, protective waxes, and nourishing oils.
Each ingredient plays a role in softening cuticles, conditioning nails, and hydrating the skin. Together, they give your hands that cared-for, spa-like feel.
Shea Butter – The star of this recipe, shea butter is deeply moisturizing and helps soften even the roughest cuticles. Its creamy texture gives the balm a rich, luxurious feel. That signature “buttery” feel in homemade cuticle balm comes straight from shea butter, and you can really notice the difference in hydration.
Beeswax – Adds structure to the balm while creating a natural barrier that locks in moisture and protects cuticles from drying out.
Argan Oil – Often called “liquid gold”, argan oil is prized in skincare for its high vitamin E content and lightweight feel. It glides on smoothly and sinks into the skin without feeling greasy, delivering instant moisture exactly where you want it.
Jojoba Oil – Another moisturizing staple, the texture of jojoba oil closely resembles the skin’s natural oils, which helps it absorb beautifully. Jojoba heals, soothes, and balances dry cuticles, and is gentle enough for daily use. This oil delivers lasting moisture, making it the perfect addition to this cuticle balm recipe.
Essential Oils (Optional) – Essential oils give your homemade cuticle balm a signature scent while also enhancing its own nourishing properties. Lavender, tea tree, and lemon are popular choices for cuticle care. Lavender, lemon, or tea tree essential oil can add a beautiful scent and make the balm feel even more indulgent.
Herbal-Infused Carrier Oils (Optional Twist) – Swap in one of your own infused oils to personalize the balm. For example, rose-infused oil adds a delicate floral note and a touch of luxury, while calendula-infused oil is soothing and calming, perfect for dry or brittle cuticles.
Together, these ingredients create a balm that looks and feels luxurious and keeps your hands look naturally beautiful.
Step-by-Step DIY Cuticle Balm Recipe with Shea Butter
Ready to create your own spa-worthy DIY cuticle balm? With shea butter as the star, this method transforms natural oils and beeswax into a rich, luscious treatment for both cuticles and nails. The hands-on process is simple, and you’ll love the results: nourished, silky skin and a sense of everyday luxury.
Step 1: Combine All Ingredients And Melt

Add the argan oil, jojoba oil, beeswax, and shea butter to a heat-safe glass measuring cup or jar. Melt slowly using a double boiler (preferred) or in the microwave in short bursts.
Low, gentle heat is key for a silky smooth blend. Beeswax does take the longest to melt but be patient. Don’t try to speed up the process with high heat. Overheating can scorch your oils and cause shea butter to feel waxy or develop a grainy texture later.
If you’re using a microwave, heat in 20–30 second intervals, stirring between bursts until everything is fully melted and the mixture looks clear and uniform.
A double boiler gives you more control and helps prevent hotspots. Keep water out of the jar as moisture can affect the texture and shelf life of the cuticle balm.
If you want to personalize the recipe, this is also the moment to swap part of the carrier oils with an infused oil such as rose (for a luxe feel) or calendula (for extra soothing).
Step 2: Cool Slightly, Then Add Essential Oils (Optional)

While essential oils are optional, adding them allows you to personalize this DIY cuticle balm recipe and make it truly your own.
Essential oils like lavender or tea tree bring calming or clarifying properties, while citrus oils such as lemon offer a crisp, clean fragrance.
If you decide to add essential oils, remove the container from the heat and let the mixture cool for a few minutes until it’s warm, not hot, to the touch. This short pause matters.
Essential oils are aromatic and volatile, so adding them to very hot oil can dull the scent as they evaporate quickly.
A simple test is to hold the glass comfortably in your hand. If it’s just warm, you’re ready to add up to 10 drops of your chosen essential oil and stir gently for even distribution.
Even if you’re skipping essential oils, this brief cooling helps prevent texture issues and minimizes condensation when you pour the homemade cuticle balm into the containers.
Step 3: Pour, Set, And Cure

Pour the warm balm into small balm containers or lip balm tubes.
Work slowly and steadily to avoid whipping in the air. Tiny bubbles can leave pinholes in the finished surface.
Let the balm set undisturbed at room temperature until firm, then allow it to cure fully—overnight is ideal—for the smoothest texture and longest wear.
Rapid chilling can cause condensation and a slightly frosted surface, so a room-temperature setting delivers the prettiest result.
Once set, pop the balm out of the mold, label it, and keep it away from heat and direct sunlight to preserve that rich, creamy feel.
That’s it! Use this DIY cuticle oil recipe for a lighter, faster-absorbing alternative.
Tips For The Best Results
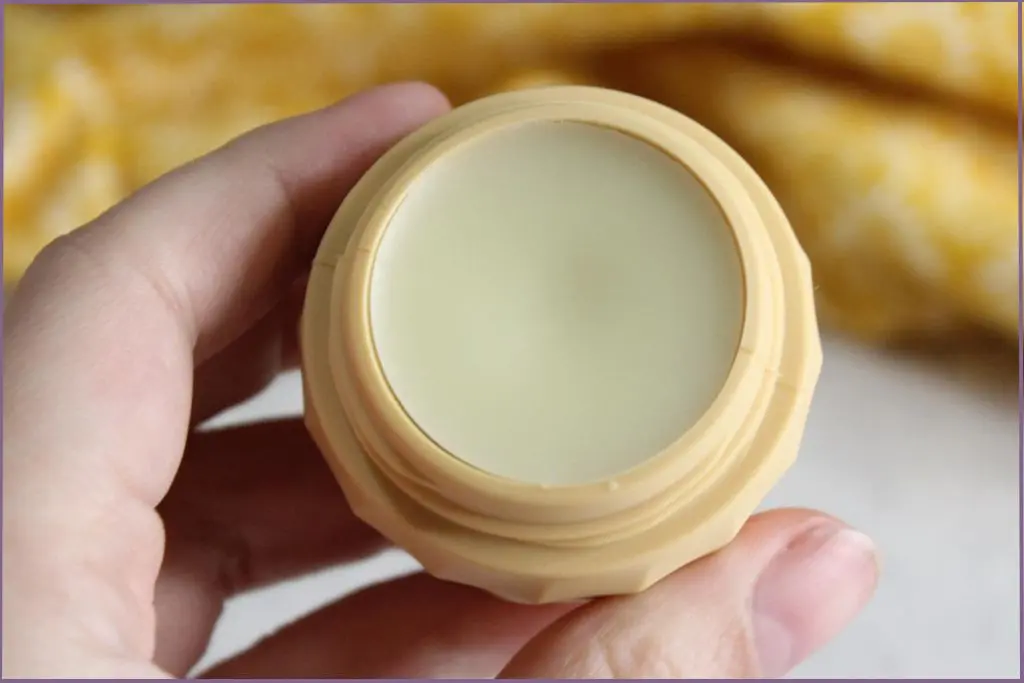
Keep these tips in mind to ensure your homemade cuticle balm with shea butter results in a flawless finish:
- Pour slowly to avoid air bubbles in your finished balm.
- Wipe away any spills before the balm sets for cleaner tins or molds.
- Use only glass or heat-resistant tools and containers to avoid plastic leaching.
How To Customize Homemade Cuticle Balm
Personalizing your DIY cuticle balm is half the fun and turns a basic self-care routine into a luxury spa moment for your nails. With just a few tweaks, you can create a balm that fits your favorite scents, skin needs, and even the seasons.
Whether you want a thicker balm for winter, a refreshing scent for summer, or a special formulation to give as a gift, the options are nearly endless. Here’s how you can customize your cuticle balm recipe to make every use a treat for your hands.
Pick Your Signature Scent
Scents have the power to change your mood and create relaxing routines. Customizing with essential oils lets you set the tone:
- For relaxation: Try lavender, chamomile, or geranium.
- For a fresh boost: Lemon, orange, or peppermint brightens things up.
- For earthy vibes: Patchouli or sandalwood offer a grounding aroma.
- For luxe elegance: Add a blend of rose and jasmine for an exotic, luxurious aroma.
Blend two or three oils for a layered scent you’ll love every time you open your balm. Always add essential oils after your base cools a little, to keep their scent vibrant.
Take this idea to the next level by adding different essential oils in each batch and keep a few variations handy to suit your mood or the season.
Remember, essential oils are highly concentrated, so just a few drops add plenty of scent and benefits.
Adjust Texture and Richness
Do you want a firmer balm for humid climates or a softer, buttery texture for dry skin? Tiny adjustments in your core ingredients make all the difference:
- For a firmer balm: Add a bit more beeswax (¼ teaspoon at a time).
- For a softer, creamier balm: Use less beeswax or add a bit more shea butter or carrier oil.
- To get a glossy finish: Add a small dash of vitamin E oil for shine and extra conditioning.
Test a small batch to nail the perfect texture for your climate and preferences.
Switch Up Carrier Oils
Swap in your favorite carrier oils to tailor hydration and feel. While argan and jojoba are the best carrier oils for homemade cuticle balm, you can substitute or combine them with other oils.
Sweet almond oil is light and silky, avocado oil adds richness, and coconut oil creates a product that feels more solid and tropical.
If your hands are sensitive, stick with jojoba and argan oils for their gentle touch.
Herbal-infused oils are another lovely option. They bring extra soothing and conditioning properties to your DIY cuticle balm recipe. Rose-infused oil brings floral sophistication, while calendula-infused oil adds soothing qualities.
Create Seasonal or Gift Variations
Change up your blend for different occasions:
Winter: Go richer with more shea and coconut oil, and try warm scents like frankincense or cinnamon.
Spring/Summer: Keep it light and bright with citrus oils or add floral notes.
Gifting: Pour into decorative tins, add a label, and tie with a ribbon for a thoughtful, handmade present.
Shimmer dust: Stir in a pinch of eco-glitter or mica for a subtle, elegant sparkle—ideal for gifting.
Dried herbs or flower petals: Mix in tiny pieces of dried calendula or rose petals for beauty and extra soothing power.
Choose Your Container Style
Presentation makes a difference!
Pour your balm into sleek metal tins for a polished, spa-like feel, or use lip balm tubes for an on-the-go version you can slip into your bag.
Silicone molds in fun shapes make the balm perfect for gifting, especially when paired with a homemade hand scrub or cuticle oil.
With a few thoughtful tweaks, your DIY cuticle balm becomes more than just a nail treatment. It’s a personalized self-care ritual or a gift that feels truly special.
How to Store Homemade Shea Butter Cuticle Balm

Homemade cuticle balm, rich with natural oils and butters, deserves thoughtful storage so it stays fresh and effective. Unlike commercial products, your balm contains no harsh preservatives, so a few simple habits keep it in top shape.
Use airtight containers: Choose metal tins, glass jars, or sturdy silicone molds with tight lids.
Keep out of direct sunlight: Store balm in a cool, dry drawer or cabinet to maintain texture and prevent melting. Bathrooms are fine as long as they’re not steamy all day.
Avoid moisture: Always use dry, clean hands or tools when scooping out balm. This helps prevent water from getting into the mix, which can shorten shelf life.
Properly stored, your DIY cuticle balm stays fresh for up to 6 months. If you notice any change in smell or texture, it’s time to whip up a fresh batch.
How to Use DIY Cuticle Balm
While using cuticle balm is pretty straightforward, a couple of preparatory steps can make it even more effective.
Here’s how to make your hands look and feel pampered every day:
- Start with clean hands: Wash and dry hands thoroughly so your balm glides on clean skin and nails.
- Scoop a small amount: Use the tip of a clean finger or a manicure spatula. Less is more; a little goes a long way.
- Massage gently: Rub the balm into each cuticle in small, circular motions. This not only softens skin but boosts circulation, making your nails look instantly neater.
- Focus on dry spots: Pay special attention to areas prone to cracking or peeling.
- Let it soak in: For intensive care, apply before bed and slip on cotton gloves. You’ll wake up to soft, refreshed cuticles.
For on-the-go care, small tins or tubes tuck easily into a bag or desk drawer. Whenever your hands feel rough, apply a quick swipe for an instant boost.
Don’t stop at your cuticles. This cuticle balm recipe balm works beautifully on rough knuckles, dry patches, or anywhere your skin needs a little extra care.
Make it part of your self-care ritual: pair your cuticle balm with a homemade sugar scrub or a quick hand soak for an easy, spa-like routine right at home.
Making your own DIY cuticle balm at home gives you total control over the ingredients while bringing a touch of everyday luxury to your self-care routine. With shea butter, argan oil, and jojoba oil as the foundation, you get deep hydration and a silky feel that store-bought balms rarely match. This simple recipe can be easily adapted to fit your favorite scents, textures, and seasonal needs.
Experiment with essential oils, try new oil blends, or create batches for friends. If you want to discover more ways to personalize and enhance your nail care, take a look at the list of essential oils and their uses for fresh inspiration.
DIY Cuticle Balm With Shea Butter FAQ
What is the benefit of shea butter for cuticles?
Shea butter melts into dehydrated cuticles, leaving them soft and smooth. It holds in moisture, so nails and skin don’t dry or crack. Gentle and rich, it gives your cuticles a healthy look.
Can I use cocoa butter instead of shea butter in this cuticle balm recipe?
Yes, you can. Cocoa butter makes a good swap if you like a firmer balm and a softer scent. The texture will be slightly different, but both types of butters work well for nail and cuticle care.
Does this shea butter cuticle balm recipe help nails grow?
Well-moisturized cuticles support healthy nail beds, which can help nails stay strong and resist chipping. While it won’t make nails grow faster, it helps prevent breakage.
Can I use coconut oil instead of argan or jojoba?
Yes, coconut oil works well, but it will make the balm a little firmer. You can balance it by reducing the beeswax slightly.
How long does homemade cuticle balm last?
When stored in a cool, dry spot and kept sealed, most homemade balms last 6 to 9 months. If you notice a change in smell or texture, it’s best to make a fresh batch.
Can I use this balm on other dry spots?
Yes, dab it on elbows, knees, or rough knuckles. Shea butter softens anywhere your skin feels dry.
