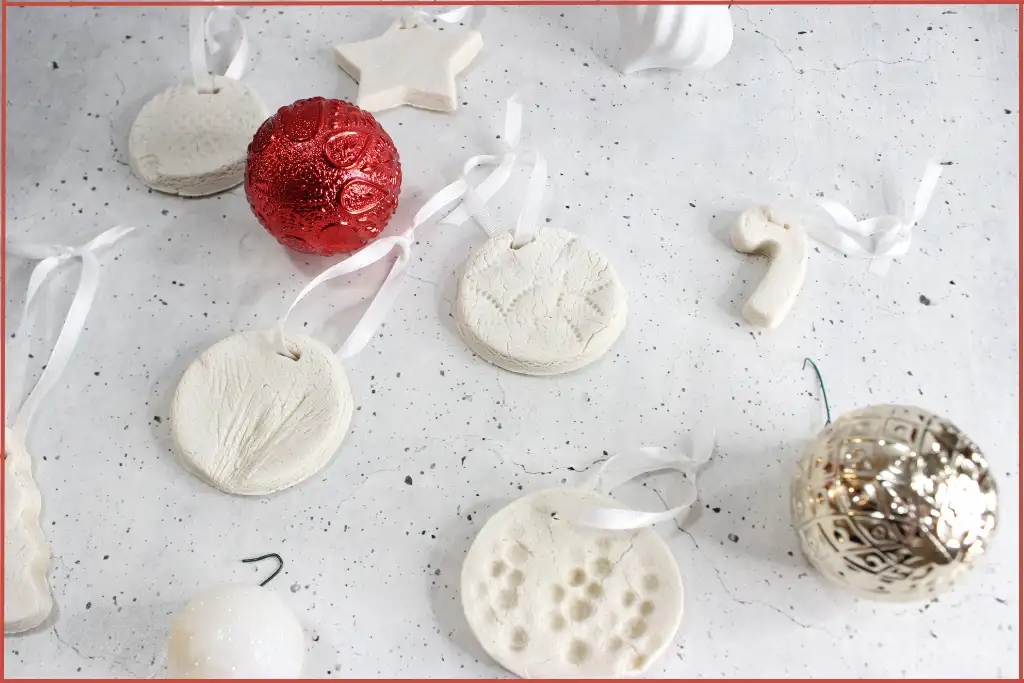
Transform your holiday décor with handmade Christmas diffuser ornaments. Scented with essential oils, these no-cook ornaments fill your home with natural aromas all season long.
This easy DIY project requires just three simple ingredients and your favorite essential oils to create beautiful, aromatic decorations that are perfect for crafting, gift-giving, and eco-friendly holiday decorating.
Table of Contents
Affiliate Disclosure: Some links on this site are affiliate links. I may earn a small commission if you purchase through them, at no extra cost to you. See the full affiliate disclosure.
What Are Christmas Diffuser Ornaments?
✨ Get 12 Free Holiday Diffuser Blends — Printable PDF
Instantly make your home smell like Christmas with these festive, ready-to-use recipes.
Christmas diffuser ornaments are porous, clay-like decorations that absorb essential oils and slowly release their aroma.
The salt dough base creates a naturally porous surface that holds essential oils beautifully. As the oils evaporate, they release their aromatic compounds into the air, gently diffusing festive aromas throughout your space.
What makes diffuser ornaments special is their versatility. You can change their scent throughout the season by simply adding different essential oil blends. They are also completely natural, biodegradable, and free from any artificial fragrances.
Why Choose the No-Cook Method?
Making no-cook diffuser ornaments offers several advantages over traditional baked salt dough recipes. The air-drying process requires no oven, making this craft accessible to anyone, including those in apartments or dorm rooms without baking facilities. It’s also more energy-efficient and safer, especially when crafting with children.
Air-dried ornaments develop a slightly more porous texture than their baked counterparts, which actually enhances their ability to absorb and diffuse essential oils. The slower drying process creates a structure that holds fragrance longer and releases it more gradually.
This method is also incredibly forgiving. There’s no risk of over-baking or burning, and you can check on your ornaments throughout the drying process. The no-cook approach makes this craft perfect for beginners and experienced crafters alike.
Ingredients & Materials For DIY Christmas Diffuser Ornaments

For the Diffuser Ornament Dough:
2 cups All-Purpose Flour – Forms the base structure
½ cup Salt – Creates texture and helps preserve the ornaments (table or sea salt both work)
¾ cup + 2 tablespoons warm water – Binds ingredients together (warm water helps with mixing)
These specific ratios create the perfect consistency for rolling, cutting, and air-drying. The high salt content acts as a natural preservative and helps create the porous texture that makes these ornaments effective essential oil diffusers.
For Shaping & Assembly:
Cookie cutters in various holiday shapes (stars, trees, angels, snowflakes)
Rolling pin for even thickness
Ribbon (natural fibers like cotton, jute, or twine work best)
Straw or wooden skewer for creating ribbon holes
Parchment paper to prevent sticking while drying
For Decorating (Optional):
Fresh pine sprigs for botanical imprints
Rubber stamps or textured fabric for patterns
Natural items like lace, leaves, or twigs
Acrylic paint or watercolors for coloring
Cinnamon sticks or dried orange slices to press into dough
For Scenting Your Ornaments:
Your choice of pure essential oils. For holiday diffuser ornaments, consider these aromatherapy favorites:
How To Make Christmas Diffuser Ornaments Step-by-Step
Step 1: Mix the Dry Ingredients
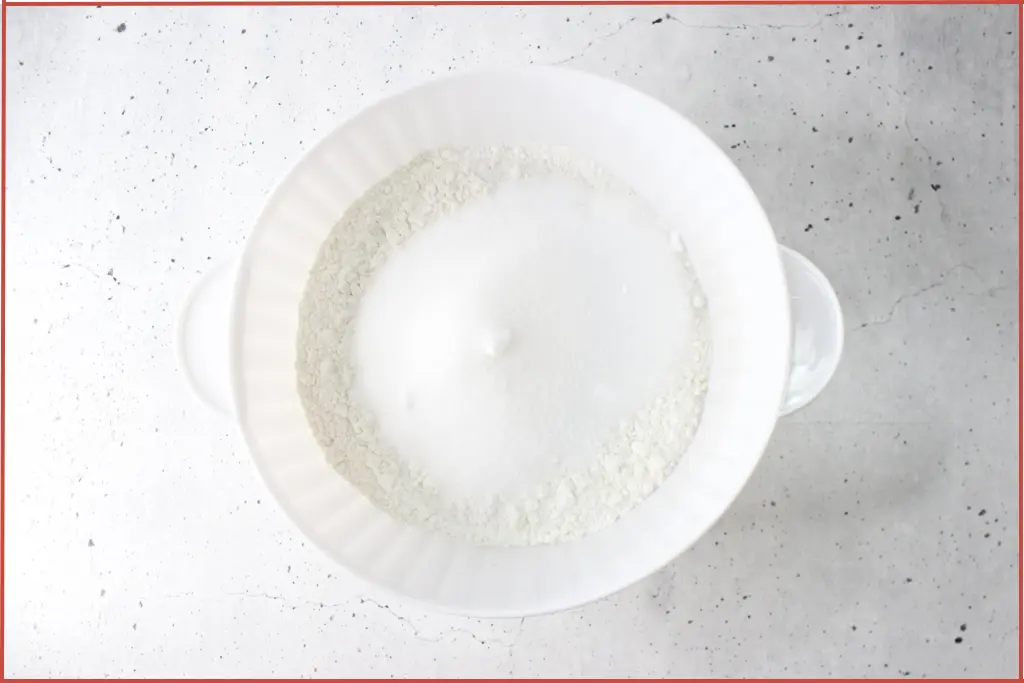
Add 2 cups of flour and ½ cup of salt into a large mixing bowl. Stir these dry ingredients together thoroughly to ensure even distribution.
The salt helps strengthen the dough and gives your ornaments a slightly grainy texture that holds detail well once dry. It also contributes to the porous texture that makes them effective essential oil diffusers.
Step 2: Add the Warm Water
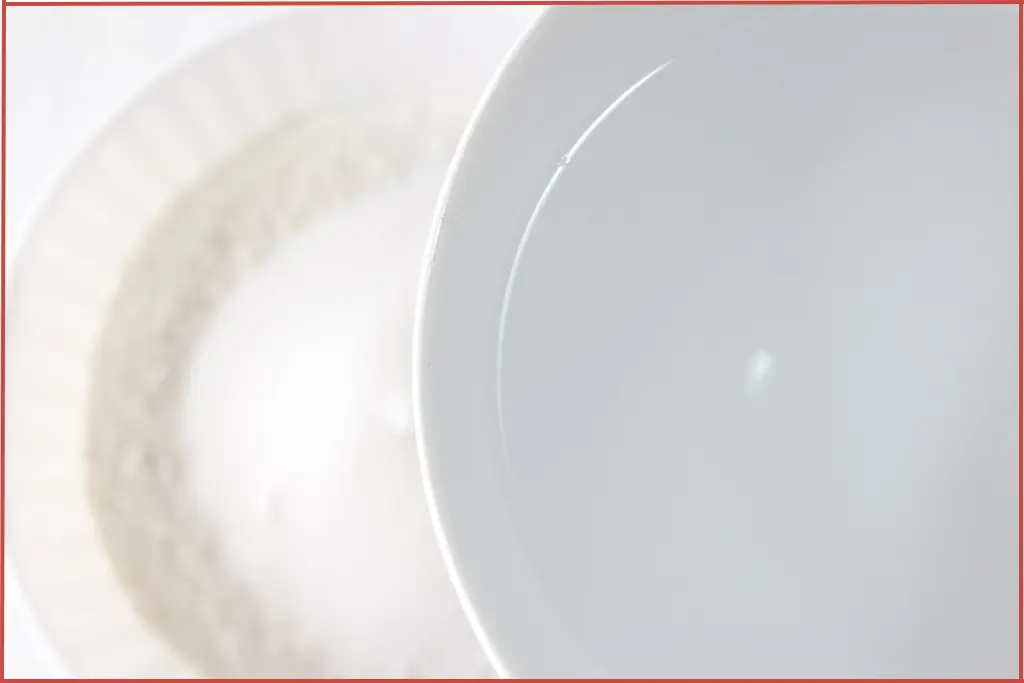
Slowly pour in the warm water, a little at a time. Warm water helps the salt dissolve more effectively, resulting in a smoother dough consistency.
Stir continuously as you add it so the mixture doesn’t become too sticky too quickly. The dough will start to come together, but may look crumbly at first, which is completely normal.
Continue mixing until all the flour is moistened and the mixture starts to come together without falling apart.
If it’s too dry, add another teaspoon of warm water; if it’s too sticky, sprinkle a bit more flour.
Step 3: Knead The Salt Dough Base
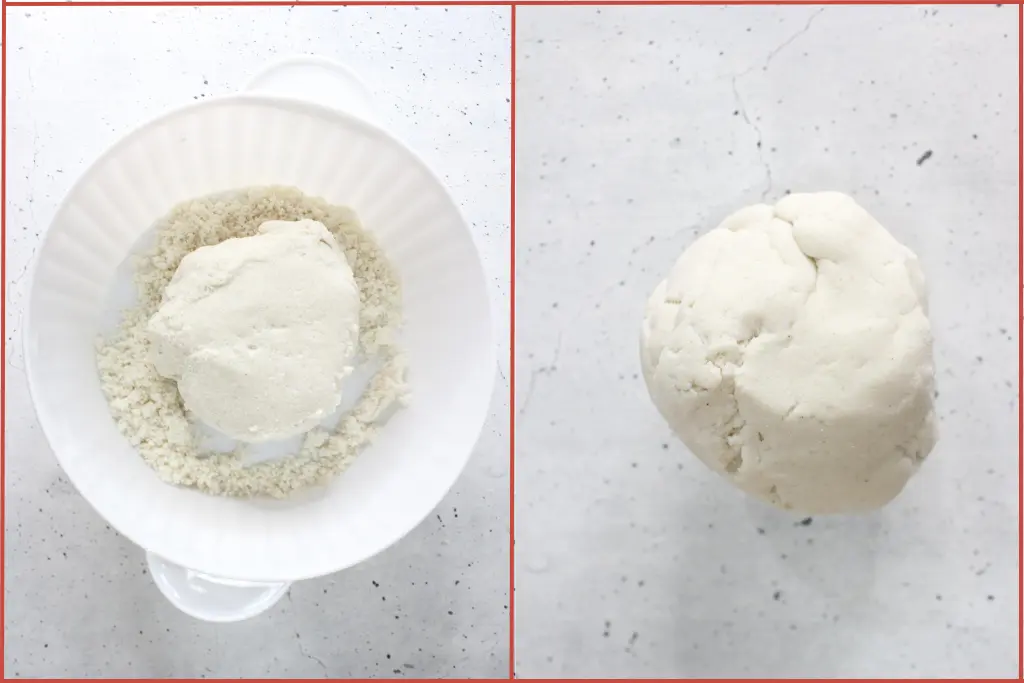
Transfer the dough onto a clean work surface and start kneading. This step is crucial for developing the right texture.
Knead for 8 to 10 minutes until the dough becomes smooth, pliable, and no longer sticky. The kneading activates the gluten in the flour, giving the ornaments strength once dry.
Use the heels of your hands to push and fold the dough, turning it as you go. If the dough sticks to your surface, dust it lightly with flour.
By the end, it should feel soft, pliable, and similar to playdough. It should not crack when you press your finger into it.
If your dough feels too dry and crumbly, add water one teaspoon at a time, kneading thoroughly between additions.
If it’s too sticky, dust your work surface with flour and knead it in gradually.
The perfect consistency will be soft and smooth, but won’t stick to your hands.
Step 4: Roll Out the Dough
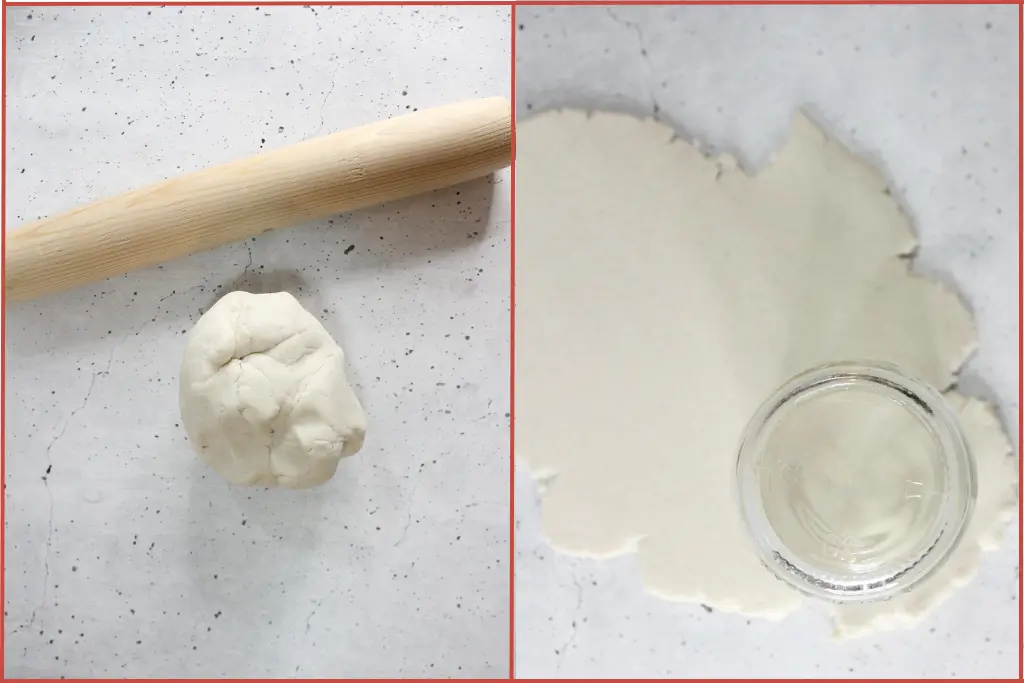
When you finish kneading, roll the dough out on a lightly floured surface to about ¼ inch thickness. A rolling pin works best, but a smooth glass bottle will do in a pinch. Maintain even pressure to avoid thin spots.
A 1/4-inch thickness is ideal. It’s thin enough to dry thoroughly but thick enough to be durable and hold essential oils well.
Too thin and they’ll be fragile; too thick and they’ll take much longer to dry.
Step 5: Cut Out Christmas Ornament Shapes
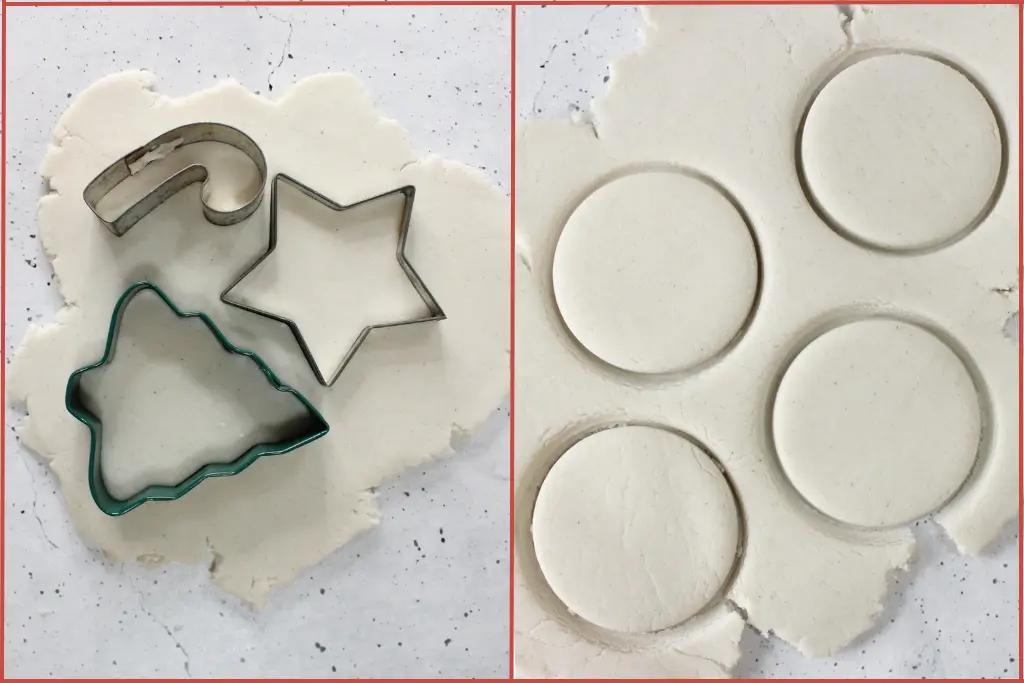
Now for the fun part! Use cookie cutters to cut out shapes that make you smile. Press firmly and straight down, then lift the cutter carefully.
Traditional holiday shapes like stars, Christmas trees, angels, and snowflakes work beautifully as diffuser ornaments.
For circular ornaments, press the mouth of a mason jar into the dough.
Lift each shape carefully with a flat spatula so you don’t distort the edges. This is a great step to involve kids, who love choosing their favorite shapes.
Tip: Keep a damp cloth nearby to cover unused dough while you work; it prevents the surface from drying out before you’re done cutting.
Step 6: Add Natural Imprints or Designs
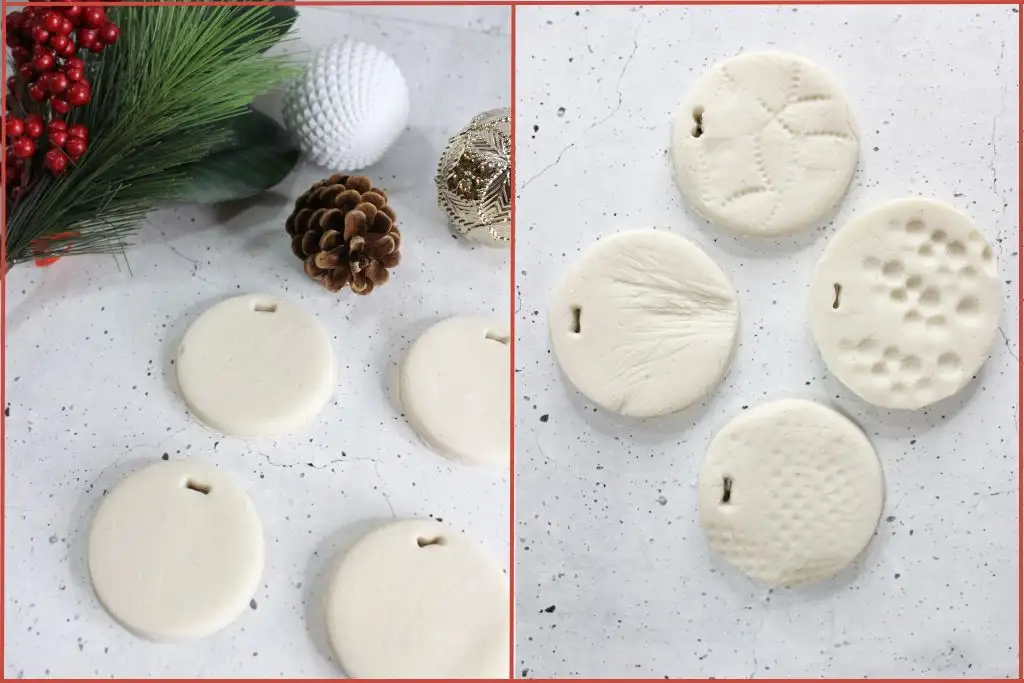
This is where you can get creative with texture.
While the dough is still slightly damp, press fresh pine needles, evergreen sprigs, or other natural materials gently into the surface to create beautiful botanical imprints. You can also use lace, burlap, or textured fabric to create patterns.
Before the dough dries, it is still soft enough to capture fine details but firm enough to hold its shape. Press lightly. Applying too much pressure may weaken the ornament and cause it to crack later.
These imprints look beautiful once dry and give your ornaments a tactile, handcrafted charm that feels perfectly rustic and festive.
Step 7: Create a Hole for the Ribbon
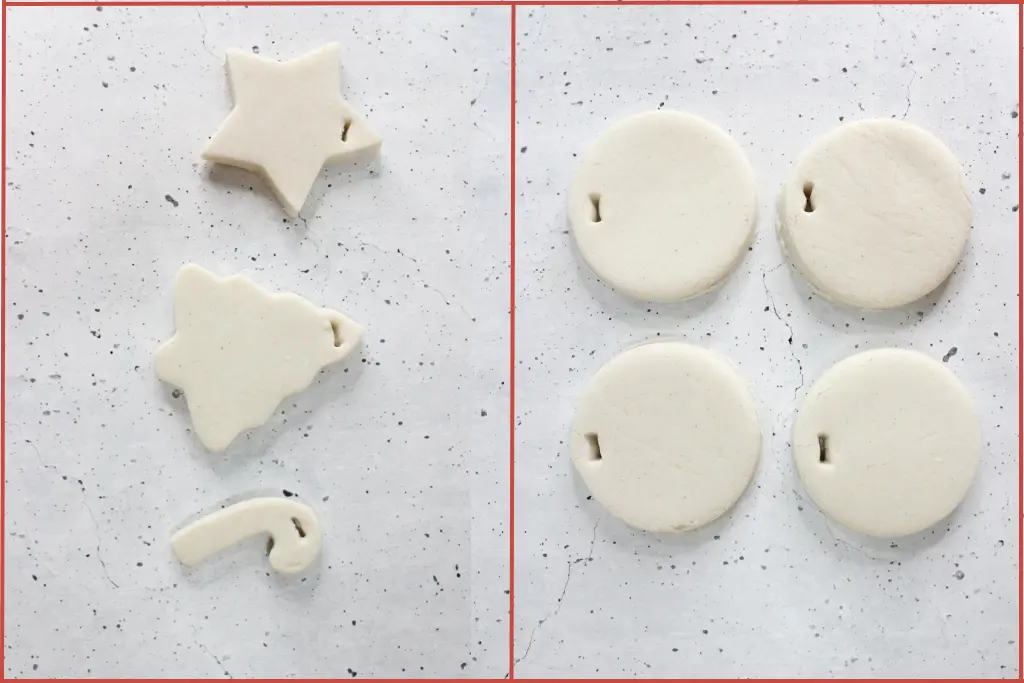
Don’t forget to create a hole for your ribbon! Use a drinking straw or wooden skewer to punch a hole about ¼ inch from the top edge of each ornament.
Make sure the hole goes all the way through and is large enough for your ribbon to pass easily once the dough hardens. The hole should be slightly larger than you think necessary, as it will shrink slightly as the dough dries.
Do not place the hole too close to the edge. Leave at least a centimeter of dough above it to prevent tearing when you hang the ornaments. If you’re creating larger ornaments, position the hole carefully to ensure the ornament will hang straight.
Step 8: Let the Ornaments Air-Dry
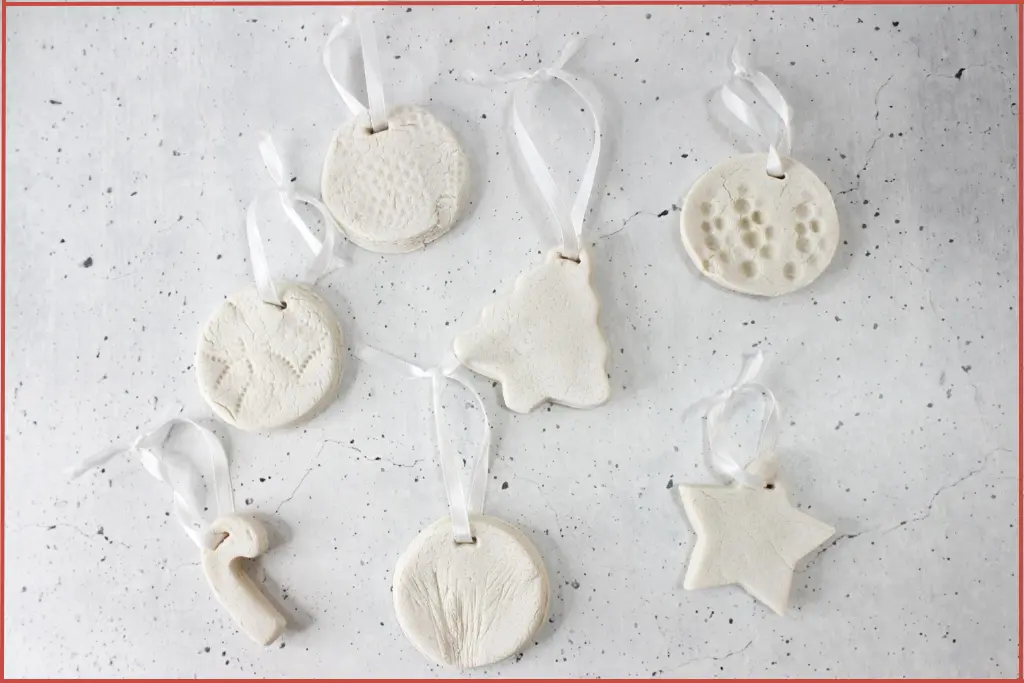
Carefully transfer your shaped ornaments to a flat surface lined with parchment paper. Leave at least an inch of space between each piece for proper air circulation during drying.
Place the ornaments in a location with good air circulation, away from direct sunlight and heat sources. The ideal drying environment is room temperature with low to moderate humidity. Excessive heat can cause cracking, while high humidity will significantly extend drying time.
Your no-cook diffuser ornaments will take 2 to 5 days to dry completely, depending on thickness, humidity levels, and air circulation. In humid climates, expect the longer end of this range. In dry climates, they may be ready sooner.
Flip your ornaments every 12 to 24 hours to ensure even drying on both sides. This prevents warping and ensures the bottoms dry as thoroughly as the tops.
You’ll know they’re fully dry when they feel completely hard and sound hollow when tapped gently.
If you notice the ribbon holes closing up as the dough dries, gently reopen them with your skewer or straw while the dough is still slightly pliable. Once completely dry, the holes will be permanent.
To test if an ornament is truly dry, check the underneath surface and edges. These areas retain moisture longest. If there’s any softness or if the ornament feels cool (indicating moisture), give it more drying time.
Step 9: Adding the Finishing Touches
Once your ornaments are completely dry, you can leave them in their natural off-white color or customize them with paint. Acrylic paint or watercolors both work well. If painting, use thin coats and allow them to dry completely.
Note: Keep in mind that painting the entire surface may reduce the ornament’s ability to absorb essential oils, so consider leaving the back unpainted.
Cut the ribbon to your desired length. 12 to 18 inches works well for most Christmas trees. Thread the ribbon through the hole you created and tie it in a knot or bow at the top. Natural fiber ribbons such as cotton, jute, or linen complement the rustic aesthetic of these handmade ornaments beautifully.
Step 10: Scent with Essential Oils
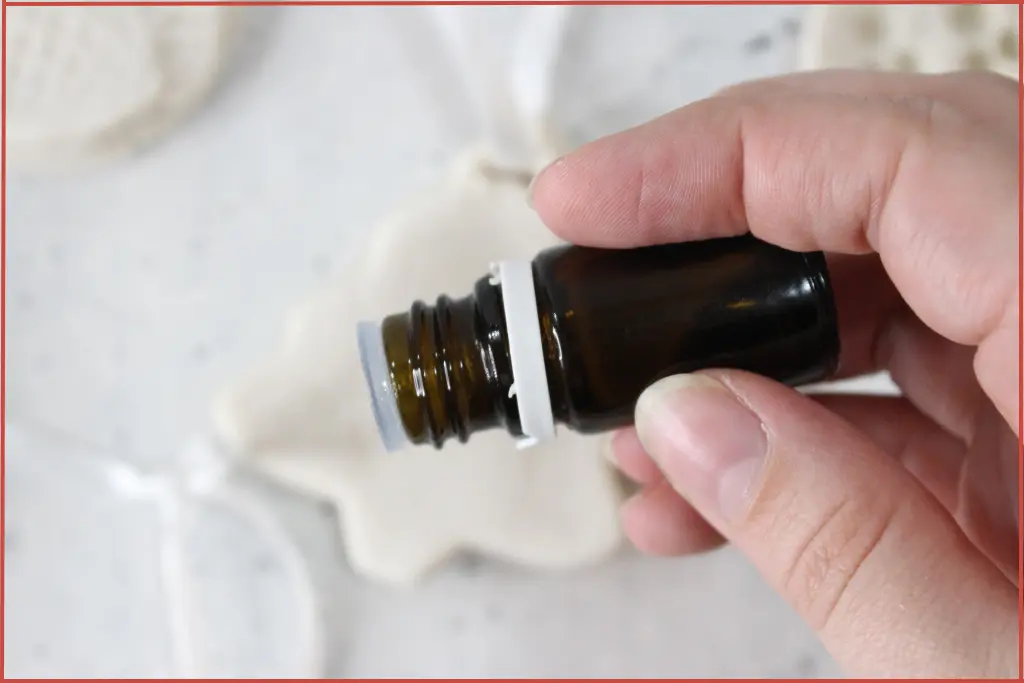
Now comes the most satisfying step – scenting your homemade Christmas diffuser ornaments. You can use a single essential oil or create custom blends for unique aromatherapy experiences.
Apply 3 to 5 drops of essential oil directly onto the back of each ornament. Allow the oil to absorb fully before handling. The porous salt dough will absorb the oil quickly.
The scent will be strongest immediately after application and will gradually fade over 3 to 5 days as the essential oils evaporate. Reapply drops as needed throughout the season to maintain your desired fragrance level.
Essential Oil Blends For Homemade Holiday Diffuser Ornaments

Creating custom essential oil blends allows you to craft signature scents that enhance your holiday atmosphere. Here are some aromatherapy-inspired combinations perfect for diffuser ornaments:
Winter Forest Blend
Capture the essence of a snowy woodland walk with this fresh, grounding combination:
- 3 drops Pine
- 2 drops Cedarwood
- 1 drop Juniper Berry
This blend brings the outdoors in, creating a crisp, forest-fresh atmosphere that’s both uplifting and calming.
Spiced Cider Blend
Warm and inviting, this blend evokes cozy evenings by the fireplace:
- 3 drops Sweet Orange
- 2 drops Cinnamon Leaf
- 1 drop Clove Bud
The citrus brightness balances the warm spices perfectly, creating a festive scent that’s not overwhelming. This compilation offers a variety of blend recipes using citrus and spice essential oils.
Peppermint Wonderland Blend
Cool, refreshing, and distinctly holiday, this blend is energizing yet soothing:
- 3 drops Peppermint
- 2 drops Fir Needle
- 1 drop Vanilla Oleoresin
This combination feels both traditional and refreshing, perfect for those who love minty holiday scents. Get more variations on this classic candy cane blend recipe.
Cozy Cabin Blend
Meditative and deeply comforting, this blend creates a peaceful ambiance:
- 2 drops Cedarwood
- 2 drops Frankincense
- 2 drops Sweet Orange
This balanced blend is excellent for relaxation and unwinding during the busy holiday season.
Single Essential Oil Suggestions
If you prefer simplicity, these single oils work beautifully on their own:
- Fir needle or pine for an authentic Christmas tree scent
- Frankincense for a calming, meditative atmosphere
- Peppermint for a clean, crisp, minty aroma
- Sweet orange for cheerful, uplifting citrus freshness
- Cedarwood for grounding, woodsy warmth
- Vanilla for a warm, luxurious fragrance
- Cinnamon leaf for cozy holiday spice (use sparingly as it’s very strong)
One of the joys of making diffuser ornaments is experimenting with different scents. Try pine in the first week, then switch to a spiced blend the next.
Scent your ornaments with lighter oils such as orange or peppermint for a quick, bright burst of fragrance. To make your home smell like Christmas for longer, use heavier oils like cedarwood, frankincense, and patchouli, which diffuse slowly and provide a long-lasting aroma.
Using an artificial Christmas tree? Scent your diffuser ornaments with this festive blend so it smells just like a real tree and fills your space with that classic Christmas tree scent.
Pro Tip: Apply oils to the back or bottom of the ornament to keep the decorative front looking pristine. If you’ve painted your ornaments, the unpainted back will absorb oils more effectively.
Each ornament becomes a little diffuser that subtly releases its aroma throughout your home — bringing calm, comfort, and seasonal joy.
Tips for Creating Perfect No-Cook Diffuser Ornaments
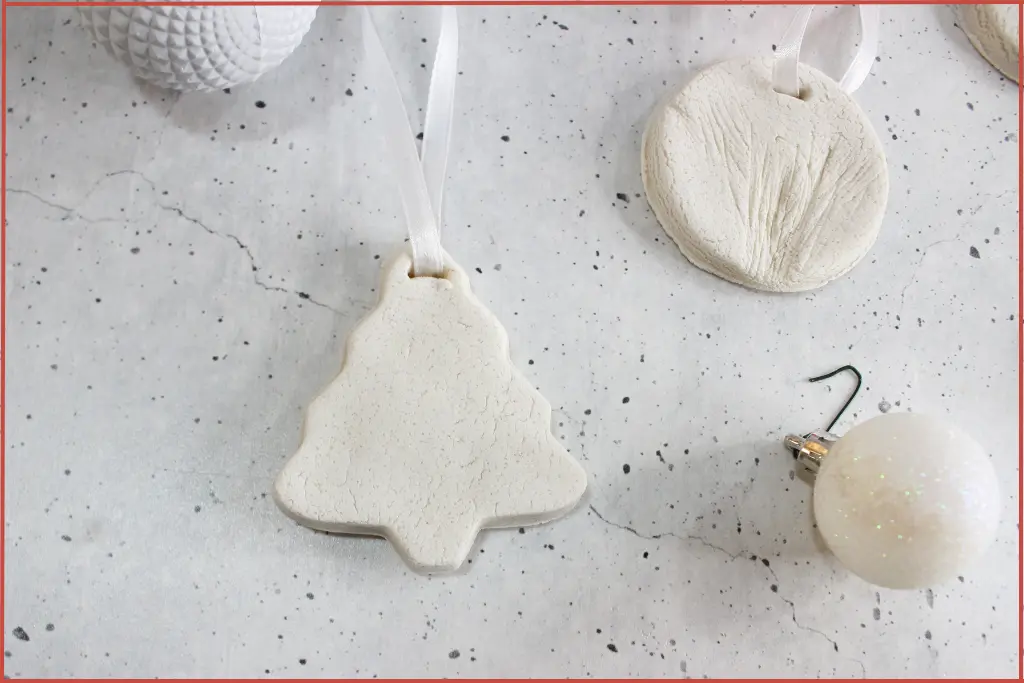
Work in batches if you’re making many ornaments. The dough won’t dry out quickly if you keep it covered, but working with smaller amounts makes the process more manageable and enjoyable.
Keep unused dough wrapped in plastic wrap or in an airtight container while you work with each batch. This prevents the surface from drying and cracking.
Use parchment paper under your ornaments during the entire drying process. This prevents sticking and makes it easy to flip them without damage.
Create a dedicated drying station with good airflow. A wire cooling rack elevated on books or blocks allows air to circulate underneath, speeding up the drying process significantly.
Make extras. Essential oil diffuser ornaments make wonderful impromptu gifts! Having a few extra diffuser ornaments on hand is perfect for unexpected visitors, last-minute gift needs, or replacing any that crack during drying.
Test your essential oils on one ornament first, especially if using oils you haven’t tried before. This lets you adjust the number of drops for your preferred scent intensity.
Consider the season when choosing shapes. While Christmas trees and snowflakes are holiday classics, stars, circles, and nature-inspired shapes can be used year-round on your tree or in other spaces.
Troubleshooting Common Issues When Making Essential Oil Diffuser Ornaments
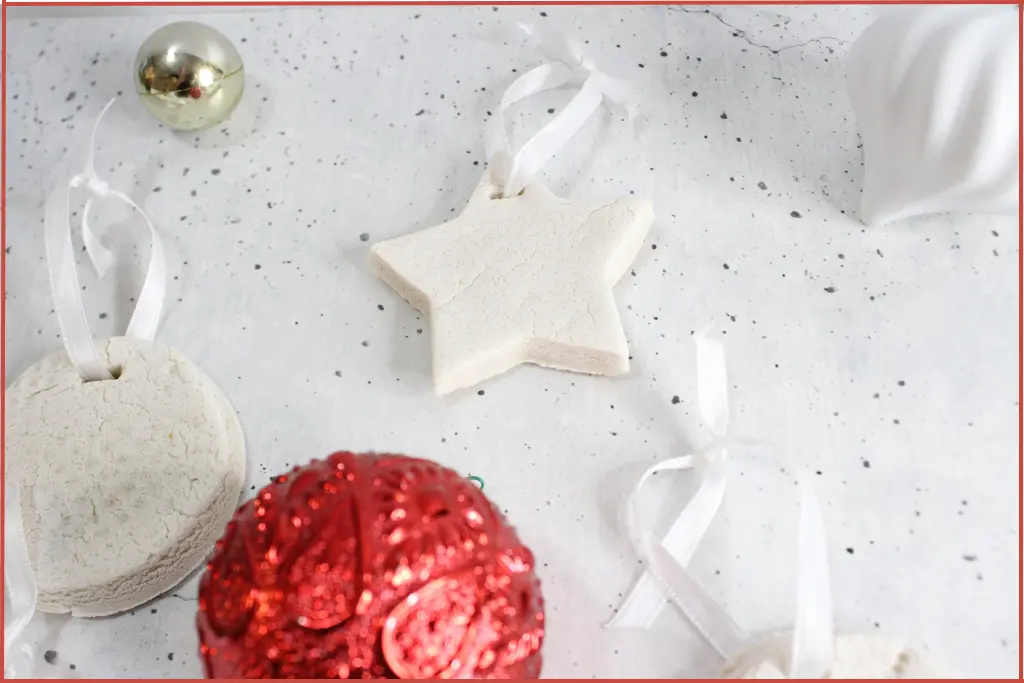
Even simple DIY projects have their quirks. Don’t worry — every small hiccup is just part of learning how the dough behaves and how humidity, texture, or timing can affect the outcome. Here’s how to identify and fix the most common issues so your ornaments turn out perfectly every time.
The dough is too crumbly and won’t hold together
Overly dry dough tends to crack when rolled or shaped. It might feel sandy or stiff instead of pliable. Add warm water one teaspoon at a time, kneading thoroughly between additions. It may take 2 to 3 additional teaspoons to reach the right consistency.
Tip: Warm water helps the salt dissolve slightly, giving the dough elasticity and making it easier to work with.
The dough is too sticky and sticks to your hands
Dust your work surface and hands with flour, then knead it into the dough. Add flour gradually – too much will make the dough dry and crumbly again.
Ornaments are cracking while drying
Small cracks can appear if the ornaments dry too quickly or unevenly. This is because rapid moisture loss causes stress in the dough, while slow drying keeps it strong and even. This happens most often in hot or dry environments.
Allow the ornaments to air-dry naturally at room temperature. Flip them every few hours for even airflow, and avoid direct sunlight, heaters, or dehumidifiers. If you notice early cracking while still soft, smooth the area gently with a damp finger.
Ornaments are warping or curling
This happens when one side dries faster than the other. Flip your ornaments more frequently (every 8 to 12 hours) and ensure air can circulate around them. Using a wire rack helps significantly.
Ribbon holes are closing up
Reopen them with a skewer or straw while the dough is still somewhat pliable (within the first 24 hours). Make initial holes slightly larger than needed to account for some shrinkage.
Ornaments feel dry but the edges are still soft
The edges and backs dry last. Give them more time. Depending on humidity, some ornaments may need up to a week to dry completely, especially if they are too thick.
Let them air-dry for an additional day, or place them in a very low oven (150°F / 65°C) for 20 minutes to finish curing. They should feel light, firm, and cool to the touch when fully set.
Tip: Proper drying not only strengthens them but also helps them absorb and hold essential oils longer.
Edges Crumble or Break
Delicate edges can crumble if the dough is rolled too thin or handled before fully dry.
Roll the dough to about ¼ inch thickness and wait until it’s completely hardened before tying ribbons or adding weight. For extra durability, you can brush a thin layer of diluted white glue or clear matte sealer over fragile areas.
If you’re hanging large or heavy shapes, thread ribbon through the hole gently to avoid stress on the edges.
Essential oils aren’t lasting long
Ensure your ornaments are completely dry before adding oils. Any residual moisture will prevent proper absorption. You can also try applying oils more frequently (every 2 to 3 days) or using slightly more drops.
By anticipating these small challenges, your no-cook diffuser ornaments will come out beautifully – sturdy, fragrant, and full of character. Remember: handmade crafts aren’t about flawless perfection; they’re about presence, creativity, and the quiet satisfaction of making something with care.
Creative Design Ideas for Your Christmas Diffuser Ornaments
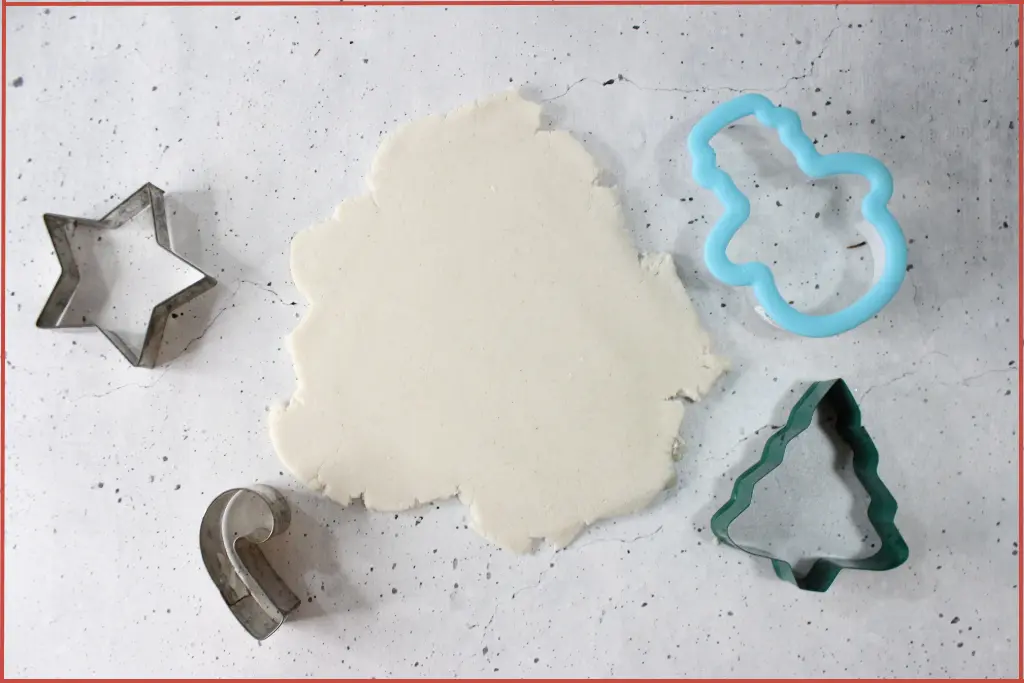
The beauty of DIY diffuser ornaments lies in their endless creative possibilities. Beyond traditional Christmas shapes, consider these design approaches:
Minimalist Scandinavian Style
Create simple geometric shapes such as hexagons, triangles, and circles. Leave them unpainted for a natural, rustic look, or paint them in soft whites and grays. Add subtle stamped patterns or leave them completely plain for a modern aesthetic.
Botanical Impressions
Press fresh evergreen sprigs, herbs like rosemary or thyme, or winter berries into the dough before drying. These create beautiful natural relief patterns that look elegant and organic. Brush the raised texture lightly with white paint or mica powder for a frosted woodland look.
Rustic Lace Texture
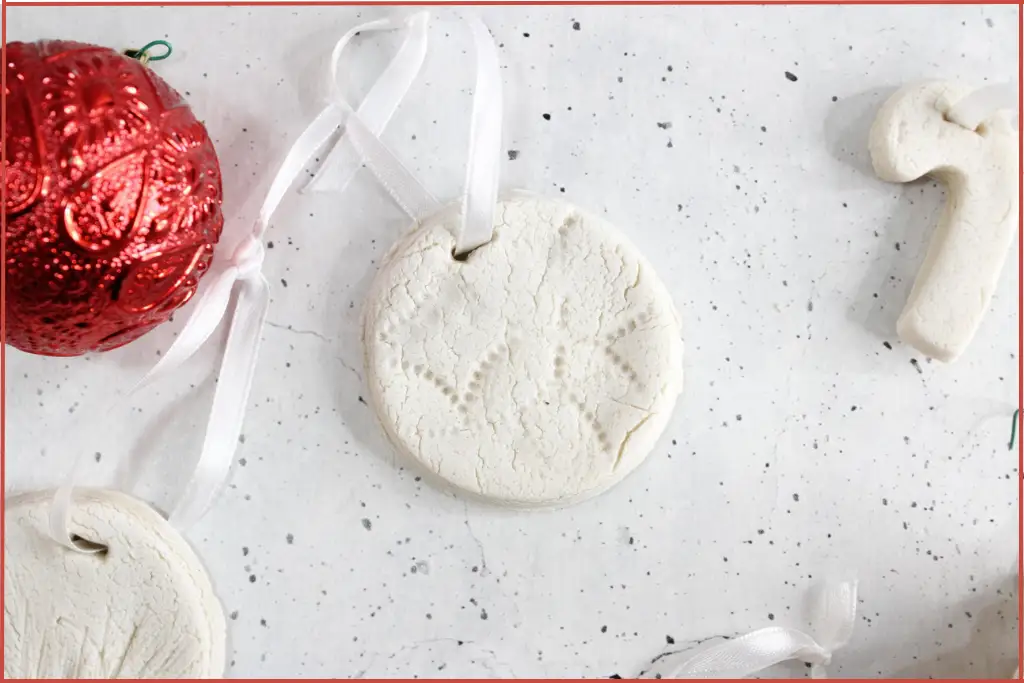
Lay a piece of lace or crochet over your rolled-out dough and gently roll once with your pin. Lift the lace to reveal an intricate pattern. The subtle detail adds elegance and pairs beautifully with natural jute string and neutral paints.
Personalized Keepsakes
Use letter stamps to add initials, dates, or short words like “JOY”, “PEACE” or CALM.” Once dry, outline the letters with fine metallic paint for a subtle yet elegant finish.
These make thoughtful gifts and meaningful ornaments that infuse your décor with fragrance and intention
Children’s Handprint Keepsakes
For families with little ones, press a small handprint or fingerprint into the dough before drying. It’s simple, sweet, and completely irreplaceable.
Add a few drops of child-safe essential oil like lavender or chamomile after drying, and you’ve created a sentimental piece that captures a moment in time – perfect for gifting to grandparents or keeping for future holidays.
Layered Textures
Combine different techniques. Stamp a snowflake pattern, then add a pine needle border, or create a textured background with burlap before cutting your shapes.
Gift Tag Ornaments
Make rectangular ornaments with space to write names. These serve as both gift tags and ornaments that recipients can keep and use year after year.
Themed Collections
Create ornaments around a shared idea – “Winter Forest,” “Ocean Calm,” or “Morning Citrus.” Each set can use matching shapes, colors, and scent blends. It’s an excellent idea if you plan to give them as a series or display them in multiple areas around your home. Themed sets make your handmade collection feel cohesive and artful, like a curated sensory display.
Nature’s Palette
If painting, stick to nature-inspired colors. Soft sage greens, warm terracotta, creamy whites, and natural wood tones complement the organic materials beautifully.
Painting allows you to coordinate your ornaments with your décor while keeping their handmade charm intact.
Creative Uses Beyond the Christmas Tree
While these essential oil diffuser ornaments are perfect for holiday trees, their usefulness extends far beyond December decorating:
Create Aromatic Garlands & Wreath Embellishments
String multiple ornaments together with twine or ribbon to create scented garlands for mantels, doorways, or windows. Add some dried citrus slices, cinnamon sticks, pinecones, and greenery. Space them evenly and use complementary scents for a cohesive aromatic experience.
Attach essential oil ornaments to evergreen wreaths for added texture and aromatic interest. Refresh the oils weekly for continuous fragrance.
The combination of natural textures and soft scents instantly gives your home a handmade, aromatic warmth that feels inviting and real.
Use As Gift Package Decorations
Instead of paper bows, tie one of your diffuser ornaments onto a wrapped gift with twine or ribbon. It looks charming, smells wonderful, and adds an extra layer of thoughtfulness.
Moreover, your recipient gets both a beautifully wrapped present and a reusable aromatherapy ornament.
Add a handwritten tag explaining which oils you used so your recipient can enjoy their aromatherapy benefits long after the wrapping paper is gone.
Bring a Touch of Aroma to Everyday Spaces
These ornaments are too lovely to hide away after the holidays. Use them all year round – in your car, bathroom, or office.
Choose scents that fit the season: citrus in spring, lavender in summer, and spice blends in winter. Each ornament becomes a little reminder that calm and creativity can live anywhere you choose to bring them.
Hang as Car Air Fresheners
Hang a smaller ornament from your rearview mirror using a shorter ribbon. Apply uplifting essential oils like peppermint, lemon, or rosemary for an energizing drive.
Use as Closet Sachets Or Drawer Fresheners
Place undecorated ornaments (without ribbon) on closet shelves or hang them from clothing rods. Use lavender, cedarwood, or lemongrass to keep spaces fresh and naturally repel moths.
Tuck ornaments into dresser drawers with calming scents like lavender or chamomile for a subtle, pleasant fragrance on your linens and clothes.
Create Window Hangings
Create a winter window display by hanging ornaments at varying heights in front of a window. The natural light creates beautiful shadows while the oils diffuse throughout the room.
Customize For Seasonal Aromatherapy
Make ornaments in any season with seasonal cookie cutters – flowers for spring, suns for summer, leaves for fall. Use appropriate essential oils to match the season.
How To Store and Care For Homemade Essential Oil Diffuser Ornaments
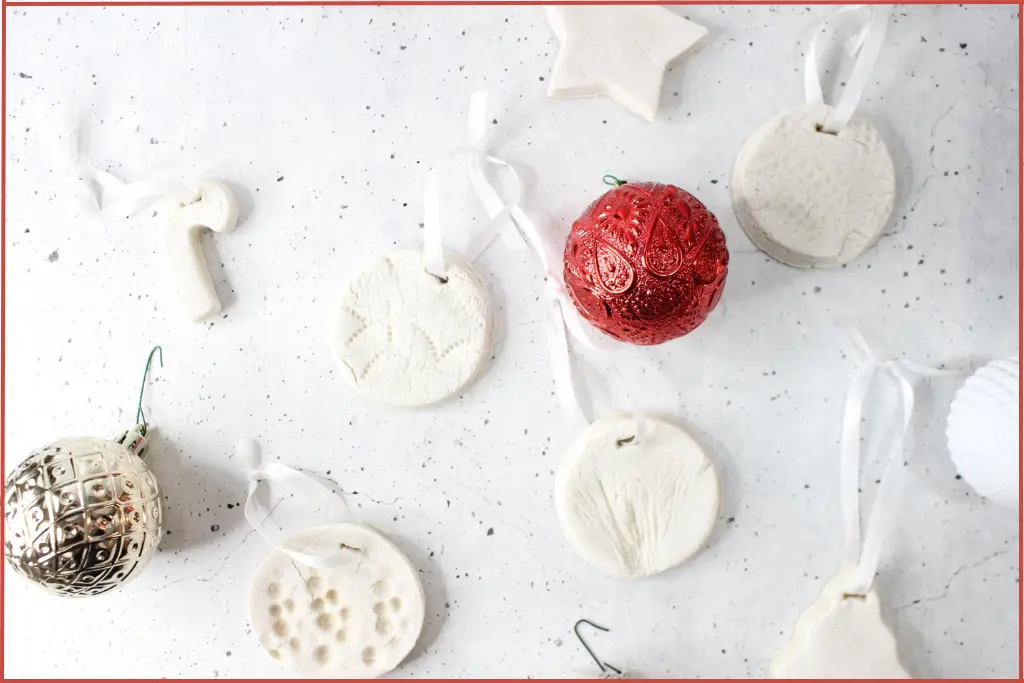
With proper care, your no-cook Christmas diffuser ornaments will last for years, becoming beloved pieces of your holiday décor collection.
When the season ends, wrap each ornament individually in tissue paper or store them in a breathable container lined with paper. Avoid plastic bags or airtight containers, which can trap moisture and lead to mold. A cardboard box or wooden crate works perfectly.
Store ornaments in a cool, dry location away from direct sunlight, which can fade painted designs. A closet, attic, or storage room with consistent temperature is ideal.
Before storing, allow them to air out to ensure any essential oils have fully evaporated.
If you notice any mold spots developing (unlikely with the high salt content, but possible in very humid conditions), gently wipe the ornament with a cloth dampened with white vinegar, then allow it to air dry completely before storing again.
Refreshing old ornaments is simple – just add new essential oils. If an ornament becomes damaged, cracked, or breaks, remember that all the ingredients are biodegradable. You can add broken pieces to your garden compost or discard them guilt-free.
Most well-made, properly dried essential oil diffuser ornaments will last 5 to 10 years or more with careful handling. The edges may become slightly worn over time, which only adds to their handmade charm.
Homemade Christmas Diffuser Ornaments Are An Eco-Friendly Choice
In a world of mass-produced holiday décor, Christmas diffuser ornaments offer a sustainable, natural alternative that aligns with environmentally conscious living.
Every ingredient is biodegradable and natural. When your ornaments eventually reach the end of their useful life, they’ll break down harmlessly rather than contributing to landfill waste.
Unlike synthetic air fresheners with chemical fragrances, essential oils provide a natural scent derived directly from plants. You’re avoiding artificial chemicals while bringing authentic botanical aromas into your home.
These ornaments are genuinely reusable, not just recyclable. Add fresh essential oils every year to revive them. This longevity results in less waste and less consumption of new materials.
The no-cook method uses no electricity or gas for baking, making these ornaments energy-efficient to produce. The only energy required is for the initial mixing, which is done by hand.
Creating your own ornaments reduces the need for store-bought decorations that come with excessive packaging, shipping emissions, and often lower-quality materials that need replacing every few years.
Create Your Own Aromatic Holiday Tradition
Creating essential oil diffuser ornaments can become a cherished annual tradition that brings family and friends together. Consider hosting an ornament-making party where everyone crafts their own designs and experiments with different essential oil blends.
Date your ornaments by stamping or writing the year on the back. Over time, you’ll build a collection that tells the story of your family’s holidays, with each year represented by unique designs and scents.
Create themed sets as gifts for friends, family, or teachers. Package 3 to 5 ornaments in a small muslin bag with a small bottle of essential oil and instructions for use. It’s a thoughtful, handmade gift that shows care and creativity.
The no-cook method makes this craft accessible to everyone, requiring no special equipment beyond basic kitchen tools. Involve children in age-appropriate tasks.
Young children can help knead the dough, choose cookie-cutter shapes, and press botanical materials into the surface. Older children can help with the entire process, including selecting and blending essential oils (with proper guidance on safe usage).
Document your designs each year with photos. Create a digital or physical scrapbook showing your ornament evolution. This becomes a wonderful way to see how your creativity and skills develop over time.
DIY Christmas diffuser ornaments combine the creativity of crafting with the aromatic benefits of essential oils, resulting in beautiful, functional decorations that enhance your holiday season naturally. Whether you’re an experienced crafter or trying your first DIY project, these ornaments are forgiving, fun, and endlessly customizable.
This year, skip the store-bought air fresheners and create something meaningful with your own hands. Your essential oil Christmas diffuser ornaments will become treasured pieces of your holiday tradition, bringing natural fragrance and handmade beauty to your celebrations for years to come.
Have you made essential oil diffuser ornaments? Save this recipe for your holiday crafting and tag friends who would love to try this natural aromatherapy project.
Frequently Asked Questions
How long do the essential oils last on the ornaments?
Essential oils will maintain their scent for approximately 3 to 5 days, depending on the specific oils used, the ambient temperature, and air circulation. Reapply oils as the scent fades.
Heavier oils, such as cedarwood and frankincense, last longer than lighter, more volatile oils such as citrus.
Can I use any essential oil on my diffuser ornaments?
You can use any pure essential oil you enjoy. For the longest-lasting scents, choose oils from the middle and base note categories. It’s best to avoid very thick oils like vanilla absolute or oils that might stain.
Always use pure essential oils rather than fragrance oils for the most authentic aromatherapy experience.
How long do no-cook diffuser ornaments last?
If stored in a dry, cool place, these ornaments can last for several years. The scent may fade over time, but you can easily refresh it by adding new drops of essential oil each season.
Can I speed up the drying time?
While patience yields the best results, you can use a fan to improve air circulation around your ornaments. Avoid using ovens, even at low temperatures, as rapid drying often causes cracking. Dehumidifiers can help in very humid environments.
The safest approach is simply giving the diffuser ornaments adequate time to air dry naturally.
What can I use if I don’t have cookie cutters?
Get creative. Use the rim of a glass or jar for circles, cut shapes freehand with a butter knife, or use jar lids of various sizes. You can even create unique abstract shapes or rustic, organic forms that aren’t perfectly symmetrical.
Can I bake these homemade ornaments instead of air-drying?
While you can bake salt dough, the no-cook method creates a more porous texture that’s better for absorbing and diffusing essential oils. If you must bake due to time constraints, use a very low temperature (200°F) for 2 to 3 hours, checking frequently to prevent browning.
How do I prevent my ornaments from molding?
The high salt content naturally inhibits mold growth. Ensure ornaments are completely dry before storing and keep them in a dry environment. Never store damp ornaments or those in humid locations. If you live in a very humid climate, consider adding a small silica gel packet to your storage container.
Can I make these with children?
Absolutely! This is a wonderful family craft. The dough is non-toxic (though very salty, so discourage tasting). Children can help with mixing, kneading, cutting shapes, and adding decorative impressions. Adult supervision is recommended when adding essential oils, as these should be used with care.
Are these ornaments safe around pets and kids?
The dough itself is non-toxic, but essential oils should always be used with care. Keep the ornaments out of reach of small children and pets, and choose gentle oils like lavender or chamomile if sensitivity is a concern
Can I paint or seal these ornaments without affecting the scent?
Yes, just be mindful to leave one side unsealed. That porous surface allows the essential oils to absorb and diffuse properly while the painted side adds color and charm.
